14
5.3 TEMPERATURE SETTING
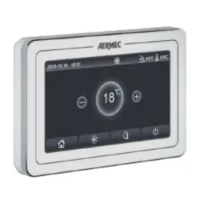
Press “+” or “-” button under on status to increase or decrease set temperature by 0.5°C/1°C or 1°F; hold “+” or “-” button to increase or decrease set temperature by 0.5°C/1°C
or 1°F every 0.3s. Please refer to "4.2.3Activation of indoor unit operating parameter modication menup.12" Parameter Setting for the setting method of the temperature
setting interval in Celsius.
n Dry mode, when temperature is 16°C or 61°F, continuously press “-” button twice to decrease temperature to 12°C or 54°F (when save function is activated, the temperature
in Dry mode can’t be adjusted to 12°C or 54°F).
When the control method under Dry mode is humidity control, press “+” or “-” button to adjust the set humidity at 5% intervals.
The humidity setting range is 45%-75%, and the default value is 65%. The humidity control method under Dry mode can only be set for the unit with this function.
Please refer to "4.2.3Activation of indoor unit operating parameter modication menup.12" Parameter Setting for the setting method.
NOTE:
1. Only when the wired controller controls LPG indoor units can the setting temperature be adjusted by pressing “+” or “-” under Auto mode.
2. When Absence function is activated, the setting temperature cannot be adjusted by pressing “+” or “-”.
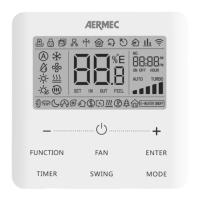
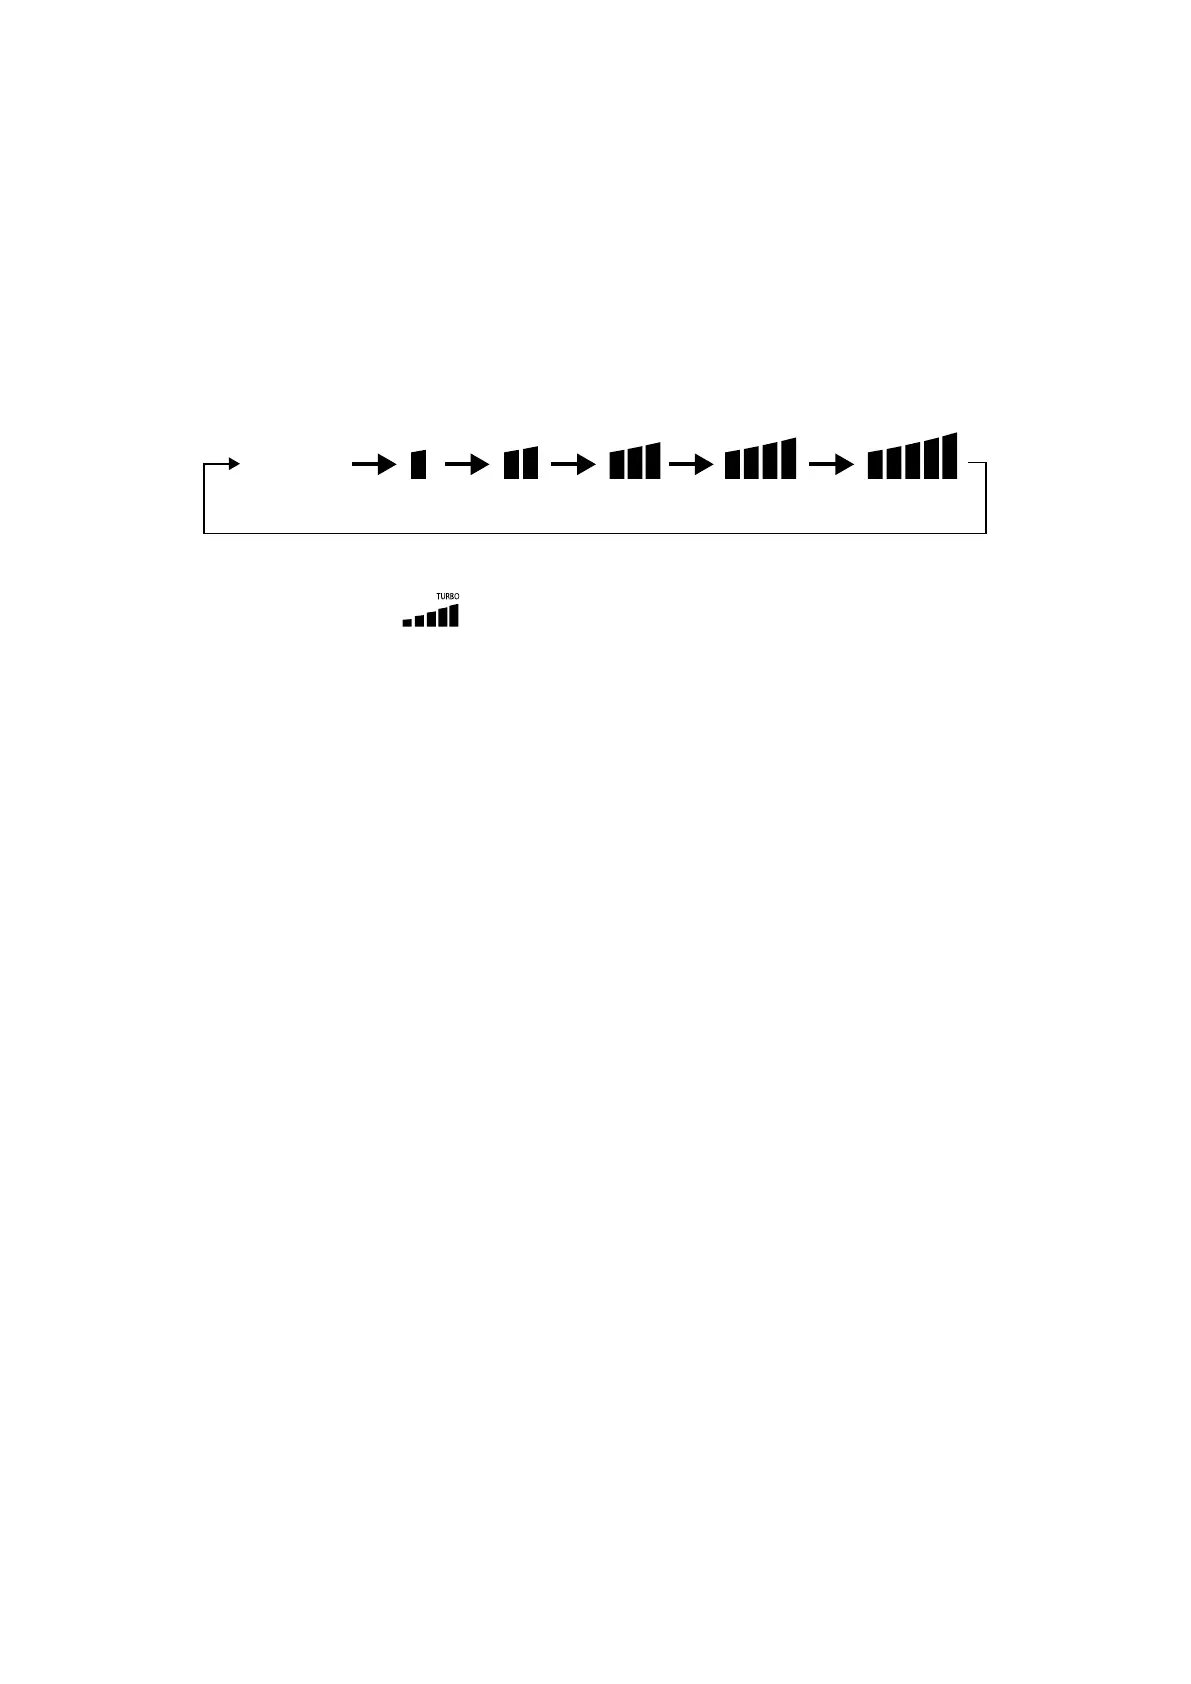
5.4 FAN SETTING
Under On status, pressing “FAN” button can set fan speed circularly as:
AUTO
In unit on status, press “FUNCTION” button to switch to Turbo function with Turbo function icon “TURBO” blinking, and then press “ENTER” button to start or cancel Turbo
function.
When Turbo function is activated, Turbo function icon “
” will be bright.
NOTE:
1. Under Dry mode, fan speed is low and can’t be adjusted.
2. If indoor unit’s fan speed is set auto, indoor unit will change fan speed automatically according to room temperature in order to make the room temperature more stable
and comfortable.
5.5 TIMER SETTING
The wired controller is equipped with two kinds of timer: general timer and clock timer.
General timer is factory defaulted setting. Please refer to "4.2.3Activation of indoor unit operating parameter modication menup.12" Parameter Setting for the timer
setting way.
5.5.1 General timer
Unit On/O after a desired hour can be set through general timer.
Set Timer: when timer is not set, press “TIMER” button to enter timer setting and “HOUR” icon is blinking. Press “+” or “-” button to adjust timer time. Press “TIMER” button to
save the setting and then exit setting.
Cancel Timer: when timer is set, press “TIMER” button to cancel it.
Timer setting range: 0.5-24h. Press “+” or “-” button to increase or decrease timer time by 0.5h; hold “+” or “-” button to increase or decrease timer time by 0.5h every 0.3s.
5.5.2 Clock setting
Clock display: when the timer setting way is clock timer, timer zone displays system clock in unit On and O status. The clock can be set at this time.
Clock setting: long press “TIMER” button for 5s to enter clock setting. Press“+” or “-” button to increase or decrease clock time by 1min; hold “+” or “-” button for 5s to increase
or decrease clock time by 10min; hold “+” or “-” button for 10s to increase or decrease clock time by 60min.
Press “ENTER” button or “TIMER” button to save the setting and then exit setting.
5.5.3 Clock timer
Unit On/O at a certain time can be set through clock timer.
Timer Setting:
1. Press “TIMER” button to enter timer on setting and the “ON” icon is blinking.
2. Press “+” or “-” button to adjust unit On time. Press “ENTER” button to nish setting.
3. Before pressing “ENTER” button, pressing “TIMER” button can save unit On time and then switch to unit O time setting with “OFF” icon blinking.
4. Press “+” or “-” button to adjust unit O time. Press “ENTER” button to nish setting.
Cancel Timer:
Press “TIMER” button to enter timer setting; press “TIMER” button again to switch to the setting of unit ON time or unit O time; press “ENTER” button to cancel timer.
Press “+” or “-” button to increase or decrease timer time by 1min; hold “+” or “-” button for 5s to increase or decrease timer time by 10min; hold “+” or “-” button for 10s to
increase or decrease 60min.