46
Read all instructions before installing or using this appliance.
Installation Instructions
Save these instructions for future reference.
Conversion to Propane gas
This conversion must be performed by a
competent person. After conversion the
installation must comply with the relevant
regulations and also the local electricity supply
company requirements. Read the instructions
before converting this appliance.
Failure to convert the appliance correctly could
invalidate any warranty or liability claims and
lead to prosecution.
This instruction must be used in conjunction with
the rest of the appliance instruction, in particular
for information on Standards, range positioning,
connection hose suitability etc.
When servicing or replacing gas-carrying
components disconnect from gas before
commencing operation and check appliance is
gas sound after completion.
Do not use re-conditioned or unauthorised gas
controls.
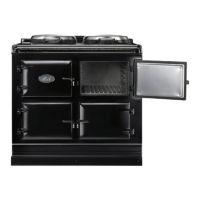
Orifices
Standard burner Wok burner
A orifice, B internal injector, C external injector
Remove burner caps and heads. Remove old
orifices. Fit new orifices. Reassemble in reverse
order.
Orifices
Natural Gas Propane Gas
Wok burner internal 110 internal 71
external 166 external 93
Large Burner 170 106
Medium Burners 150 84
Small Burner 107 61
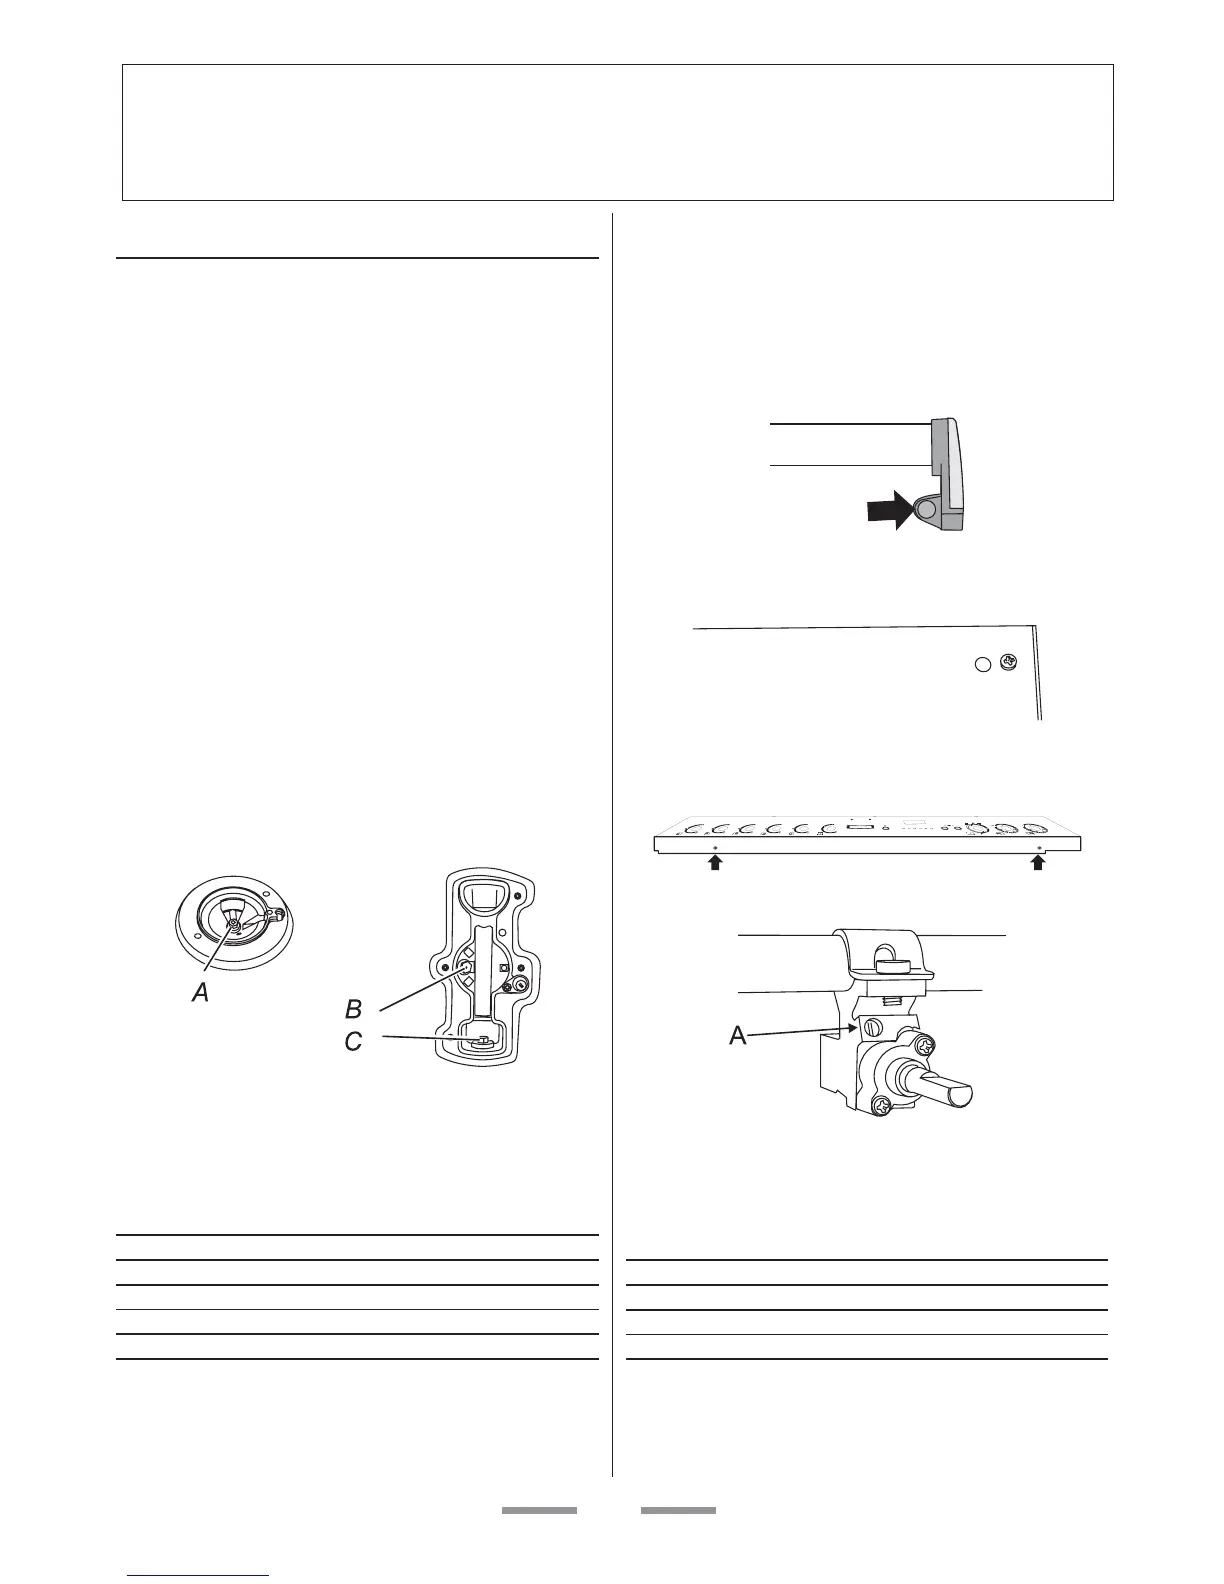
Valve adjustment
Pull off all the control knobs. If the hand rail has
been fitted remove it - remove the plastic
blanking plugs and remove the 2 end bracket
fixing screws.
Remove the 2 cross headed screws that were
hidden by the hand rail end brackets.
Open the oven door & or broiler door and
remove the fixing screws underneath the control
panel.
Lower control panel clear.
A valve bypass screw
Take out the bypass screw and replace with the
correct LP screw on each gas control.
Valve Bypass screws
Natural Gas Propane Gas
Wok burner 82 49
Large Burner 70 38
Medium Burners 53 31
Small Burner 43 22
 Loading...