Latchlng/Auto Reset
You can configure the relays as either Latching or Auto Reset. Latching relays remain in an
alarm condition and must be reset manually by using the pushbutton located behind the
instrument’s Display door*. Failsafe Auto Reset relays automatically energize when the
machine returns to its Non-Alarm state of operation. You can program the relay to automat-
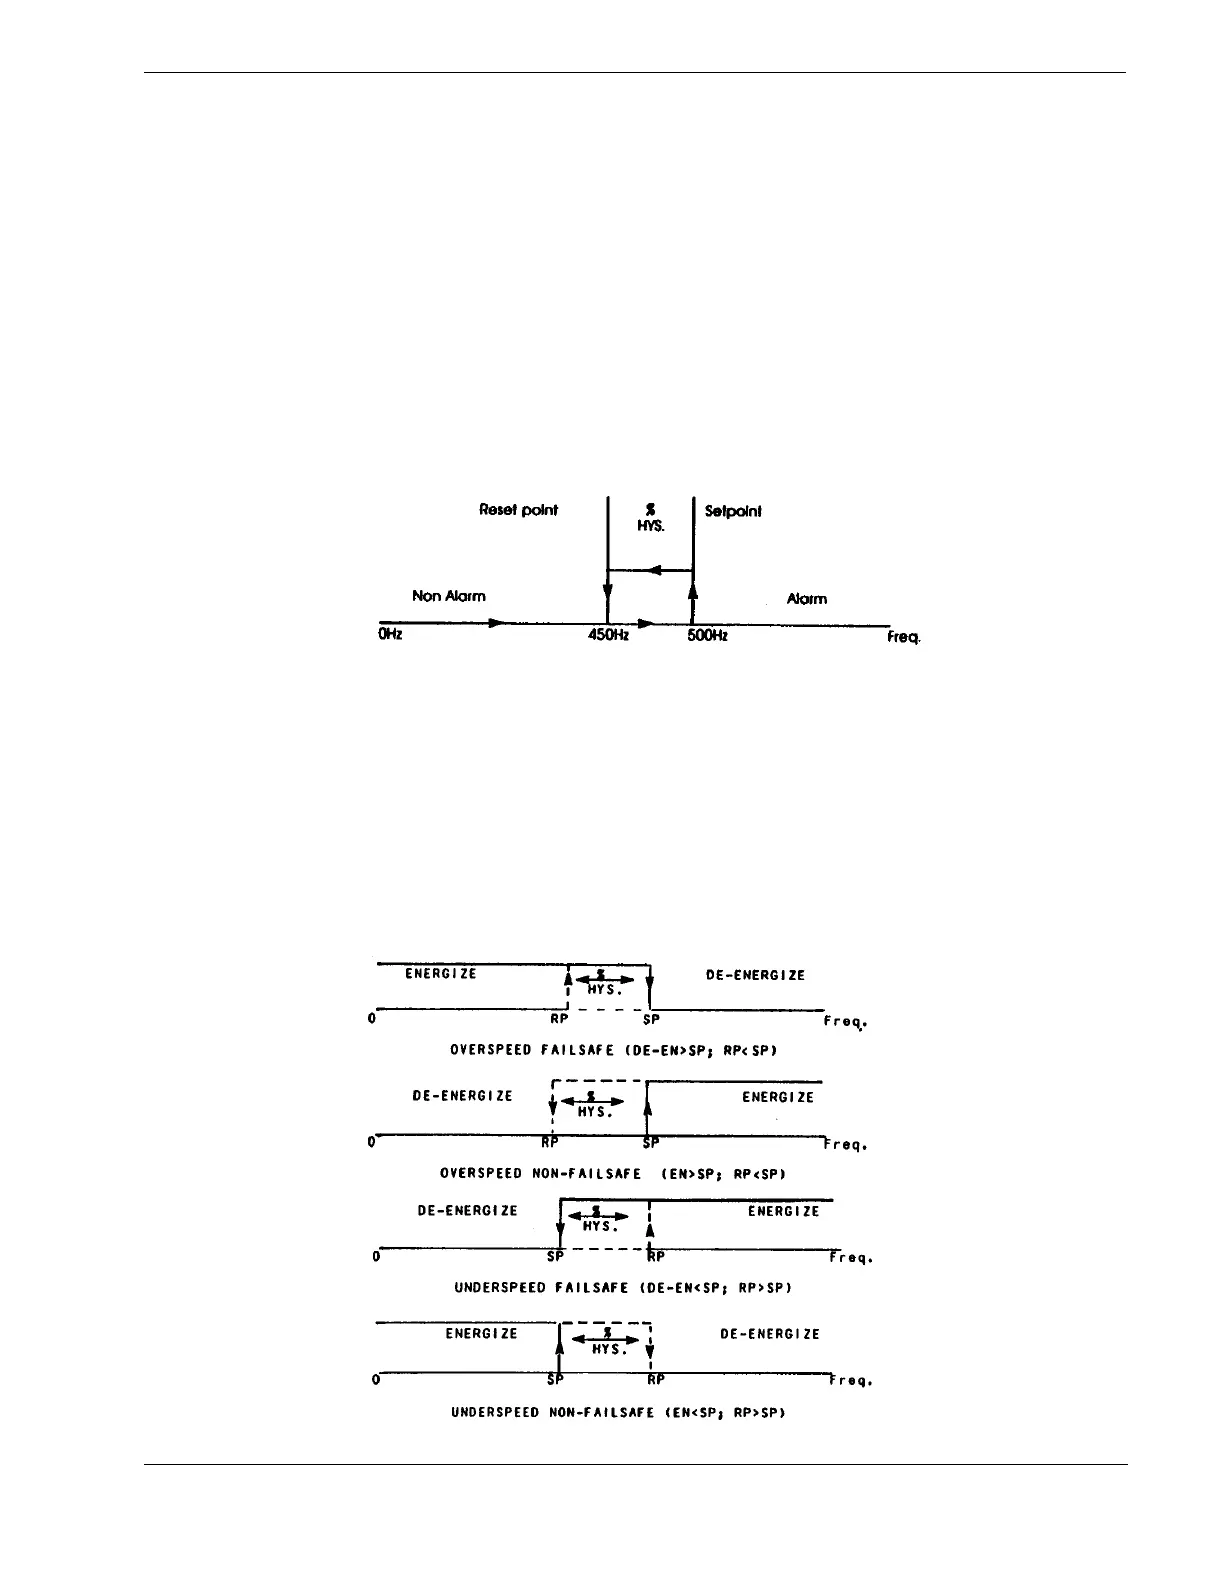
ically reset at setpoint or you can program it to reset with a Hysteresis (a dead band). That
is, you can program it to reset within a specified range of the setpoint. Hysteresis prevents
“chatter” (the clicking on and off of the relay) as frequency hovers around the setpoint
value. Hysteresis is specified as a percentage of the setpoint value. The position of hysteresis
above or below the setpoint is determined by the relay type. Overspeed relays have
hysteresis below the setpoint. Underspeed relays have hysteresis above the setpoint.
Figure 4 shows an overspeed relay with hysteresis below setpolnt.
*Loss of instrument power will cause a latching relay to reset in the absence of an alarm
condition.
FIGURE 4. OVERSPEED RELAY WITH HYSTERESIS BELOW SETPOINT
Figure 5 illustrates the behavior of the setpoint relays.
FIGURE 5. SETPOINT RELAY BEHAVIOR
En = energize RP = resetpoint > = above
DE - EN = de-energize HYS. = hysteresis < = below
9
 Loading...