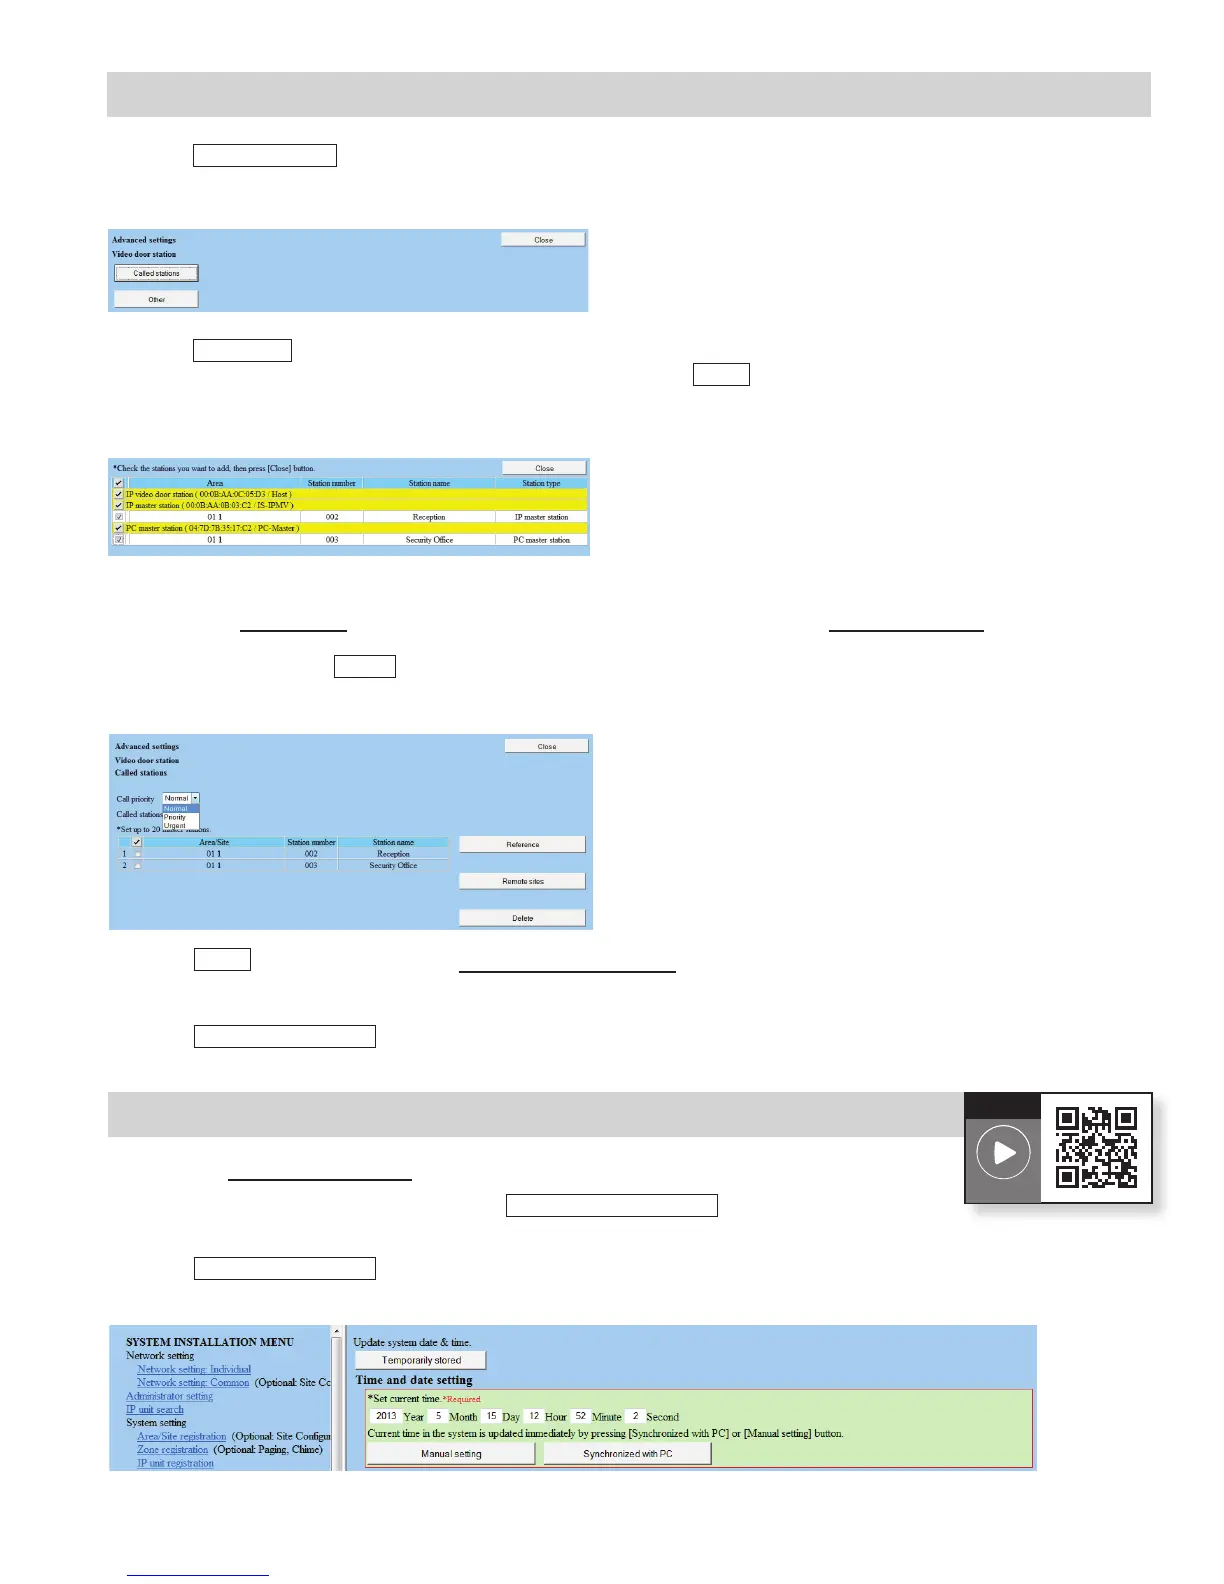
Figure 9.2: Advanced Settings - Video Door Station
Figure 9.3: Called Stations
D. Click
Called stations
(see Figure 9.2). A new window will open.
E. Click
Reference
toopenanewwindowandselectthemasterstobecalledbycheckingtheboxbesideeachunit
(see Figure 9.3). Once the masters have been selected, click
Close
.
7
Figure 9.4: Advanced Settings
F. Select the Call priority level for this door station from the drop-down list. The Advanced settings window will
display the master(s) that will be called (see Figure 9.4).Ifamasterwasselectedinerror,checktheboxnextto
that master and click
Delete
to remove from the list.
G. Click
Close
to go back to the main Advanced station settings window.
H. RepeatStepsCthroughGforallvideodoorstations.
I. Click
Temporarily stored
to save changes.
Step 9: Advanced Station Settings (cont.)
A. Click the Time and date setting from the menu on the left.
B. IfthePC’sdateandtimeiscorrect,click
Synchronized with PC
.
If not, set it manually (see Figure 10.1).
C. Click
Temporarily stored
to save changes.
Step 10: Time and Date Setting
Figure 10.1: Time and Date Setting
How-To
Video Link