Read safety rules on reverse. Read & understand all warnings
& safety rules before operating equipment. Know how to lock
the gun trigger saftey lock before operating the equipment.
Stir paint and if necessary strain paint using a paint strainer bag
Check gun/hose connections to make sure they are tight.
Lock gun trigger safety lock (Airlessco gun shown)
Note: Plug into 3 pronged grounded electrical outlet. Extension
cord must be 3 wire, 12 gauge. Do not coil cord.
Put pump suction tube into bucket of paint.
Turn the Prime-Pressure Relief Valve to
gap between handle & body).
Turn ON and adjust low pressure on the pressure control knob.
The unit will now self-prime.
Wait about one minute until uid comes out of the return tube
Turn the Prime-Pressure Relief Valve to
gap between handle and body)
Leave the Prime-Pressure Relief Valve fully closed and very
carefully unlock the guns trigger safety lock.
Aim the gun 12” from test surface (cardboard) and spray out
the storage solution. Turn the pressure control knob clockwise
to increase pressure. Increase the pressure enough to atomize
the paint & give a full pattern. Use the lowest pressure possible.
Always keep the gun perpendicular to the surface. Move the
gun at a steady rate. It is important to “trigger” the gun after
gun movement has begun and release trigger before gun
Overlap half the width of each paint stroke.
Release pressure when you stop spraying & before servicing
gun or machine or before changing or cleaning gun tip by:
Lockin the gun trigger safety.
Turn toggle switch to OFF position and unplug from
Release gun safety lock and trigger gun to relieve residual
Turn Prime/PR Valve to open position.
Submerge gun in water (if using latex) or thinner (oil-base) to
prevent drying gun nozzle.
Always use low pressure in the cleaning process.
Always remove spray tip before cleaning–
AFTER following the Pressure
Use a metal bucket for cleaning and maintain rm metal to metal contact
READ AND UNDERSTAND ALL SAFETY WARNINGS ON REVERSE SIDE OF THIS USERS GUIDE!
TOOLS & EQUIPMENT NEEDED:
TOOLS & EQUIPMENT NEEDED:
Soft bristle brush, clean-up rags.
8” crescent wrench for removing gun tip &
Prepared 5 gal. bucket of soapy water if using
latex, or mineral spirits if using oil-based.
(Second bucket will usually be required).
IMPORTANT: Relieve pressure by following the Pressure
Relief Procedure, Step 6 of Operation, and be sure gun
safety lock (latch) is in locked position.
Remove tip and tip guard from spray gun and place in mineral
Note: Turn unit ON. Turn pressure control knob to low pressure.
Lift suction tube and return tube out of paint and hold over paint
bucket. Any paint remaining in the unit will return into the bucket
out through the return tube.
Wipe excess paint from suction tube.
Place suction tube into prepared bucket of water or mineral
Note: Release the gun trigger lock very carefully.
Turn the Prime/PR Valve to the closed position. Adjust the
pressure control knob for minimum pressure.
IMPORTANT: Never use high pressure for cleaning!
Trigger gun into paint bucket to allow paint to run out of hose and
Place gun over empty metal bucket and trigger gun using VERY
LOW PRESSURE & maintaining rm metal to metal contact for
3-4 minutes until it runs clean. (Second bucket may be required).
IMPORTANT: Follow Pressure Relief Procedure Step 6A of
Remove lters from suction tube and gun handle. Clean with
water or mineral spirits and soft brush and reassemble suction
reassemble gun tip and tip guard at
Pump Conditioner with 1 gal. of water or Pump Conditioner
prepared mineral spirits and put suction tube into pail. Prime unit
(Prime/PR Valve Open Position & Pressure Control Knob in low
position) Trigger gun to ll the hose & gun. LEAVE this mixture in
the pump & hose for storage. DO NOT DIS CHARGE. Turn motor
off while the suction tube remains in the bucket.
Roll up hose and tape. Now reassemble gun with spray tip and tip
guard. NOTE: After you have disconnected sprayer from electri-
cal power, turn Prime/PR Valve to closed position for storage.
Prime Pressure Relief Valve (Prime-PR Valve)
Used to relieve pressure from gun, hose & tip and to prime the
Used to relieve pressure from gun, hose & tip and to prime the
unit when in OPEN position. (It is in open position when there
unit when in OPEN position. (It is in open position when there
is a wider gap between handle and body).
When in the CLOSED position, there is only a very slight
gap between handle & body. When closed the system is
Handle as if it was a loaded rearm!
turns the unit ON and OFF.
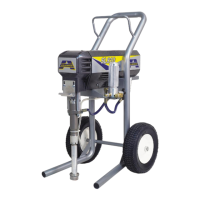
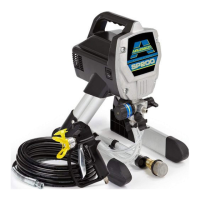
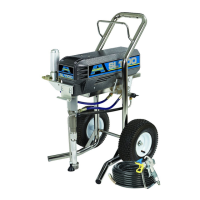
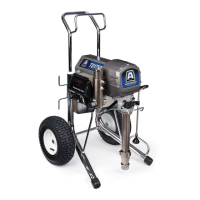
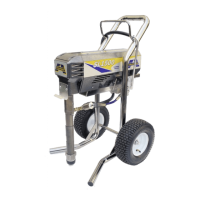
SL & LP Electric Paint Sprayer Users Guide
to adjust pressure only. DOES
to adjust pressure only. DOES
NOT relieve pressure from gun
NOT relieve pressure from gun
and system! Turn clockwise to
and system! Turn clockwise to
increase pressure & counter-
increase pressure & counter-
clockwise to decrease pressure.
clockwise to decrease pressure.
Storage solution of Pump Conditioner mixed with
1 gal. of water if using latex OR compatible paint
thinner if using oil-based paint.