Interior
2020 Flying Cloud 5-15
will slow the circulation of hydrogen and ammonia gas,
or in severe cases, completely block it, resulting in a
loss of cooling�
Anytime the trailer is parked for several hours with
the refrigerator operating, the trailer should be leveled
to prevent the loss of cooling� The trailer needs to be
leveled only so it is comfortable to live in (no noticeable
sloping of oor or walls).
When the trailer is moving, the leveling is not critical,
as the rolling and pitching movement of the trailer will
pass to either side of level, keeping the liquid ammonia
from accumulating in the evaporator tubing�
Operation
The refrigerator requires 12-volt current to operate,
even if running on LP or 120-volt modes� The 12-volt
is used to power the circuit board that directs the
refrigerator functions� When running in a mode such
as LP, it means the heat source, by far the largest
power requirement; to evaporate the ammonia is being
provided by an LPG burner�
A fan switch is mounted on the left panel as you enter
the trailer on 19 and 20 ft� models� On all other models,
refrigerators vent through the roof and do not require
a fan� The fan is thermostatically controlled when the
switch is on�
The fan increases the cooling efciency of the
refrigerator; therefore Airstream recommends leaving
the switch on whenever possible� Please note that
turning the fan off during hot, humid weather conditions
may substantially affect the cooling capacity of the
refrigerator�
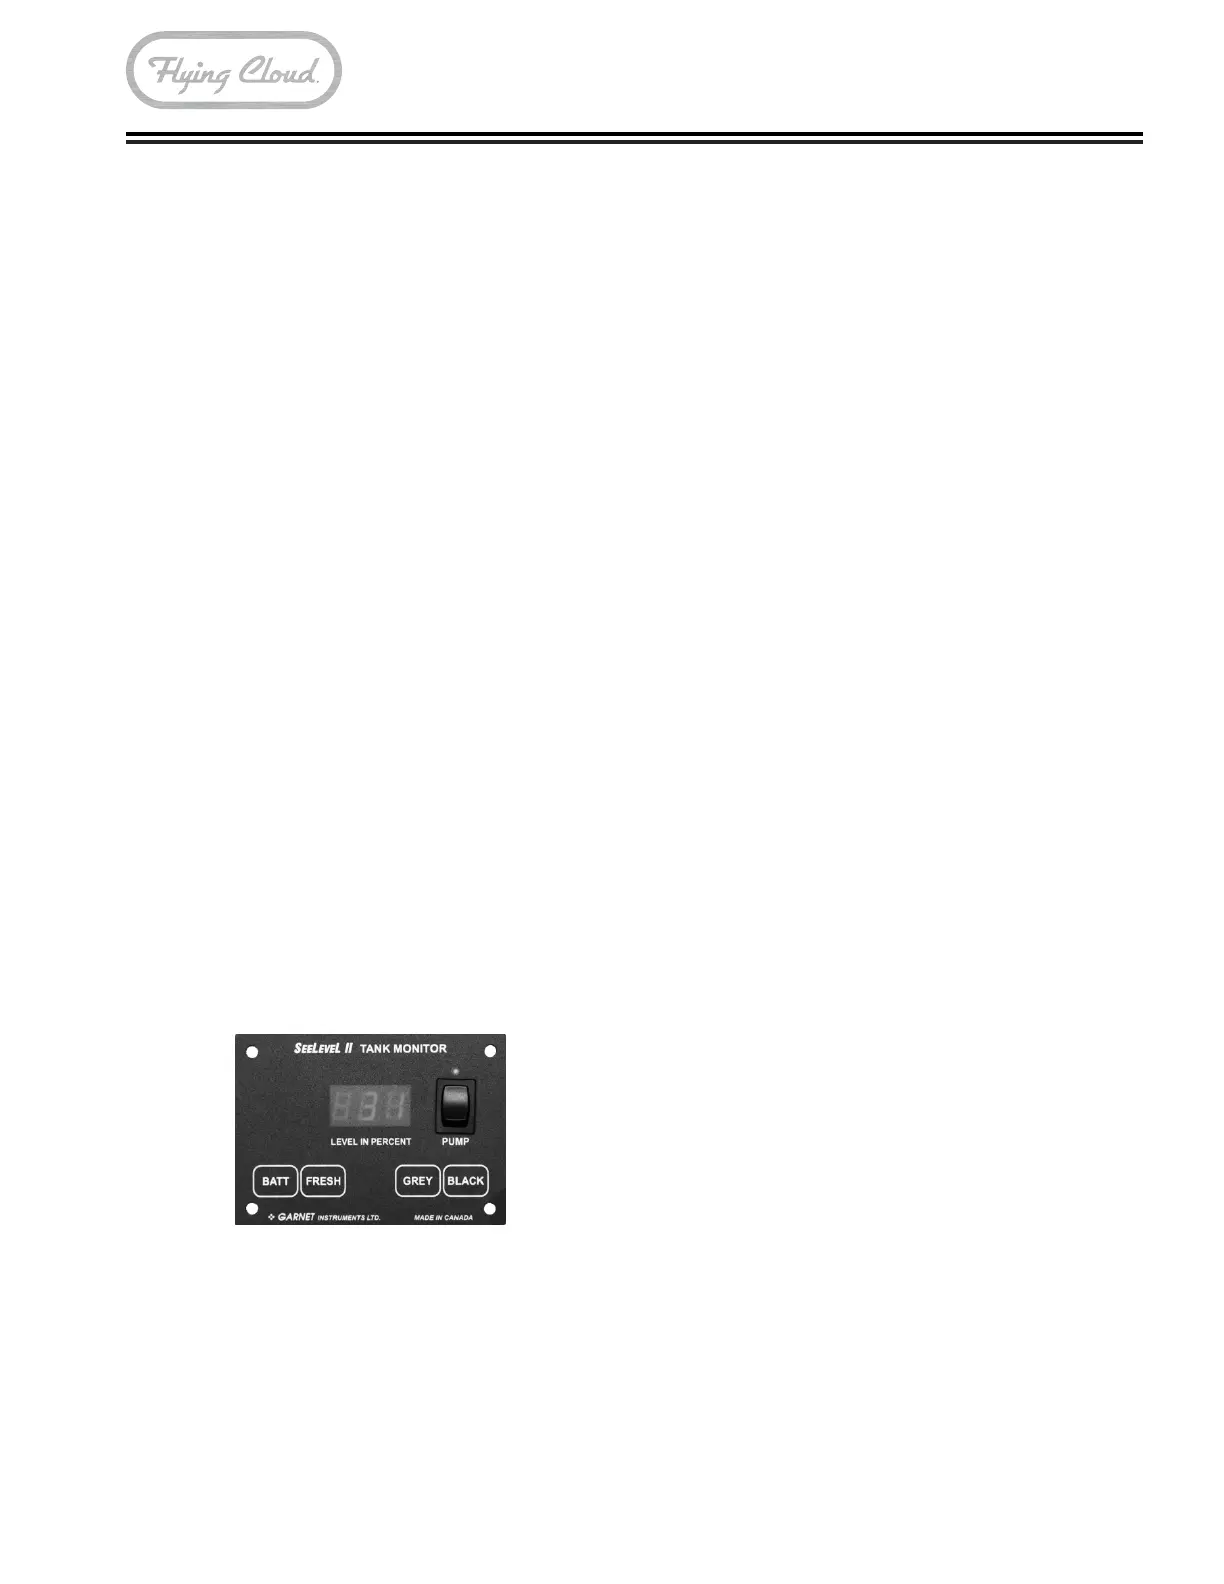
SeeLevel II Monitor Panel
The display is the only system component that is
accessed by the user� All user input to the display is
done using the four buttons along the bottom of the
display�
The display receives the information from the three
sender pads via a single, two-conductor wire, and
displays the level information in percent of full on a
three-digit, LED display� When the front panel button
for a particular tank is pressed, the display powers
up and displays the level for that tank� If the button
is pressed and released, the display will show the
level for about 5 seconds and then shuts down
automatically� If another button is pressed before the
display shuts down, then the new level will immediately
be shown� If the same button is pressed twice, the
display will hold on that tank and continue to show
updated levels for 5 minutes before shutting off� This
allows the user to monitor the lling or draining of the
tank� By pressing two buttons at once, the diagnostic
functions can be accessed�
Sender pads are installed and stuck to the sides of
the holding tank� The sender pad scans the water
level through the tank wall using digital techniques
programmed into the sender microprocessor�
To Read a Water or Sewer Tank Level
1� Press the button corresponding to the tank to be
checked and release it, the display will show the
levels in percent on the LED display� If no other
button is pressed, then the display shuts off after
about 5 seconds�
2� If another button (including BATT) is pressed
before the 5 second time is up for the rst button,
the display will immediately switch to show the new
level or voltage� The 5 second time-out is restarted
every time a button is pressed�
3� To continuously display a reading, press and
release the desired button, and then press the
same button a second time� When the button is
released, the display will be on hold mode, which
is indicated by the decimal point on the right hand
side turning on� While the display is in the hold
mode it will recheck the level once per second
so the user can watch the level change while the
tank is being lled or drained. The display will
automatically shut off after 5 minutes in hold mode�
To end the hold mode before the 5 minutes is up,
press any tank button, and the display will shut off�