5
A-MIP 210 V1.06
Installation
Aivia fixing
Never install Aivia under direct sunlight exposure.
You risk exposing the defibrillator to excessive
temperatures.
• Aivia installation must be done by qualified personnel
only and member of the Bornavie charter.
• If the Aivia is installed in the street or any unrestricted
passage
way, select a ground surface (abutment) or a column.
• Fixing must be adapted to the type of support the Aivia
is being fixed on.
• Aivia implementation zone must be free as signified
above.
• Exact dimentions of the Aivia are provided at the
Specifications sections of this document.
• Make sure that every cable has been taken thru the
cable passage before affixing the Aivia to the wall.
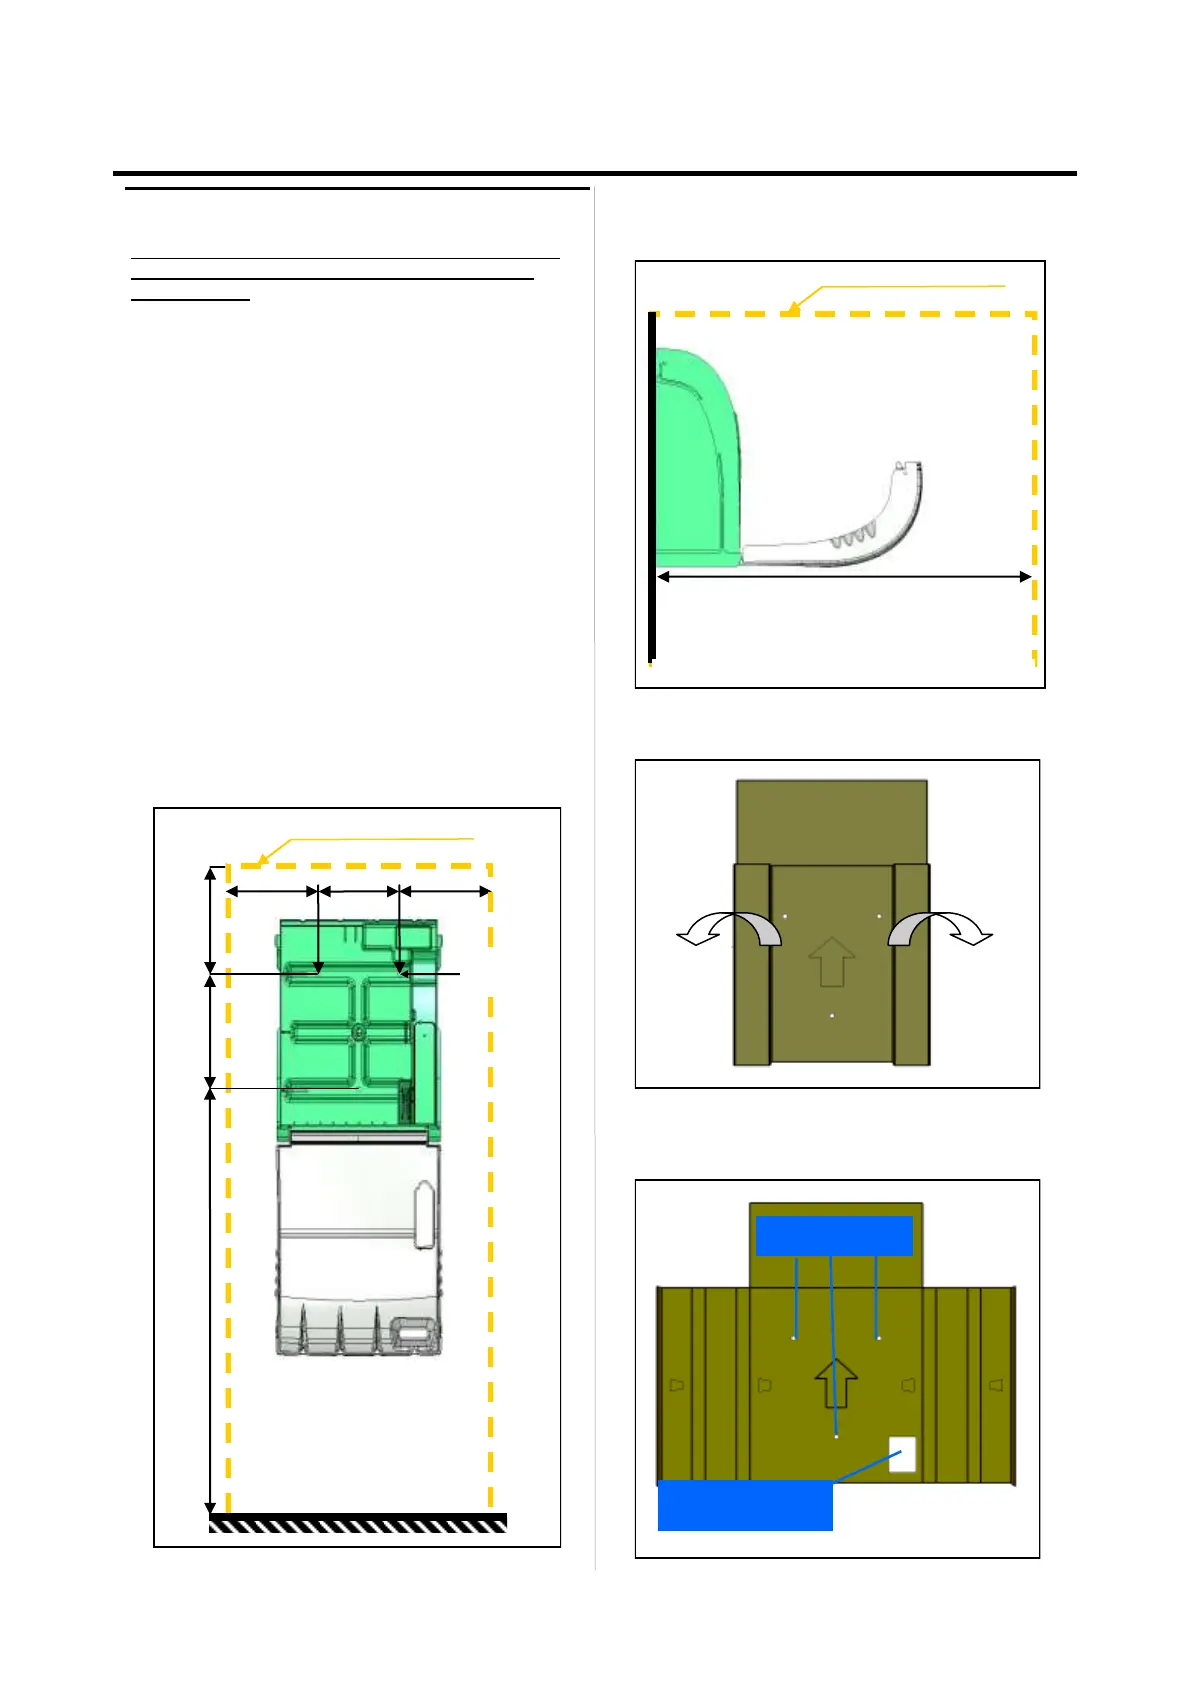
Useful zone for Aivia implementation
215 mm
190mm 220mm 220mm
150 mm 1300 mm
8,5 mm
• Let a free space of 140cm from the supporting wall to
allow easy opening of the Aivia.
• To mark fixing and cable passage, use the drilling
template provided with the packing.
• Put the template against the wall, arrow facing you and
directed forward.
1400 mm
Useful zone for Aivia implementation
Fixing holes
24V DC Cables
passage