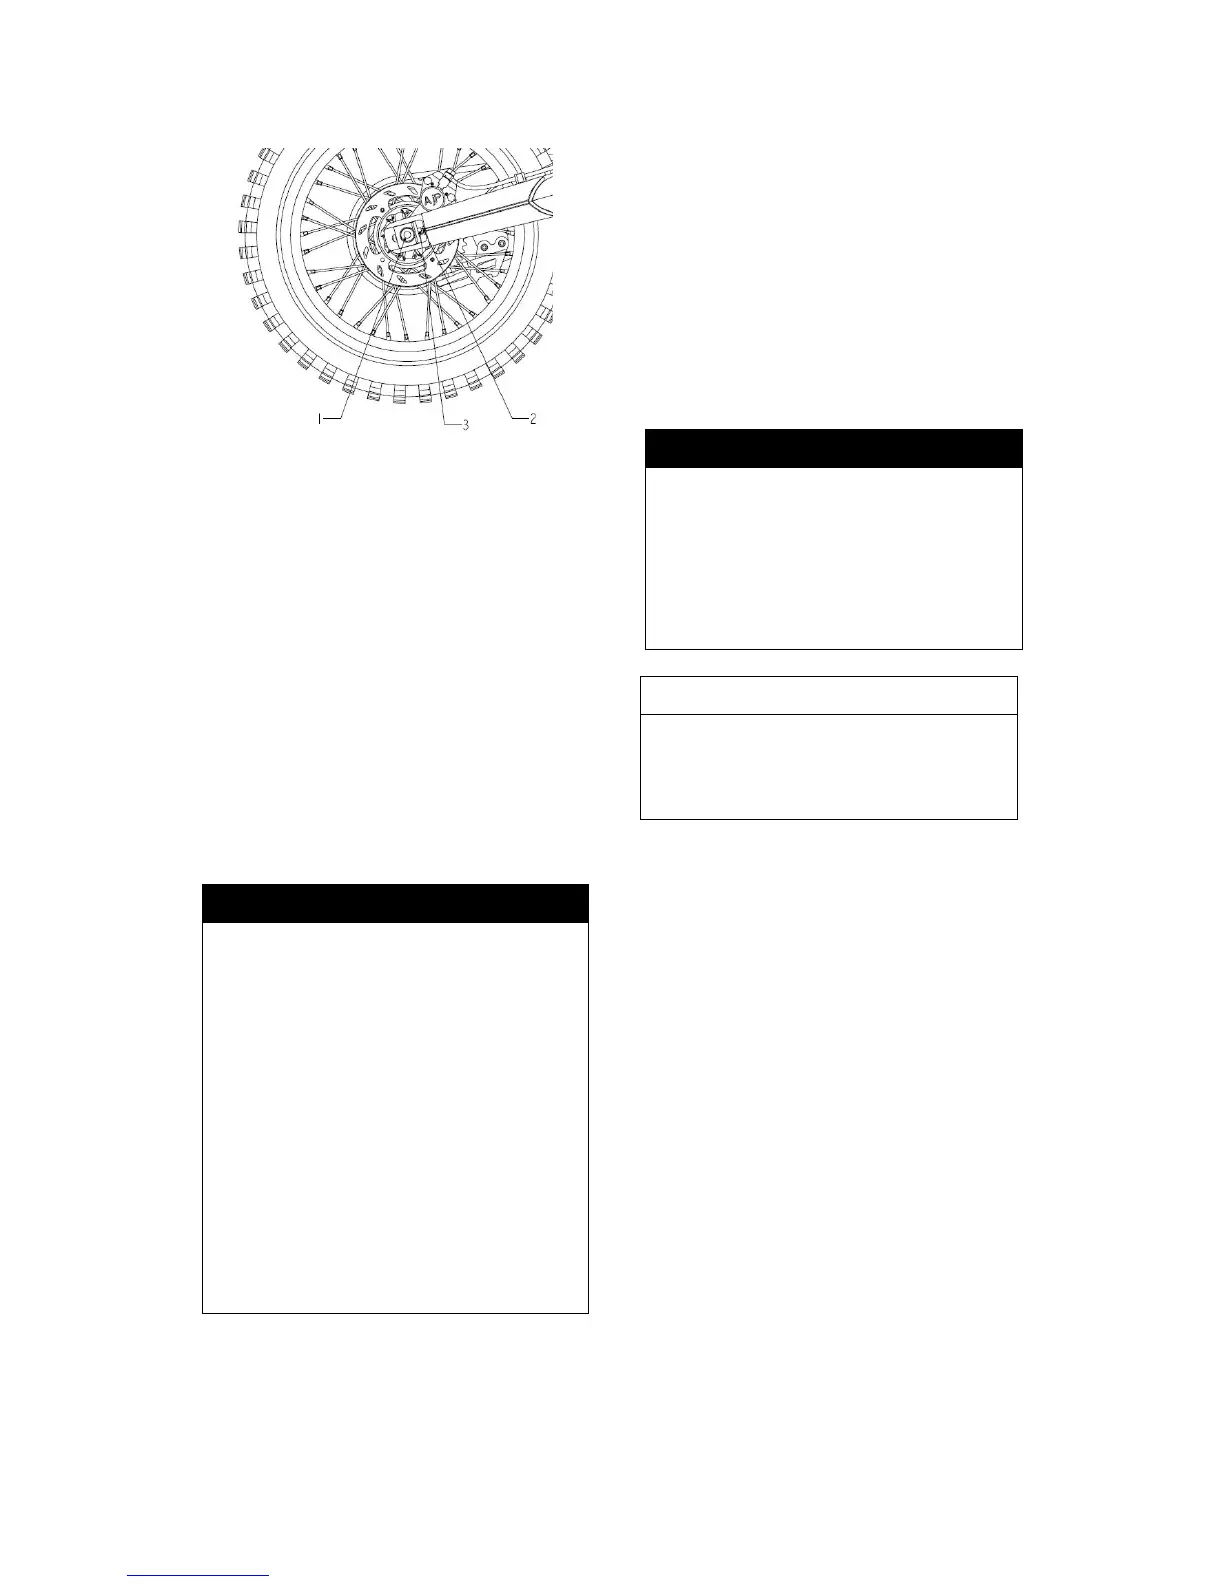
1 - Place the motorcycle on the side
stand
2 - Loose axle nut (1)
3 – Loose fixing nuts on both sides (2)
4 – Regulate adjuster screws (3) until
the chain has 15-30mm of slack. At the
same time that the chain is being
adjusted, the rear sprocket must be
kept in perfect alignment with the front
sprocket. Align both right and left
adjusters to the same position.
4 - Re-tighten the axle nut securely and
tighten fixing nuts (2).
5- Recheck the chain slack after
tightening, lubricate and adjust if
necessary.
! WARNING !
- Excessive tensioning of the chain
will put additional load on the
components of the secondary drive
chain (chain, bearings and rear
wheel). Aside from resulting
premature wear, chain may rupture
or transmission countershaft may
break.
- On the other hand, too much slack
in the chain can result in chain
jumping off the chain wheels. If this
happens, chain could also block rear
wheel or damage the engine.
- In either case, operator is likely to
loose control of the motorcycle.
Drive chain maintenance
A good maintenance is very important
for long chain life. Chains without o-
rings should be cleaned in fireproof
solvent regularly and afterwards treated
with hot grease or chain spray. On the
other hand, o-ring chains are very
simple to clean. The best way is to use
lots of water but never use brushes or
cleaning liquids. After letting the chain
dry completely, use a chain spray to
lubricate it.
Also check sprockets and chain guides
for wear and replace if necessary.
! CAUTION !
When mounting chain master link
clip, the closed side of the master
link must point in the running
direction.
BRAKES
Brake pads
Brake pads chosen by AJP provide an
optimal combination of dosing, brake
performance and lifecycle.
! WARNING !
No lubrication should be allowed to
reach rear tyre or rear brake disc,
otherwise road adherence and rear
wheel braking effects will be
strongly reduced and the
motorcycle can easily get out of
control.
PR4 User’s manual Page
19