! WARNING !
If brake pads are replaced too late
so that the lining is partly or entirely
worn, steel components of brake
pad will rub against brake disc,
thereby reducing braking effect and
destroying brake disc.
! CAUTION !
- Don’t place brake fluid in contact
with paint; it is a powerful paint
remover
- Use only clean break fluid or from
a sealed container
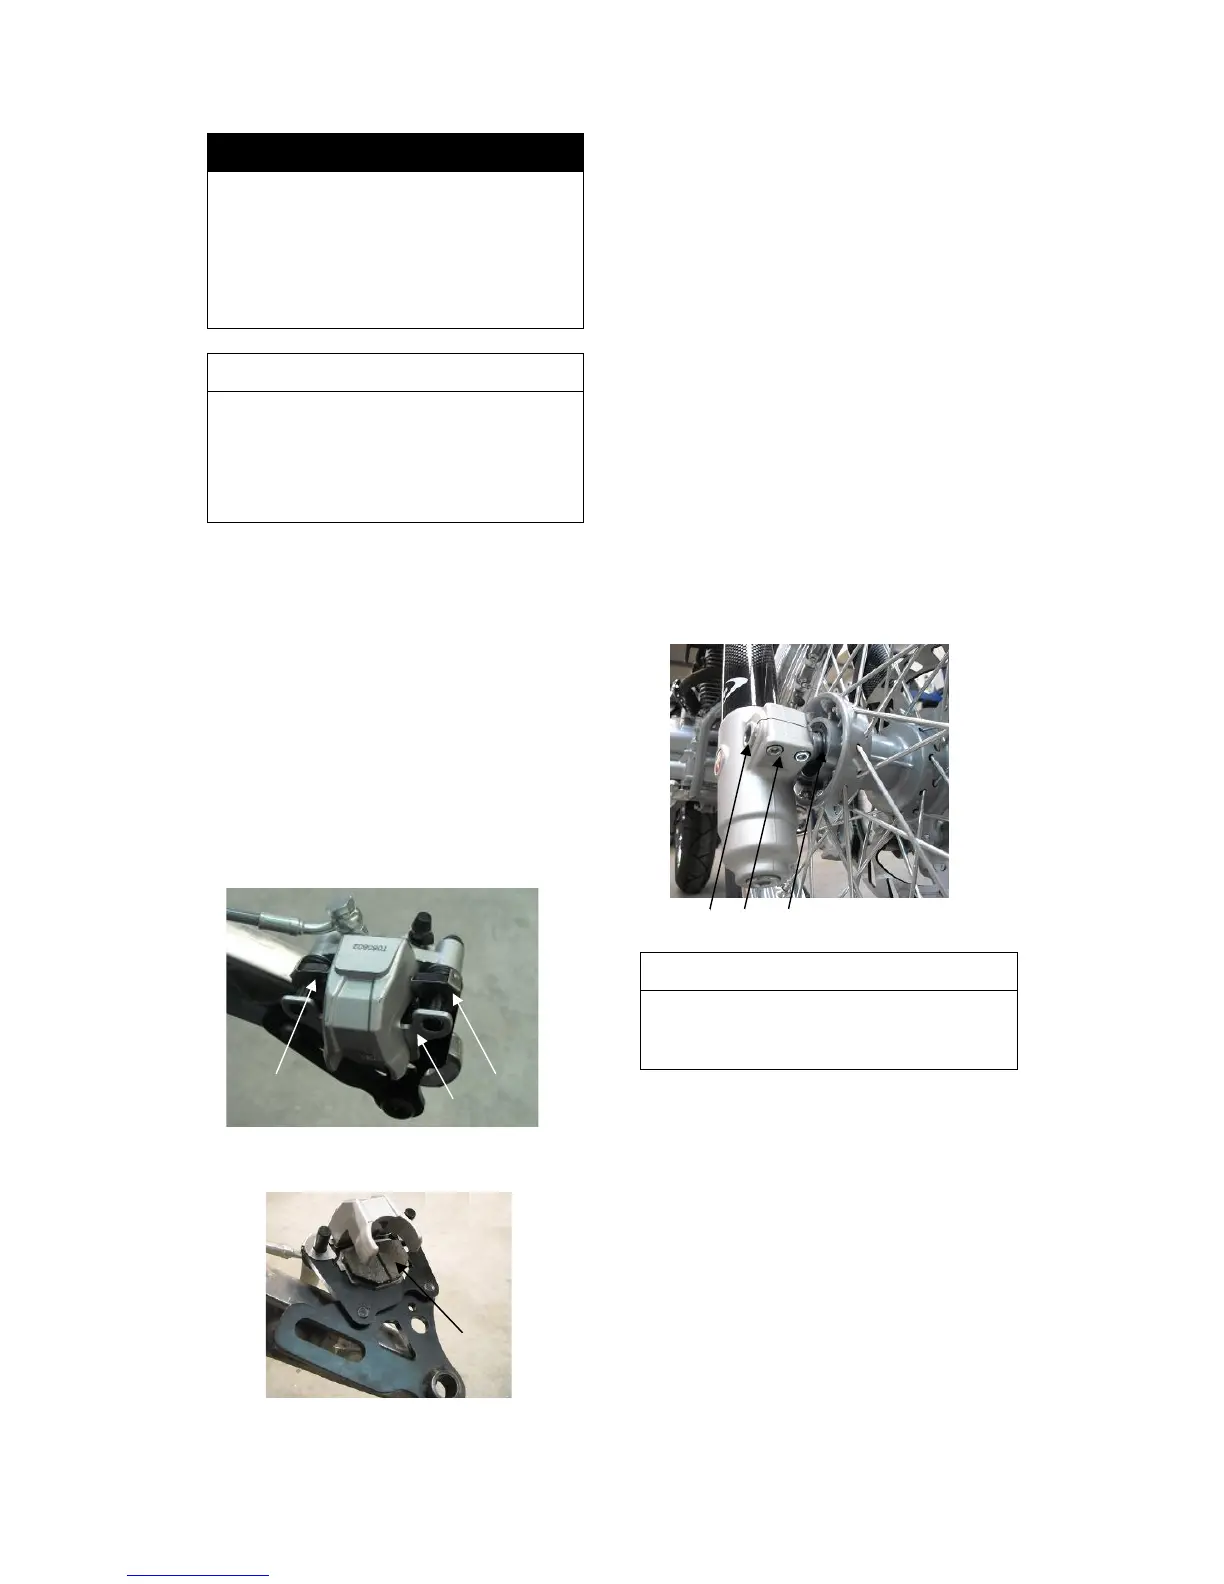
Replacing the rear brake pads (*)
Remove the rear wheel – see “REAR
WHEEL REMOVAL” and with a
screwdriver push the brake pads to
move the piston into its basic position.
Then push brake pad guides back (1)
and remove inner brake pad (2). After
removing inner brake pad one can
access to outer brake pad (3), which
can be removed with help from a
screwdriver.
Clean the brake calliper thoroughly with
compressed air, insert brake pads, first
outer and then inner. Then place rear
wheel back on.
FRONT WHEEL REMOVAL
Dismounting and mounting front
wheel
To remove the front wheel, jack the
motorcycle up on its frame so that the
front wheel no longer touches the
ground.
Loosen the 2 clamping screws (1) on
the right side of the fork, hold the wheel
and unscrew the front axle (2). Remove
the front wheel carefully from the fork
and take spacer (3) off the hub.
! CAUTION !
- Do not operate hand brake lever
when front wheel has been
removed.
1
Front wheel mounting
1
2
Place front wheel between front fork
sleeves in a way that brake disc is
between brake pads. Tight front axle or
the fixation nut and tight fixation
screws.
Check if front wheel rotates freely
without any restrain.
3
PR4 User’s manual Page
23