200 Series Tooling Alcoa Fastening Systems
24
A
A
SSEMBLY
SSEMBLY
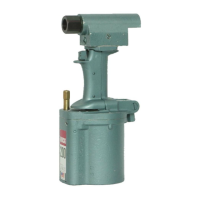
HEAD ASSEMBLY TO HANDLE ASSEMBLY
1. Assemble new O-ring (2-5) and new back-up ring
(2-6) to pilot of head (2-1).
2. Place three new O-rings (1-2) in counterbores in
mating surface of Handle (3-1).
3. Smear LUBRIPLATE 130AA on pilot, O-ring and
back up ring.
4. Carefully push head assembly (1-1) and handle
assembly (1-4) together.
5. Install four socket head cap screws (1-3). Tighten
screws to 34 inch pounds torque.
HANDLE ASSEMBLY TO CYLINDER ASSEMBLY
1. Remove (unscrew) adjusting screw (4-30) in bot-
tom of cylinder (4-1). Use Wrench 100878.
Remove spring (4-29) and spring guide (4-28).
2. Unscrew spring sleeve (4-27) to remove pressure
on cap (4-5). Use Wrench 100878.
3. Place four new O-rings (1-7) in counterbores in
mating surface of cylinder (4-1).
4. Assemble new quad ring (3-45) on air piston (3-
44).
5. Assemble new O-ring (3-3) to pilot of handle (3-
1).
6. Smear LUBRIPLATE in cylinder bore (4-1), on air
piston (3-44), on piston rod (3-34) and on pilot of
handle (3-1) and O-ring (3-3).
7. Carefully push piston and handle pilot into cylin-
der.
8. Install eight socket head cap screws (1-5) and
one socket head cap screw (1-6). Tighten eight
screws (1-5) to 34 inch pounds torque and one
screw to 6-9 foot pounds torque.
9. Tighten sleeve (4-27) to 1 75 inch pounds torque.
10. Reassemble spring guide (4-28) and spring (4-
29).
11. Reassemble adjusting screw (4-30). Screw in just
far enough put some pressure on the spring.
12. Refill tool with hydraulic fluid and adjust shift
valve adjusting screw per instructions included in
this manual.