FITTED EQUIPMENT
161
CD/MP3/TUNER WITH
AUXILIARY INPUT
Provision has been made in the furniture for
your dealer to install a provided head unit
similar in appearance to that fitted in the
dashboard of a car. The unit operates as a CD
player and FM/AM radio. In addition MP3 files
stored on a CD can be read and played by the
unit. Speakers mounted in the front locker of
the caravan are connected to this head unit
for a stereo sound output. A retractable AM/
FM aerial on the side of the caravan, enables
reception of radio stations.
An auxiliary input on the front of the unit
allows a separate MP3 player or similar to
be connected from that player’s headphone
socket. The can be positioned in the locker
and connected directly to the front of the head
unit, using an appropriate lead (not supplied),
or alternatively can be connected at a socket
on the binnacle at the front of the caravan,
again using an appropriate lead.
To use the connection on the binnacle, plug
the flying lead found in the locker below the
head unit, into the ‘Aux In’ socket on the front
of that head unit. At the binnacle, locate the
3.5mm jack socket near the centre of the bin-
nacle. Using an appropriate lead, (not supplied)
connect your player’s headphone socket to the
jack socket on the binnacle, to relay sound up
to the head unit. Depending on the specifica-
tion of the head unit, ‘Aux in’ may need to be
selected as an audio source on the head unit,
and the volume levels of both the head unit
and the player may have to be adjusted to find
an appropriate sound level.
STATUS DIRECTIONAL
TV AND FM RADIO ANTENNA
Firstly determine the approximate location
of the nearest transmitter and whether the
signals are horizontally or vertically polarized.
For assistance ask your site operator or check
antennas in the vicinity
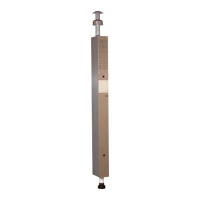
1. Loosen the Mast Locking Collar and Wall
Bracket and raise the antenna. Turn the
mast to direct the Antenna towards the
TV transmitter.
The RED spot on the bottom of the mast
indicates the front of the Antenna.
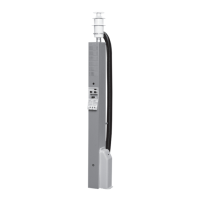
2. When receiving vertically polarized signals,
rotate the winder anti-clockwise to cant
the antenna through 90°. The red / green
indicator, if present, indicates vertical or
horizontal orientation.
Note: Direction assumes user is looking
down on roof.
Note: DO NOT over tighten or use undue
force on the winder.
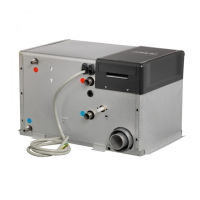
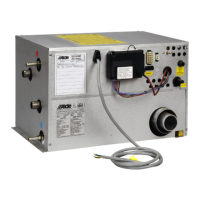
3. Switch ON the Power Pack and the RED
LED will illuminate.
4. Check the gain control switch is set to
normal – NML.
5. Tune your television to the strongest signal.
You may need to adjust the direction of the
mast to achieve the best quality picture.
6. Secure by tightening the Mast Locking
Collar and Wall Bracket
Removing the antenna
A permanently fitted Status can be easily
removed leaving only the Mounting Foot and
rubber gaiter.
1. Unplug the antenna from the Power Pack.
2. Loosen the Mast Locking Collar and
Wall Bracket and lift off whilst feeding out
the cable.
3. Push the Blanking Cap supplied into place.
! WARNING: The Blanking Cap is a
temporary seal and is not for long term use.
! WARNING: Always ensure the aerial is
lowered before driving off.
TV INLET/CD/MP3 TUNER