AFTER SALES SUPPORT
19
1300 855 831
support@scheppach.com.au
AUS Hotline Costs: Local rate for landline calls*
*Charges may vary dependent upon network operator or mobile network provider.
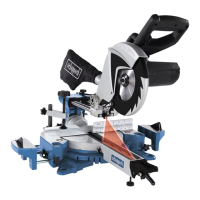
MODEL: HM80L PRODUCT CODE: 60120 04/2018
AUS
HM80L Assembling and operation
7.2 Dust bag (Fig. 1-2)
The mitre saw comes with a dust bag (18) for sawdust and chips.
Squeeze together the metal ring on the dust bag and attach it to the outlet open-
ing in the motor area.
The dust bag (18) can be emptied by means of a zipper at the bottom.
7.3 Using the laser (Fig. 7-8)
• To switch on: Move the ON/OFF switch for laser (31) to the “I” position. A laser
line is projected onto the material you wish to process, providing an exact guide
for the cut.
• To switch off: Move the ON/OFF switch for laser (31) to the “0” position.
• Replacing the battery: Switch off the laser (30). Remove the battery compart-
ment cover (33). Remove the batteries and replace with new batteries
(2 x AAA). Check that the battery terminals are positioned correctly when in-
serting new batteries. Close the battery compartment cover (33) again.
7.4 Cross cut 90° and turntable 0°
Caution! For 90° mitre cuts, the moveable fence (17a) must be xed in the inner
position.
• Open the set screw (17b) on the moveable fence (17a) and push the moveable
fence (17a) inwards.
• Warning! The moveable fence (17a) must be locked in a position far enough
from the inner position that the distance between the fence (17a) and the saw
blade (7) is no more than 8 mm.
• Before making the cut, check that no collision could occur between the move-
able fence (17a) and the saw blade (7).
• Tighten the set screw (17b) again.
• Move the machine head (5) to its upper position.
• Use the handle (2) to push back the machine head (5) and x it in this position if
required (dependent on the cutting width).
• Place the piece of wood to be cut at the fence (17) and on the turntable (15).
• Lock the material with the clamping device (8) on the machine base (16) to pre-
vent the material from moving during the cutting operation.
• Push down the release lever (4) to release the machine head (5).
• Press the ON/OFF switch (3) to start the motor.
• Use the handle (2) to move the machine head (5) steadily and with light pres-
sure downwards until the saw blade (7) has completely cut through the work-
piece.
• When the cutting operation is completed, move the machine head (5) back to its
upper position and release the ON/OFF switch (3).
Caution! The machine executes an upward stroke automatically due to the re-
turn spring, i.e. do not release the handle (2) after completing the cut; instead
allow the machine head to move upwards slowly whilst applying light counter