62
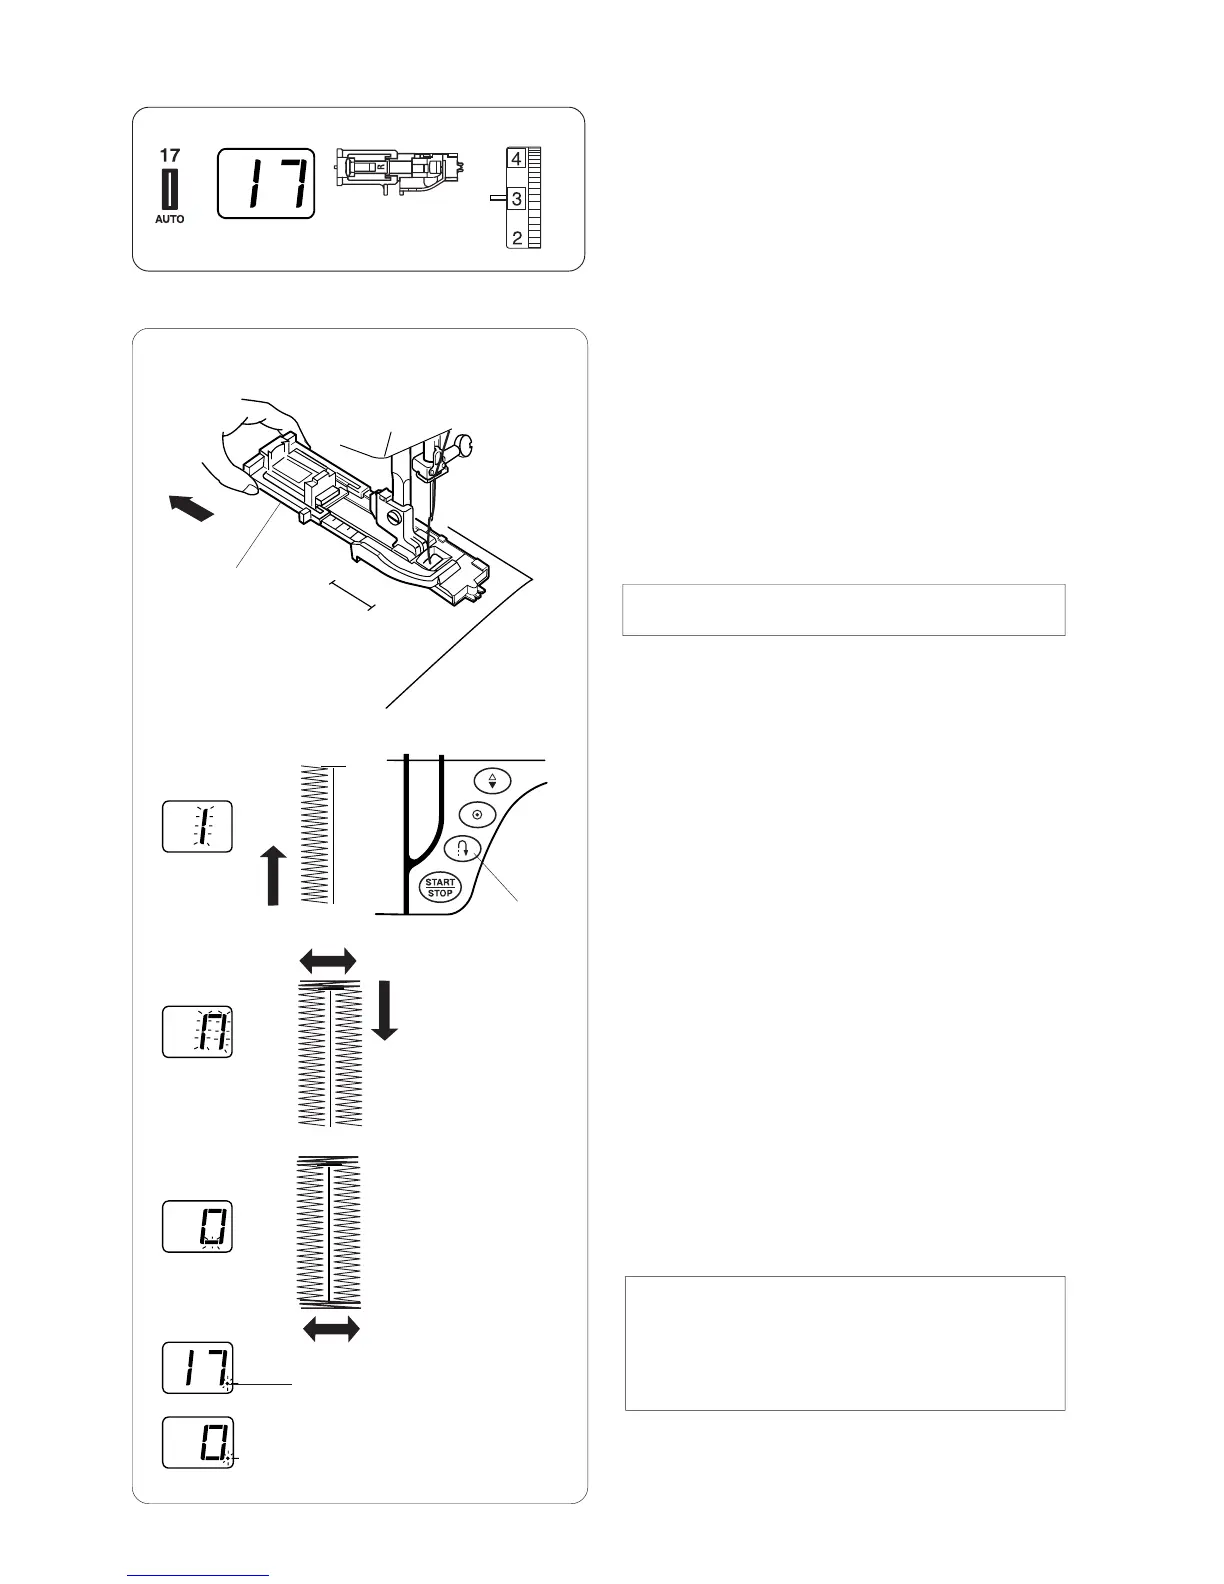
z Pull the Button Holder all the way out.
Insert the fabric under the foot. Press the needle
up/down button twice. Remove the fabric to
the left to draw the needle thread through the
hole of the foot.
x Insert the garment under the foot, and lower the
needle at the starting point. Then lower the
Automatic buttonhole foot R.
q Button Holder
NOTE:
You do not need to pull down the buttonhole lever.
c Sew the left row up to the required length. Then
stop the machine and press the reverse button.
w Reverse button
v Start the machine again to sew the back bartack
and the right row of the buttonhole.
Stop the machine when you are directly
opposite the starting point.
Press the reverse button.
b Start the machine again. The machine will sew
the front bartack, lock the stitches and
automatically stop when the buttonhole is
completed. After completed the buttonhole,
dot will blink.
Blinking dot
NOTE:
You can sew another buttonhole identical to the first
one by simply restarting the machine.
The buttonhole width and stitch density cannot be
altered after the buttonhole is finished.
To cut the buttonhole opening, refer to page 52.
Auto buttonhole
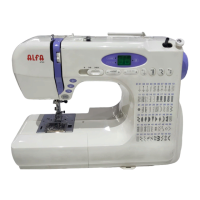
Machine Settings
q Pattern: #17
w Presser foot: Automatic buttonhole foot R
e Thread tension: 1 – 5
q
w
e
q
w
z
x
c
v
b
e
e