66
Zipper Sewing
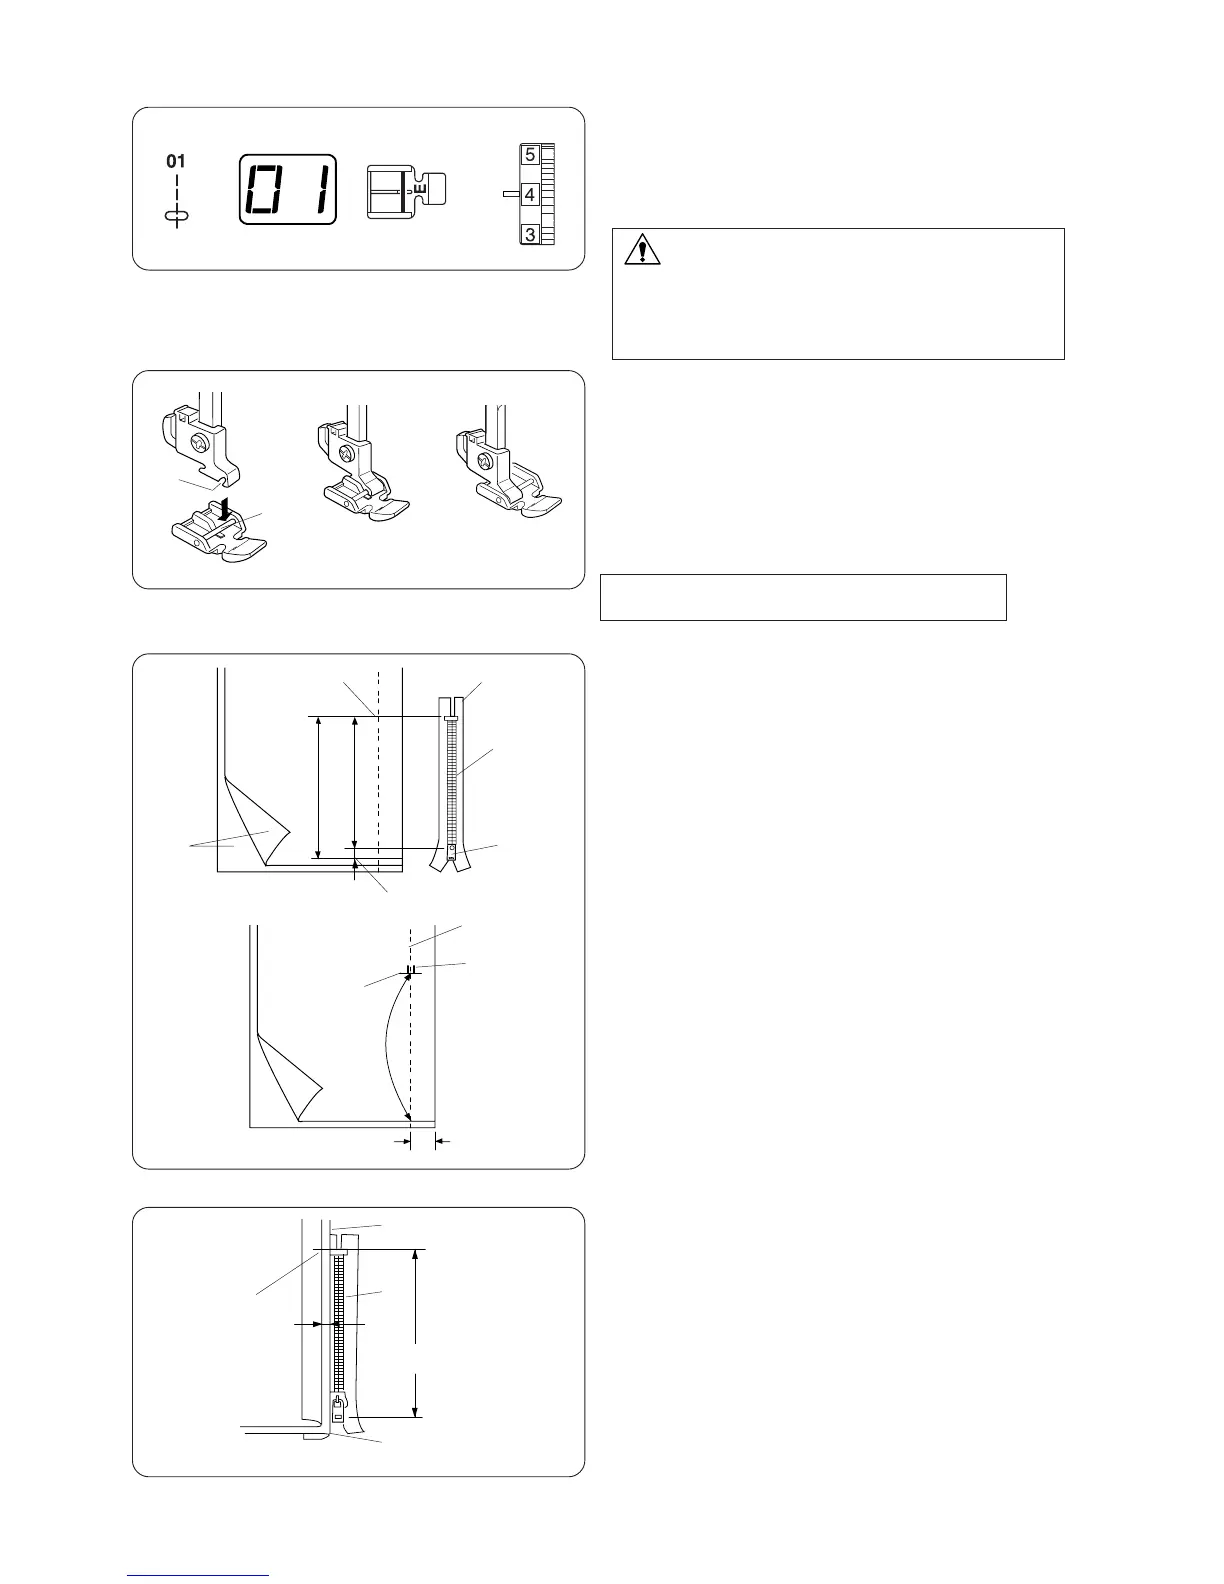
Attaching the zipper foot (optional item)
(A) Attach zipper foot E with the pin on the right-
hand side to the groove to sew the left side of
the zipper.
(B) Attach zipper foot E with the pin on the left-
hand side to the groove to sew the right side of
the zipper.
q Pin
w Groove
NOTE:
The zipper foot is available as an optional item.
Fabric preparation
z Add 3/8” (1 cm) to the zipper size. This is the
overall opening size.
q Right side of the fabric
w 3/8” (1 cm)
e Opening size
r Zipper size
t Slider
y Zipper teeth
u Zipper tape
i Wrong side of the fabric
o End of the opening
x Place the right (top) sides of the fabric together.
Sew a bottom seam 5/8" (2 cm) from the right edge
to the zipper bottom stop position. Sew a few
stitches in reverse to lock.
Increase the stitch length to “4”, set needle thread
tension to “1”, and baste the remaining length of
the fabric.
!0 5/8” (2 cm)
!1 Basting
!2 Reverse stitch
!3 End of the opening
!4 Bottom seam
CAUTION:
When sewing with the zipper foot, make sure to use
pattern #01 (straight stitch with the center needle
position). Otherwise the needle may hit the foot and
possibly break.
Machine Settings
q Pattern: #01
w Presser foot: Zipper foot E (optional item)
e Thread tension: 2 – 6
To sew
z Attach zipper foot with the right side pin.
Fold back the upper layer seam allowance. Fold
back the lower layer seam allowance to leave a
1/8" (0.4 cm) margin of fabric.
q Lower layer
w End of the opening
e Zipper teeth
r 1/8” (0.4 cm) margin
t Upper layer
y Opening size
u Folded edge
q
w
(A)
(B)
q
w
e
r
t
y
u
z
x
z
e
r
t
y
u
i
o
!1
!2
!3
!4
q
w
!0
q
w
e