SVP INSTRUCTION MANUAL Page 10
SHAW-ALMEX INDUSTRIES LIMITED 49909-010
Jun 2017
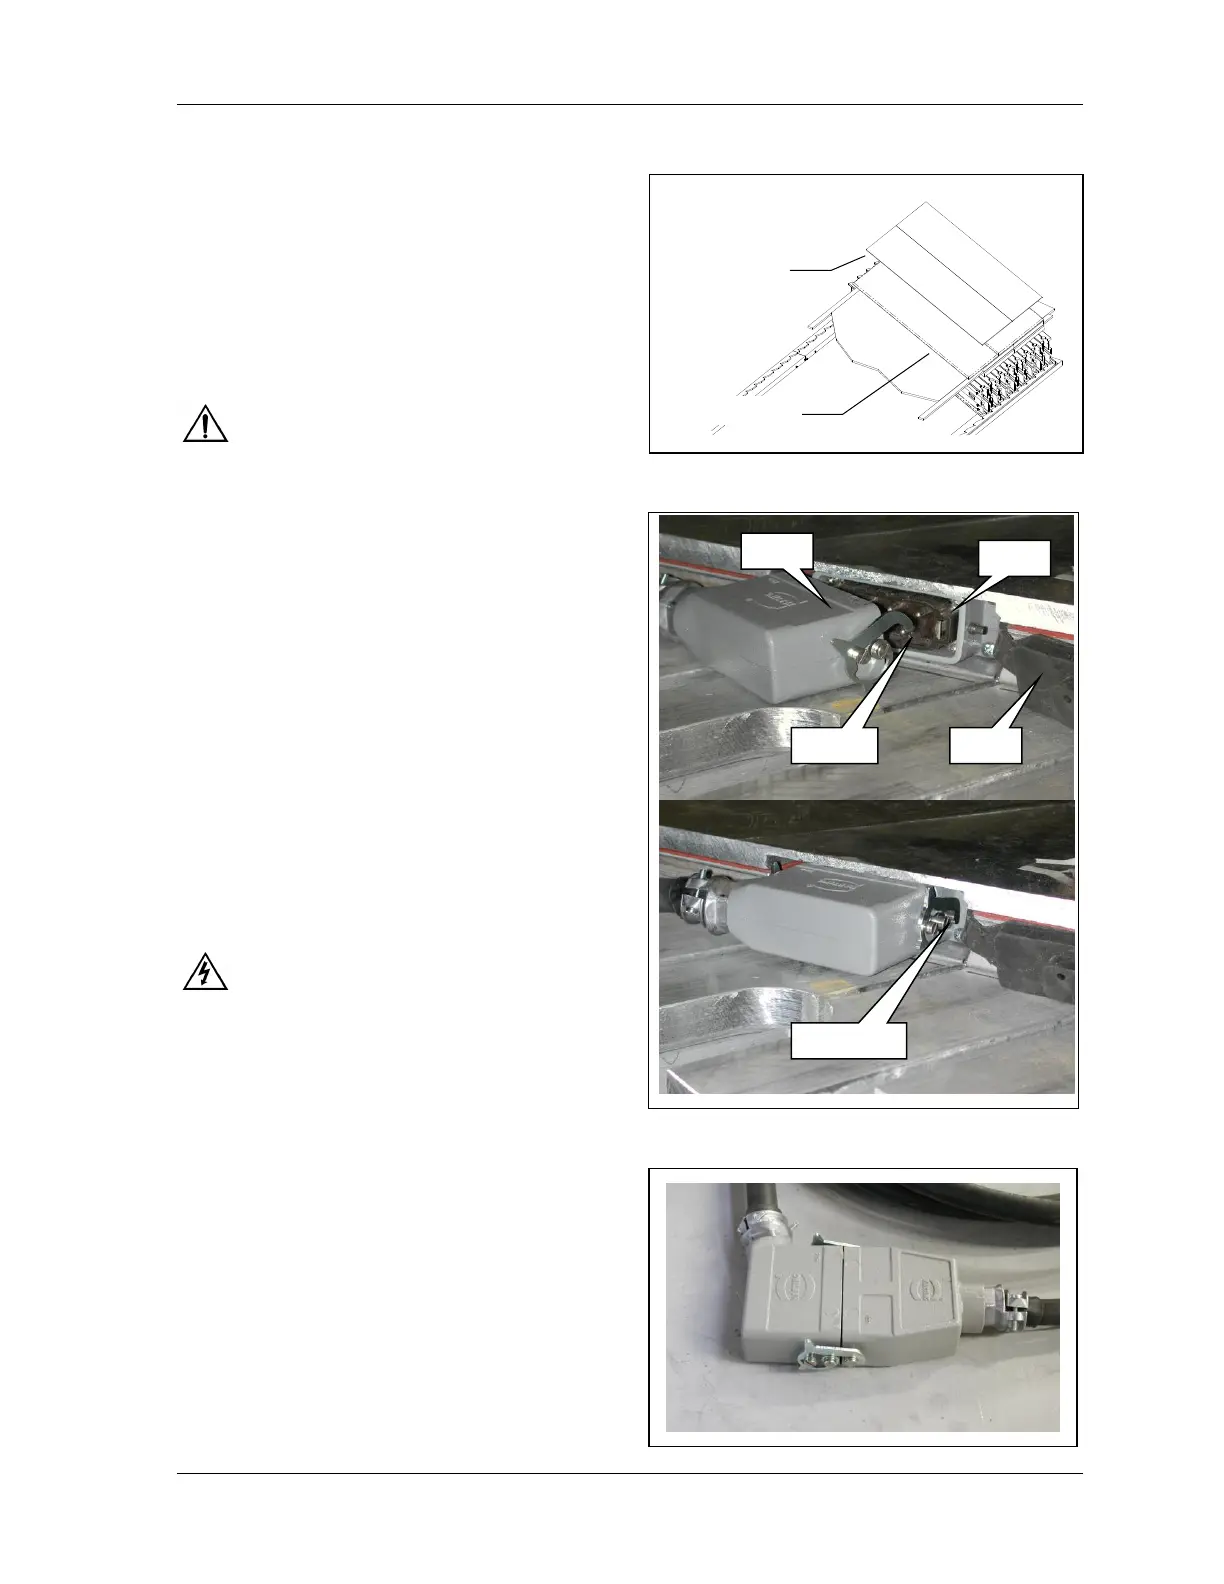
11. When using edge irons, place them on the lower
platen on each side of the belt. See Figure 7 Belt
and Edge Irons.
Tip: The edge irons should be slightly thinner (0.015”,
0.5 mm) than the belt.
12. Using the platen carrying handles, lift the top
platen into position over the splice. Ensure the
platen cable connections are at the same end and
the upper platen and lower platen are aligned. See
Figure 8 Top Platen.
Safety: Do not use the platen handle to lift the
platen overhead.
13. Remove the platen handles.
14. Position the pressure bag and bag plate over the top
platen. Locate the hose coupler at the most
convenient side for connection to the airline or fluid
pressure pump. Try to position the bag so the coupler
is on the opposite side to the electrical connection.
See Figure 10 Pressure Bag and Bag Plate.
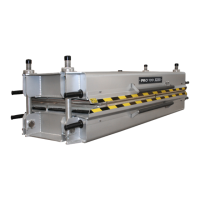
15. Remove the dust cap from the electrical connectors
and install the platen cable plug. The pin
configuration allows the plug to be installed only one
way. See Figure 9 Platen Connection
• Rotate latches open.
• Push the plug firmly into the socket.
• Rotate latches closed to hold plug in place.
Tip: The two ends of the SVP – T4 platen cables can be
connected during storage and transport to protect the
contact pins from dirt, moisture and damage. See Figure
11 Platen Cable.
Safety: Always be sure the power supply is OFF
before connecting or disconnecting the platen cables.
16. Position the top traverse bars on the pressure bag
plate. The top bars must be aligned with the lower
bars and parallel across the top of the press at both
ends of the bars. See Figure 12.
17. Install the tie bolts. The square nut must fit within
the nut retaining lugs on the traverse bars. Tighten
the shank of the tie bolt BY HAND ONLY until
the square nuts bear flat on the lugs.
Caution: Under no circumstances should a wrench be
used to tighten the tie bolts when assembling the
unit. If nuts do not turn freely by hand, inspect and
repair or replace the bolt.