SVP INSTRUCTION MANUAL Page 9
SHAW-ALMEX INDUSTRIES LIMITED 49909-010
Jun 2017
1. Remove idlers from the conveyor to provide space
for assembly of the vulcanizer. Use the set up
template and the General Arrangement drawing to
judge the distance.
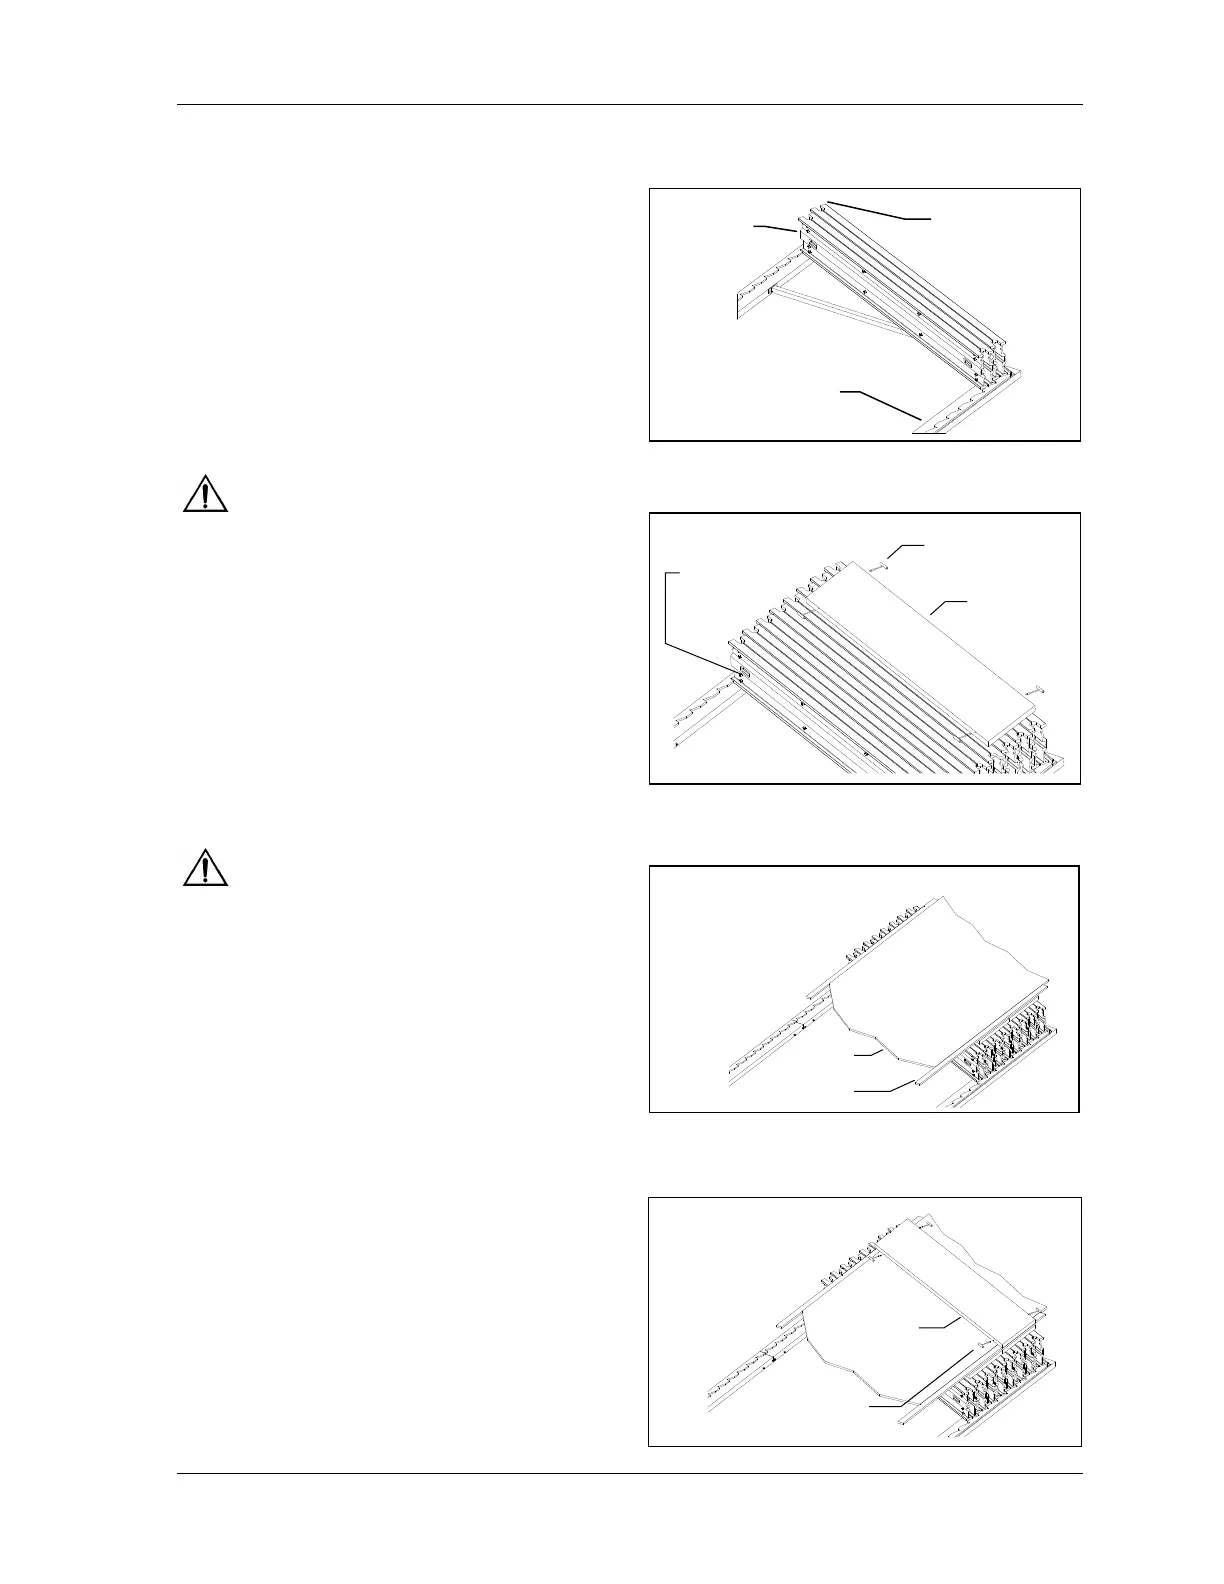
2. With the ends of the conveyor belt laid back out of
the way, locate the template at the splice location.
The templates ensure the correct traverse bar
spacing and the joiner angles ensure the correct
bias angle. See Figure 4 Templates.
3. Position the traverse bars on the template. If the
end of the traverse bar is relieved for the tie bolt,
make sure the relief is on the top. See Figure 5
Traverse Bars.
Safety: Use safety slings for moving components
too heavy to be moved manually.
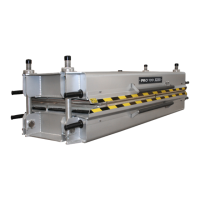
4. Install the lower restraining bars. With the gauge
pin removed from one end, slide the bar through
each traverse bar and install the gauge pin. Both
gauge pins should be approximately 3/4” (18 mm)
from the side of the outer traverse bars.
5. Install the platen carrying handles or hoist rings
into the threaded holes on the edge of the lower
platen hand tight. See Figure 6 Bottom Platen and
Handles.
6. Lift the platen onto the lower bars. Make sure the
platen is centered in both directions over the bars.
Safety: Do not use the platen handle to lift the
platen overhead.
7. Remove the platen handles because they will cause
cold spots on the platen.
8. If the orientation of the platens causes the electrical
and cooling fittings to be underneath the belt,
install the cooling hoses and platen cable now.
9. Prepare the splice on the bottom platen. It is good
practice to lay plywood or some other material on
the bottom platen while preparing the splice to
prevent damage to the platen surface.
Tip: A plywood deck can be built up around the platen
to increase the size of the worktable.
Caution: This unique platen requires support over its
entire area or permanent distortion of the platen may
occur. Fill any unused portion of the platen area with
scrap belting or shims the same thickness as the belting
being cured.
10. Install the cooling hoses on the bottom platens at
this time. It can be difficult to install the cooling
fittings after the edge irons and top platens are in
position.