P54x/EN CM/La4 Commissioning
(CM) 10-34
MiCOM P543, P544, P545 & P546
CM
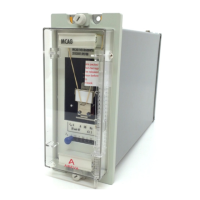
6.1.6.4 P593 auxiliary supply
P593 units operate from a dc only auxiliary supply within the operative range of 19.5 V to
300 V.
Without energizing the P593 units measure the auxiliary supply to ensure it is within the
operating range.
It should be noted that the P593 interface unit is designed to withstand an ac ripple
component of up to 12% of the normal dc auxiliary supply. However, in all cases the peak
value of the dc supply must not exceed the maximum specified operating limit.
Do not energize the P593 using the battery charger with the battery disconnected as
this can irreparably damage the unit’s power supply circuitry.
6.1.6.5 P593 light emitting diodes (LEDs)
On po
wer up the green ‘SUPPLY’ LED should have illuminated and stayed on indicating that
the P593 is healthy.
Set the ‘X.21 LOOPBACK’ switch to ‘ON’. The green ‘CLOCK’ and red ‘X.21 LOOPBACK’
LED’s should illuminate. Reset the ‘X.21 LOOPBACK’ switch to the ‘OFF’ position.
Set the ‘OPTO LOOPBACK’ switch to ‘ON’. The red ‘OPTO LOOPBACK’ LED should
illuminate. Do not reset the “OPTO LOOPBACK’ switch as it is required in this position for
the next test.
6.1.6.6 P593 optical received signal level
With an opti
cal cable connected to the P54x optical transmitter as instructed in section 6.1.2,
discon
nect the other end of the cable from the P593 receiver (RX) and use an optical power
meter to measure the received signal strength. The value should be in the range
-16.8 dBm to -25.4 dBm. Record the measured value and replace the connector to the P593
receiver.
6.1.6.7 P593 loopback test
With the ‘OP
TO LOOPBACK’ switch in the ‘ON’ position the receive and transmit optical
ports are electrically connected together. This allows the optical fiber communications
between the P443 relay and the P593 to be tested, but not the internal circuitry of the P593
itself.
Set the ‘OPTO LOOPBACK’ switch to ‘OFF’ and ‘X.21 LOOPBACK’ switch to ‘ON’
respectively. With the ‘X.21 LOOPBACK’ switch in this position the ‘Receive Data’ and
‘Transmit Data’ lines of the X.21 communication interface are connected together. This
allows the optical fiber communications between the P443 relay and the P593, and the
internal circuitry of the P593 itself to be tested.
6.1.6.8 P593 optical transmitter signal level
Usi
ng an appropriate fiber optic cable, connect the P593 optical transmitter (TX) to an optical
power meter. Check that the average power transmitted is within the range -16.8 dBm to
-22.8 dBm.
Record the transmit power level.
Connect the appropriate optical fiber to connect the P592 transmitter to the P54x optical
receiver and return to the P54x relay.
6.1.6.9 P54x optical received signal level from P593
Return to the P54x relay.
Disconnect the fiber from the P54x optical receiver that connects
to the optical transmitter of the P593 and measure the received signal level. The value
should be in the range -16.8 dBm to -25.4 dBm. Record the measurement and then
reconnect the fiber to the optical receiver.
 Loading...