P54x/EN MT/La4 Maintenance
(MT) 11-4
MiCOM P543, P544, P545 & P546
1.3 Method of repair
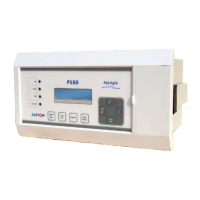
1.3.1 P54x relay
If the relay
should develop a fault whilst in service, depending on the nature of the fault, the
watchdog contacts will change state and an alarm condition will be flagged. Due to the
extensive use of surface-mount components faulty PCBs should be replaced, as it is not
possible to perform repairs on damaged circuits. Thus either the complete relay or just the
faulty PCB, identified by the in-built diagnostic software, can be replaced. Advice about
identifying the faulty PCB can be found in the Troubleshooting chapter (P54x/EN TS).
The preferred method is to replace the complete relay as it ensures that the internal circuitry
is protected against electrostatic discharge and physical damage at all times and overcomes
the possibility of incompatibility between replacement PCBs. However, it may be difficult to
remove an installed relay due to limited access in the back of the cubicle and rigidity of the
scheme wiring.
Replacing PCBs can reduce transport costs but requires clean, dry conditions on site and
higher skills from the person performing the repair. However, if the repair is not performed
by an approved service center, the warranty will be invalidated.
Before carrying out any work on the equipment, the user should be familiar with the
contents of the Safety and Technical Data chapters and the ratings on the
equipment’s rating label. This should ensure that no damage is caused by incorrect
handling of the electronic components.
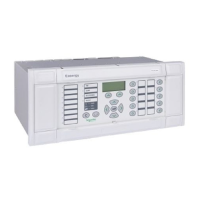
1.3.1.1 Replacing the complete relay
The case an
d rear terminal blocks have been designed to facilitate removal of the complete
relay should replacement or repair become necessary without having to disconnect the
scheme wiring.
Before working at the rear of the relay, isolate all voltage and current supplies to the relay.
Note: The MiCOM range of relays have integral current transformer shorting
switches which will close when the heavy duty terminal block is
removed.
Disconnect the relay earth, IRIG-B and fiber optic connections, as appropriate, from the rear
of the relay.
There are two types of terminal block used on the relay, medium and heavy duty, which are
fastened to the rear panel using crosshead screws, as in Figure 1 of the Commissioning
chapter (P54x/EN CM).
Note: The use of a magnetic bladed screwdriver is recommended to
minimize the risk of the screws being left in the terminal block or lost.
Without exerting excessive force or damaging the scheme wiring, pull the terminal blocks
away from their internal connectors.
Remove the screws used to fasten the relay to the panel, rack, etc. These are the screws
with the larger diameter heads that are accessible when the access covers are fitted and
open.
If the top and bottom access covers have been removed, do not remove the screws
with the smaller diameter heads which are accessible. These screws secure the front
panel to the relay.
Withdraw the relay carefully from the panel, rack, etc. because it will be heavy due to the
internal transformers.
MT
 Loading...