Door Assembly Removal (cont.)
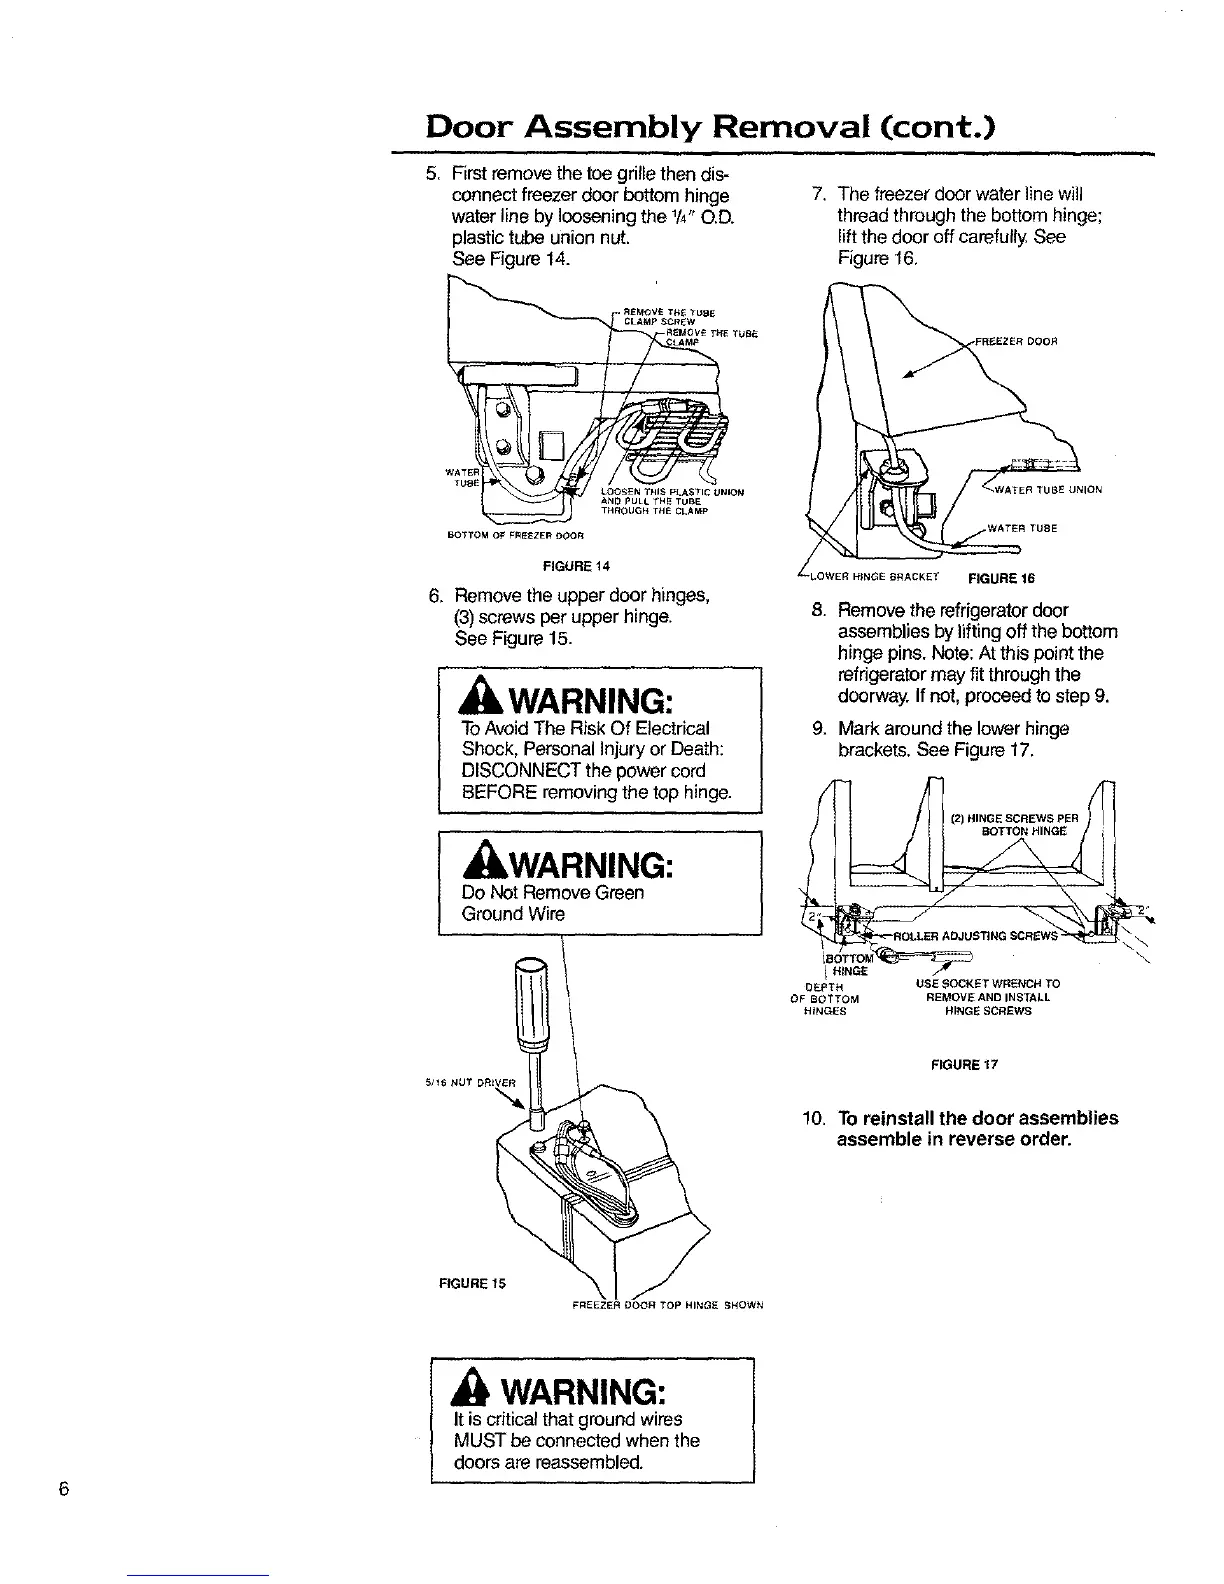
5. First remove the toe grille then dis-
connect freezer door bottom hinge
water line by loosening the %" O.D.
plastic tube union nut.
See Figure 14.
REMOVE TH_ Ttl_ E
CLAMP SCREW
REMOVE THE TUB_
CLAMP
WATER
IIIBE I_OOSE N THIS PLASTIC UNION
AND pULL "+HE TUBE
BOTTOM O_ FREEZER O00R
,
FIGURE 14
Remove the upper door hinges,
(3) screws per upper hinge.
See Figure 15.
WARNING:
ToAvoid The Risk Of Electrical
Shock, Personal Injury or Death:
DISCONNECT the power cord
BEFORE removing the top hinge.
, WARNING:
Do Not Remove Green
Ground Wire
7. The freezer door water line will
thread through the bottom hinge;
lift the door off carefully. See
Figure 16.
WATER TUBE
FIGURE 16
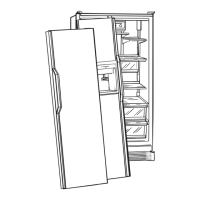
8. Remove therefrigerator door
assemblies by lifting off the bottom
hinge pine. Note: At this point the
refrigerator may fit through the
doorway. If not, proceed to step 9.
9. Mark around the lower hinge
brackets. See Figure17.
(2) HINGE SCREWS PER
BOTTON HINGE
I HINGE
DEPTH USE SOCKET WRENCH TO
OF BOTTOM REMOVE AND INSTALL
H_NGES HINGE SCREWS
\
FIGURE 17
10. To reinstall the door assemblies
assemble in reverse order.
FIGURE 15
FREEZER DOOR TOP HINGE SHOWN
6
WARNING:
It is critical that ground wires
MUST be connected when the
doors are reassembled.
 Loading...