)oor Assembly Removal
b Remove The Door
_ssemblies
)o not removethe door handles.)
Ion-Electronic Model
ools Required:
_.pe,Tightly fitted gloves, # 2 Phillips
;crewdriver,s116"Hex Nut Driver, Pencil,
s" Hex Socket, 31E"Drive Ratchet and
4" Hex Nut Drive_
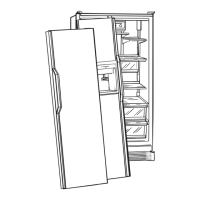
,CAUTION:
ToAvoid The Risk Of Personal
Injury first tape the top of the
doors for safety. See Figure 10.
III (3) SCREWS
ih SECURE EACH
TAPE DOORS
AS SHOWN
FIGURE 10
, CAUTION:
ToAvoid The Risk Of Personal
Injury Or Property Damage have
two (2) people remove the door.
One to hold the door and one to
remove the safety tape, and help
with the tools.
,WARNING:
ToAvoid The Riskof Electrical
Shock, Personal Injury or Death:
DISCONNECT the power cord
BEFORE removing the top hinge.
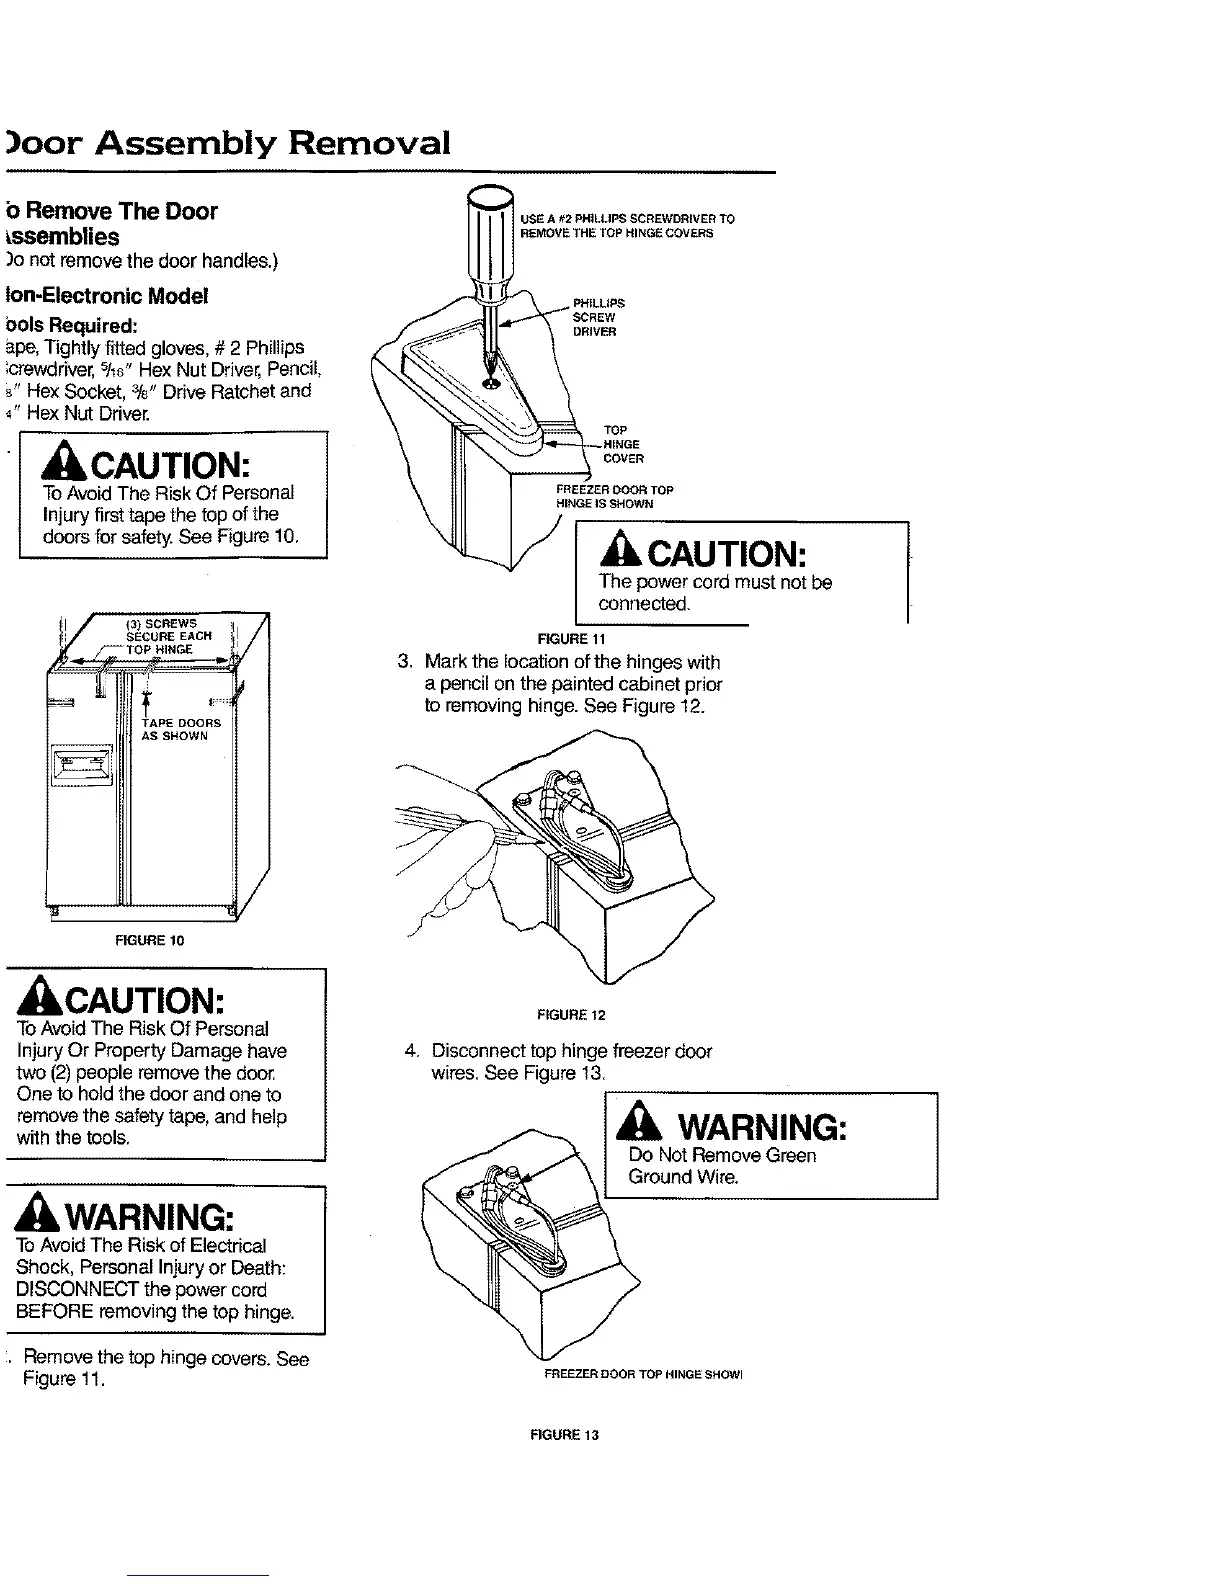
• Remove the top hinge covers. See
Figure 11.
USE A #2 PHILLIPS SCREWDRIVER TO
REMOVE THE TOP HINGE COVERS
PHILLIPS
DRIVER
TOP
FREEZERGOORTOP
HINGEIS SHOWN
I , CAUTION:
The power cord must not be
connected.
FIGURE 11
3. Mark the location ofthe hingeswith
a pencilon the painted cabinet prior
toremovinghinge. See Figure 12.
FIGURE 12
4. Disconnect top hinge freezer door
wires.See Figure13.
WARNING:
Do Not Remove Green
Ground Wire.
FREEZERDOORTOPHINGESHOWI
r
FIGURE 13
 Loading...