Do you have a question about the Ambient Weather WS-25 and is the answer not in the manual?
Guides users through the initial setup and basic operation of the WS-25 thermometer.
Details the floating pool and spa thermometer unit, including its design and function.
Describes how to enter and navigate the console's settings for time, date, and format.
Step-by-step guide to configure custom high and low temperature alarm thresholds.
Guides for calibrating temperature and humidity readings on the console for improved accuracy.
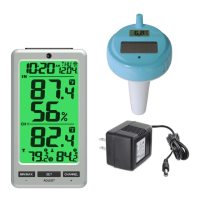
The Ambient Weather WS-25 is a wireless 8-channel floating pool and spa thermometer with an indoor temperature and humidity display console. This device is designed to monitor water temperature in pools and spas, as well as indoor temperature and humidity, providing users with essential environmental data.
The WS-25 system comprises a display console (receiver) and a floating pool/spa thermometer (remote transmitter). The floating thermometer measures water temperature and transmits this data wirelessly to the display console. The console, in turn, displays both the outdoor water temperature and indoor temperature and humidity. The system supports up to eight remote transmitters, allowing for monitoring of multiple locations if additional sensors are purchased.
The initial setup involves inserting batteries into the pool float transmitter first, followed by the display console. The floating thermometer has dip switches to assign channel numbers (from 1 to 8) and to select temperature units (°F or °C) for its own display. After battery insertion, the remote sensor's LED indicator will light for 4 seconds and then flash once every 60 seconds, indicating data transmission. The display console will automatically search for and connect to the remote sensor(s). If the display does not power up, a reset button is available on the second-generation pool float, or a manual reset procedure can be followed for older models.
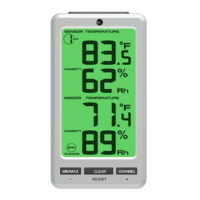
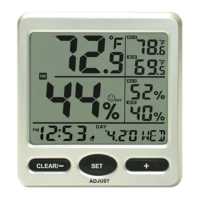
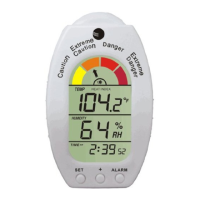
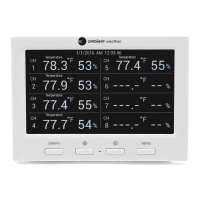
The display console features an LCD that shows indoor temperature and humidity, outdoor temperature (for up to eight channels), minimum and maximum temperature readings, time, date, and alarm icons. The console has four main buttons: MIN/MAX/-, SET/ADJUST, CHANNEL/+, and SNOOZE/LIGHT.
Users can set the 12 hr/24 hr time format, hour, minute, date format (month/day or day/month), day, month, and year. These settings are accessed by holding the SET button for 3 seconds.
In normal mode, holding the MIN/MAX key for three seconds toggles the display between Day of Week/Month-Day and Seconds/Year. The year will be shown for 30 seconds before reverting to Month-Day.
High and low temperature alarms can be set for Channel 1. To view alarms, press the SET button once. To set alarms, press and hold the SET button for 3 seconds when the alarm time and icon ALM appear. Users can adjust the alarm hour, minute, and high/low temperature thresholds. Alarms can be toggled on or off, and when active, the alarm icon will appear. If an alarm sounds, pressing any button will silence it, though the icon will continue to flash until the condition is no longer active.
Pressing the MIN/MAX button once displays the maximum recorded values, and pressing it again shows the minimum values. To reset these values, hold the MIN/MAX/- button for 3 seconds.
The CHANNEL/+ button allows users to switch between indoor readings (IN), individual remote sensor channels (2 through 8), and a scroll mode. In scroll mode, the console automatically cycles through indoor temperature/humidity and all active remote sensor channels every five seconds.
If communication with a sensor is lost (indicated by dashes on the display), users can reacquire the signal. For a specific lost channel (2-8), select the channel and hold CHANNEL/+ for 3 seconds. For a lost Channel 1 (indoor), display IN temperature/humidity and hold CHANNEL/+ for 3 seconds. If new sensors are added or multiple channels are lost, hold CHANNEL/+ for 5 seconds to initiate a broader search. The remote search icon will be displayed during this process and turn off once the signal is reacquired.
This button controls the backlight and snooze function. When operating on batteries, a quick press turns the backlight on for five seconds, while holding it for two seconds activates it for 30 minutes or turns it off. If the alarm is sounding, pressing this button activates a 5-minute snooze, with the alarm icon flashing. Pressing any other button cancels the snooze mode.
The console allows for calibration of both indoor and outdoor temperature, as well as indoor humidity. To enter temperature calibration, hold SET and CHANNEL/+ for five seconds. The indoor temperature will flash, and users can adjust the reading in 0.1-degree increments. To enter humidity calibration, hold SET and MIN/MAX for five seconds. The indoor humidity will flash, allowing adjustments in 1% increments. The ADJUST key can be held for three seconds to reset to the uncalibrated value. The calibration mode automatically exits after 30 seconds of inactivity or by pressing the SNOOZE/LIGHT button.
To restore the console to its factory settings, remove one battery, wait 10 seconds, then press and hold the MIN/MAX button while reinserting the battery. Continue holding MIN/MAX for 5 seconds after power-up, then resync the sensors.
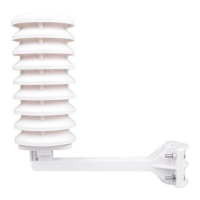
For optimal performance, the remote sensor should be placed in the pool or spa within 100 feet of the display console, avoiding solid earth or ground obstructions. A tether can be used to secure the sensor. The console should be placed at least three feet away from electronic devices like computers, TVs, and wireless phones to minimize electromagnetic interference (EMI). Users should also avoid transmitting through solid metal barriers, which can significantly reduce signal strength. Mounting remote sensors on vertical surfaces, rather than laying them flat, is recommended for proper communication.
The device uses AAA batteries for both the display console and the floating thermometer. Fresh alkaline batteries are recommended for outdoor temperatures between -4 °F and 140 °F, while fresh lithium batteries are suggested for colder ranges (-40 °F to 140 °F). The solar panel on the floating thermometer does not charge the batteries, so rechargeable batteries are not recommended due to their lower operating voltage and narrower temperature range.
During each battery change for the floating thermometer (typically every 1-2 years), it is recommended to apply waterproof silicon grease to the red colored gaskets to ensure a proper seal and prevent water leakage and damage. The F007PF sensor is designed to float; continuous submersion under a cover can lead to premature gasket failure.
When setting up or after calibration, allow about 30 minutes for both indoor and outdoor sensors to stabilize. For temperature calibration, it is recommended to place the sensor in a shaded, controlled environment next to a fluid thermometer and allow 48 hours for stabilization before making adjustments.
The manual provides a troubleshooting guide for common issues such as lost sensor communication, inaccurate temperature readings, and weak display contrast. Solutions include moving the sensor closer to the console, checking battery levels, ensuring proper sensor placement, and avoiding sources of electrical noise or RF interference.
| Type | Wireless Weather Station |
|---|---|
| Display | LCD |
| Humidity Accuracy | ± 5% |
| Transmission Frequency | 915 MHz |
| Power (Remote Sensor) | 2 x AA batteries (not included) |
| Temperature Accuracy (Outdoor) | ± 2 °F |
| Temperature Accuracy (Indoor) | ± 2 °F |
| Humidity Range | 10% to 99% |
| Wind Direction | 0 to 360 degrees |
| Rainfall Range | 0 to 393.7 inches (0 to 9999 mm) |
| Barometric Pressure Accuracy | ±0.08 inHg |
| Wireless Range | 300 feet |
| Power (Base Station) | batteries |
| Weight | Varies depending on components |
| Barometric Pressure Range | 23.62 to 32.48 inHg (800 to 1100 hPa) |