14
Note: Prior to installation, please ensure that the installation environment can support at least 3x the weight of
the camera + bracket.
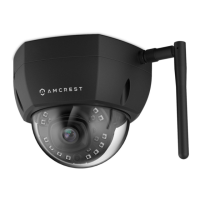
To install the camera onto a wall, follow the steps below:
1. Use a Torx/Hex wrench (included) to open the dome enclosure by unfastening the three inner hex screws
on enclosure.
2. Place the installation sticker on the wall or ceiling surface that you wish to mount your camera.
3. Using the X’s on the installation sticker, drill 3 holes to allow for the insertion of the included expansion
bolts.
4. If the camera’s cable will be exiting through the wall or ceiling surface, please be sure to drill an exit hole
and pull the cable through.
5. If the camera’s cable will be exiting through the side of the camera, route the cable through the U-shaped
channel on the side of the enclosure.
6. Align the camera with the installation sticker, then line up the 3 screw holes in the camera pedestal to the
three plastic expansion bolts on the installation surface. Put the three included screws through the
camera then insert them into the expansion bolts firmly.
7. Adjust the camera in the position that you want it to be in, then reattach the dome body to the base of
the camera. Note: Range of lens: vertical (0°~+65°), horizontal (0°~+355°). When adjusting the camera
into position, please ensure that the camera’s enclosure does not block the image or cause reflection of IR
light.