17
Service Department: 888.270.6879
CONVEYOR BELT ADJUSTMENT
ALIGNMENT AND TENSIONING
Read all safety warnings (see page 5) before proceeding.
Lock power o.
Mark the inial posion.
By design, the conveyor belt should have 1/16” or less clearance to side frames. This assists in
prevenng debris from geng under the belt but some side rubbing may be expected. This is
normal.
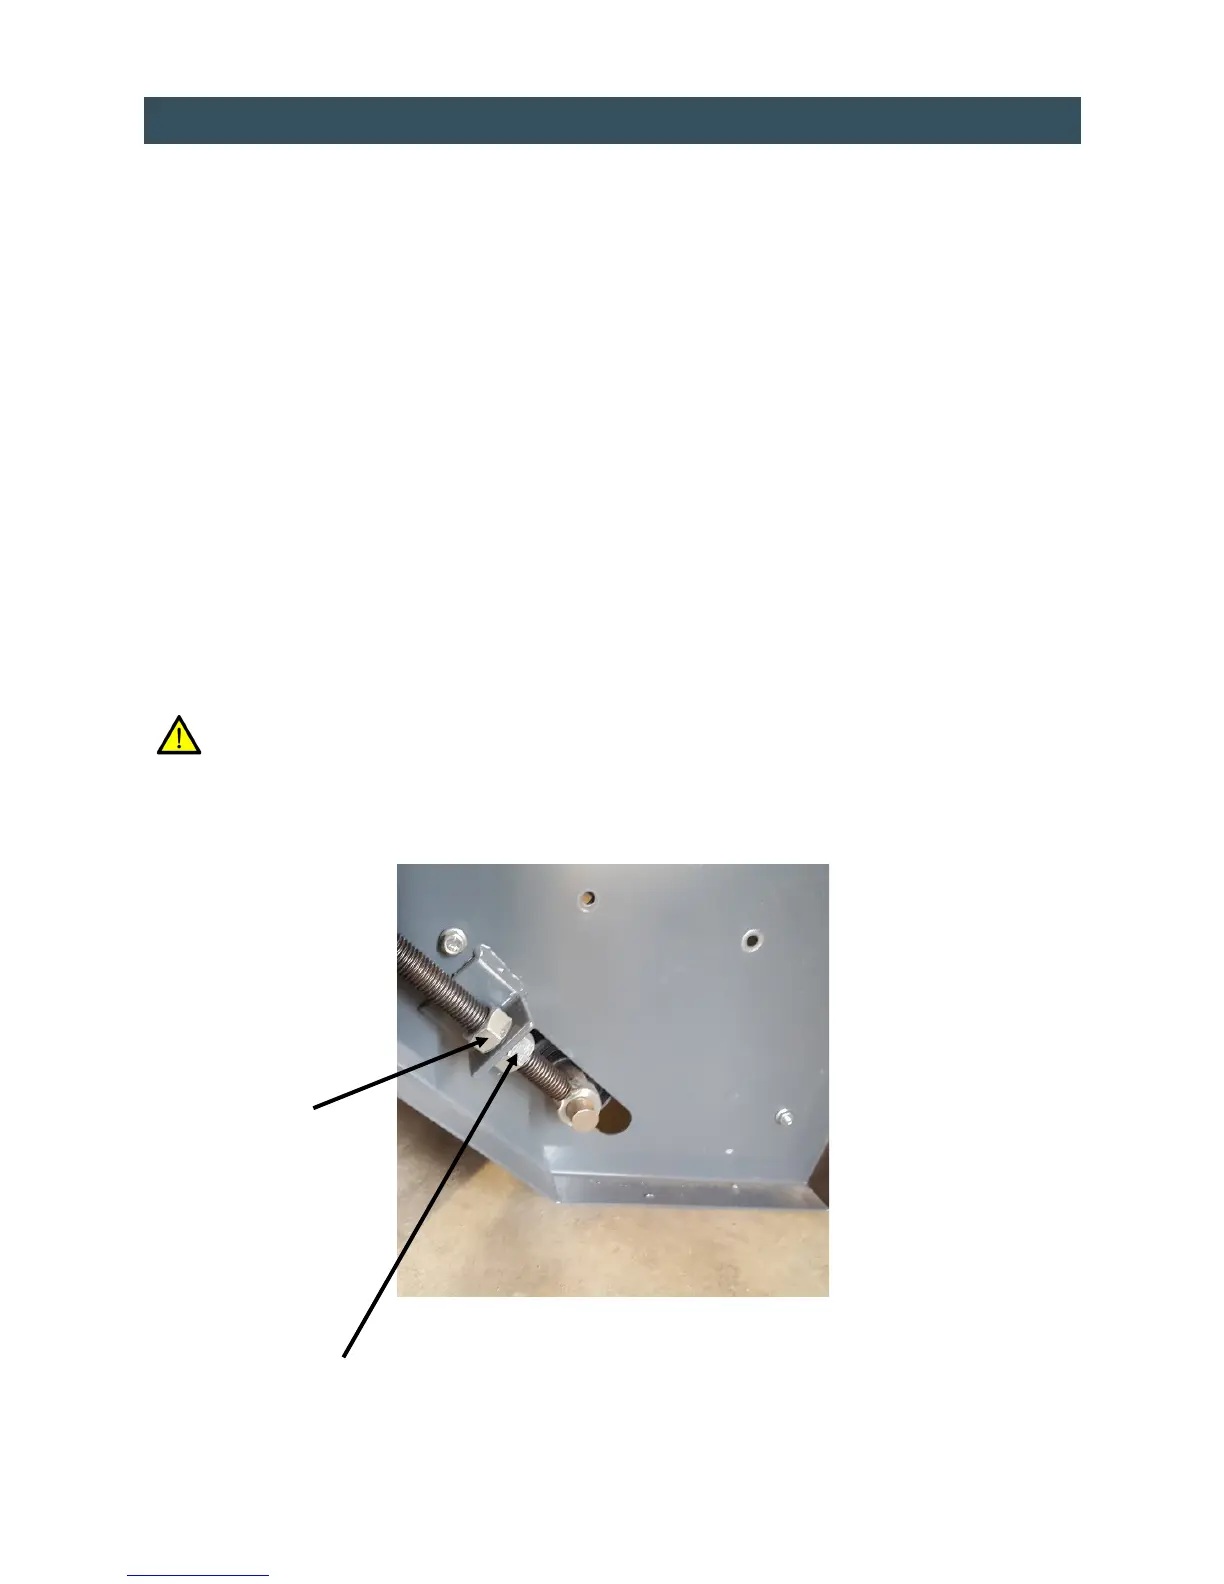
Loosen jam nuts, each side of machine (see image below).
Ensure all personnel are clear and that no tools are on machine or input chute.
Turn power on.
Run machine in forward.
Stop machine and turn power o.
Adjust alignment by ghtening take-up bolt on side of conveyor where belt is rubbing side frame. Tighten
only one quarter turn at a me.
Tighten jam nuts.
Replace all guards.
Turn power on.
Run machine in forward for ve minutes. If further alignment is required, repeat the above steps.
NOTE:
The belt may stretch during the rst few days of operaon. This will aect alignment since the belt
alignment relies in part on proper tensioning for eecve tracking.
Jam Nut
Take Up Bolt