6
MICRO-VR Bass Guitar Amplifier
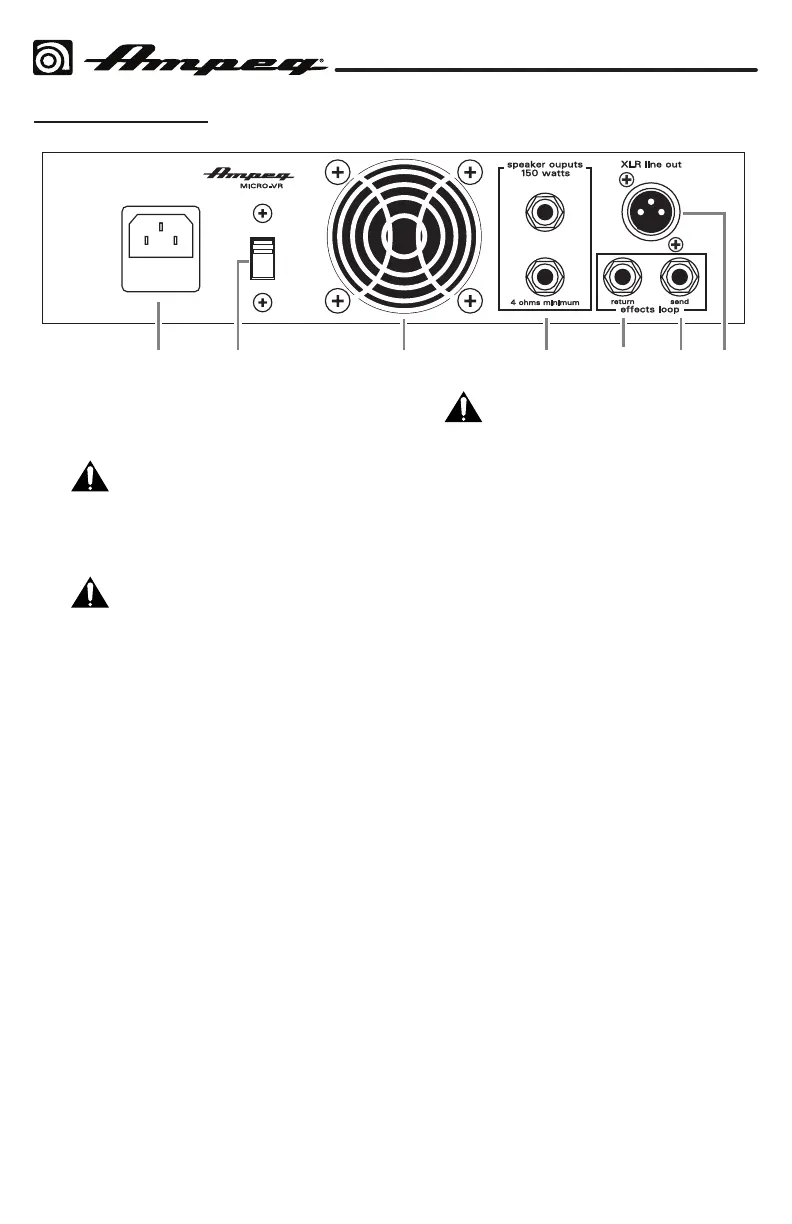
The Rear Panel
14 15 16 17 18 19 20
14. IEC POWER INPUT CONNECTOR: This
is where you connect the supplied AC
power cord.
Before plugging in the power
cord, make sure that the Voltage
Selector Switch [15] is set to the same
voltage as your local AC mains�
15. VOLTAGE SELECTOR SWITCH:
Make sure the switch is in the
correct position for your local AC
mains voltage before you plug in the AC
power cord. Use a small, at
screwdriver to slide the switch, if
required�
16. VENTILATION: Make sure that the
ventilation openings are not obscured in
any way to allow the ow of cooling air
to the power amplier’s heatsinks.
17. SPEAKER OUTPUTS: These 1/4" TS
output jacks supply speaker level power
to the speaker cabinet. The rated power
output is 200 Watts RMS into 4 Ω.
The two identical outputs are wired
in parallel, and you can use either
individually, or use both. Make sure the
total speaker impedance load is 4 Ω or
greater�
For example, you could connect:
• Two 16 Ω speakers (an 8 Ω load)
• Two 8 Ω speakers (a 4 Ω load)
• One 4 Ω speaker
Use speaker cables with 1/4" TS
ends to make the connections�
Do not use shielded instrument cables
as they may overheat�
18. EFFECTS LOOP RETURN JACK: Use
this 1/4" TS unbalanced input to return
the processed line level output of an
external eects processor, for example.
The processor could be fed by signals
from the Eects Loop Send [19].
19. EFFECTS LOOP SEND JACK: Use this
1/4" TS unbalanced output to send a
line level output to an external eects
processor, for example. The output here
is aected by all controls except the
Volume [8] and the Limiter switch [9].
Use the Eects Loop Return jack [18]
to feed the returned processed signals
back into the power amplier.
20. XLR LINE OUT JACK: Typically, you
would connect this balanced output
to the balanced input of an external
mixer, or a recorder. In this way, you do
not need to mic the speaker cabinet
in order to add it to the main mix or to
record. The output is not aected by the
Volume control [8].
This output can connect to external
power ampliers, or powered
loudspeakers, as long as they have
their own input controls to adjust the
volume level� Balanced connections
allow long cable runs to be used, as
hum and noise pickup in the line is
minimized�