4
MICRO-VR Bass Guitar Amplifier
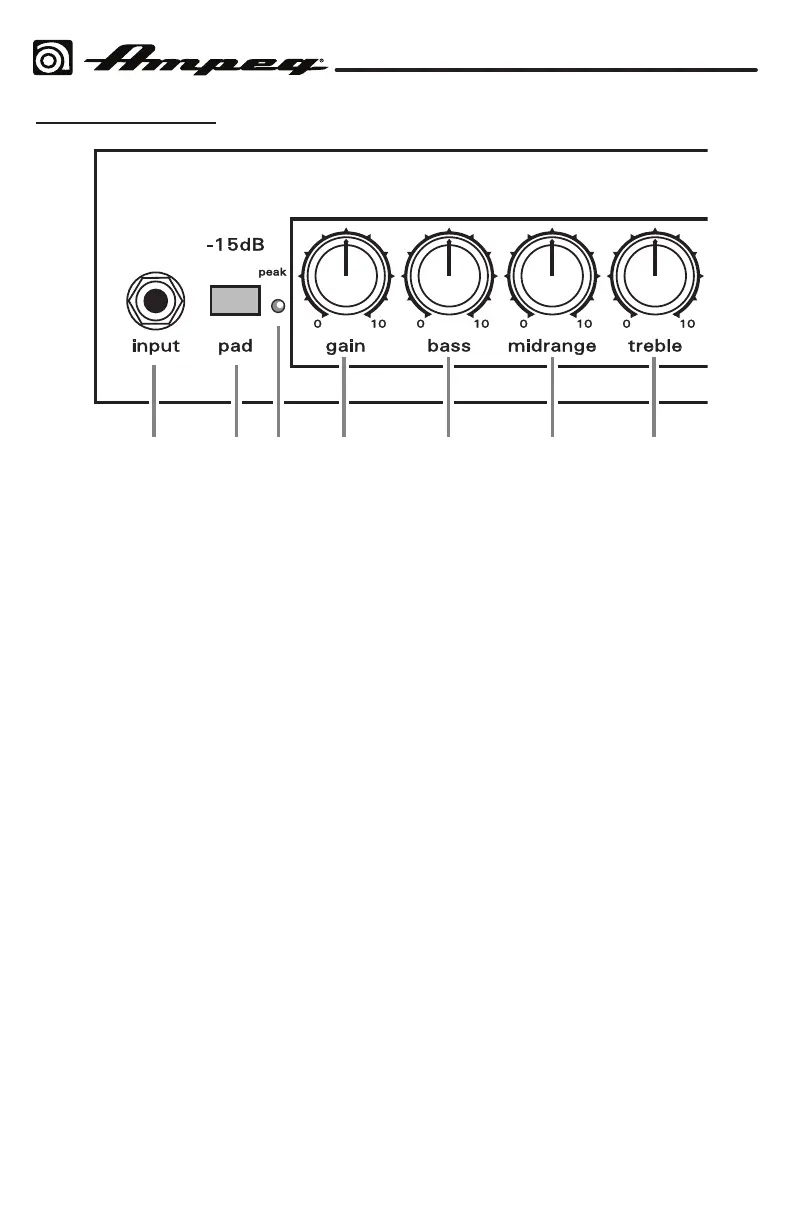
The Front Panel
1. INPUT: The signal output from an
instrument (active or passive) may be
connected to this 1/4" Input by means
of a shielded instrument cable.
2. –15 dB PAD: Pressing this switch in
reduces the input signal by 15 dB, to
compensate for higher output sources.
This attenuation is suited for use with
basses that have active electronics
or high-output pickups� Use this Pad
if you notice the Peak LED [3] comes
on regularly. It will reduce the chance
of overdriving the preamplier stage,
and allow more usable range and ne
adjustment of the Gain control.
3. PEAK LED: This red warning LED may
come on if: the input signal is too high,
the gain control is set too high, or there
is too much boost from the Bass,
Midrange and Treble controls. If it
comes on regularly, even when these
controls are low, try engaging the
–15 dB Pad [2].
4. GAIN: This varies the amount of signal
driving the preamplier. If a small
clockwise rotation from minimum
leads to overloading and the Peak LED
coming on, try engaging the –15 dB
Pad to provide more usable range with
the Gain control.
5. BASS: Use to adjust the low frequency
level of the amplier. This provides up
to 14 dB of boost, or 12 dB of cut, at 40
Hz. The low frequency output is at at
the center position�
6. MIDRANGE: Use to adjust the midrange
frequency level of the amplier. This
provides up to 5 dB of boost, or 13
dB of cut, at 500 Hz. The midrange
frequency output is at at the center
position� Rotate the control counter-
clockwise for a “contoured” sound
(more distant, less midrange output) or
clockwise for a sound that really cuts
through�
7. TREBLE: Use to adjust the high
frequency level of the amplier. This
provides up to 19 dB of boost, or 25
dB of cut, at 8 kHz. The high frequency
output is at at the center position.
1
23 45