TABLE 1 – DIAGNOSTIC CODES
Diagnostic
Code Failure Mode Action Reset
E1 Internal Humidity or
Temperature Sensor
Open or Shorted
1. If connection okay, replace User Interface, Part No� 71000062� Cycle Power
E3 Model A77
Remote Control
Communication Loss
1. Check connections between Model A77 and dehumidifier control board� Terminals should be fully
inserted and secured in the control board and Model A77 control terminals�
2. If connections are correct and secure, turn off the dehumidifier and remove the Model A77� Use a
short section of 4-wire cable to reconnect the Model A77 to the control board� Turn the dehumidifier
back on and increase the dryness level setting on the Model A77� If the dehumidifier turns on, the
problem is with the wiring between the dehumidifier and control�
3. If the dehumidifier does not turn on, call Technical Support�
Self-Correcting
E4 Insufficient Capacity 1. Check the frost sensor connection at the power board� Terminal should be fully seated on the power
board pins�
2. Remove the side access panel and verify that the sensor is secured to the suction line�
3. If the sensor is connected and secured to the refrigeration line proceed to the next step�
4. Reset the fault by cycling power to the dehumidifier�
5. Make sure the dehumidifier is not in EXTERNAL or REMOTE mode� For instruction, see pages 11 and
12 for WIRING AND SET-UP�
6. Turn the humidity setting down (below room/home humidity level) to make a dehumidification call�
7. Allow the fan and compressor to run for approximately 10-15 minutes and then enter diagnostic
test mode by simultaneously pressing the UP ARROW and MODE buttons for 3 seconds� (NOTE:
This action must be done at the user interface installed on the unit�) The LCD will display the
temperature measured by the internal sensor while also displaying AIR SAMPLING and ON, the
humidity measured by the internal sensor while also displaying %RH and ON, and the frost sensor
temperature while also displaying ON� Scroll through these values and by using the UP/DOWN arrow
buttons�
8. Record values and call Technical Support�
Cycle Power
E5 High Temperature
Thermistor Failure
1. Check the high temperature sensor connection at the power board� Terminal should be fully seated
on the power board pins�
2. Remove the side access panel and verify the sensor is not damaged and connected to the
refrigeration line coming from the compressor�
3. If the sensor is connected and secured to the refrigeration line, it may need to be replaced with Part
No� 71000035 – contact Technical Support to confirm�
Cycle Power
E6 Low Temperature
Thermistor Failure
1. Check the low temperature sensor connection at the power board�
2. Remove the side access panel and verify the sensor is not damaged and connected to the suction line�
3. If the sensor is connected and secured to the refrigeration line, it may need to be replaced with Part
No� 71000034 – contact Technical Support to confirm�
Self-Correcting
E7 Float Switch Open 1. Empty the condensate pan�
2. Check the float switch connection at the control board�
3. If not using a float switch, verify jumper is between float switch terminals on dehumidifier control board�
4. If the problem persists, replace the float switch�
Self-Correcting
E8 Inlet Air Temperature
Out of 50°F – 104°F
Range or Dew Point
Below 40°F
1. Verify all ductwork is properly sealed�
2. If no signs of leak points, contact Technical Support�
Self-Correcting
TROUBLESHOOTING
Technical Support is available Monday through Friday, 7:00 a�m� to 5:00 p�m� CST, at (800) 972-3710� Use the guides on the following pages to identify
and correct system faults� Contact Technical Support before replacing the unit or any components and for additional troubleshooting�
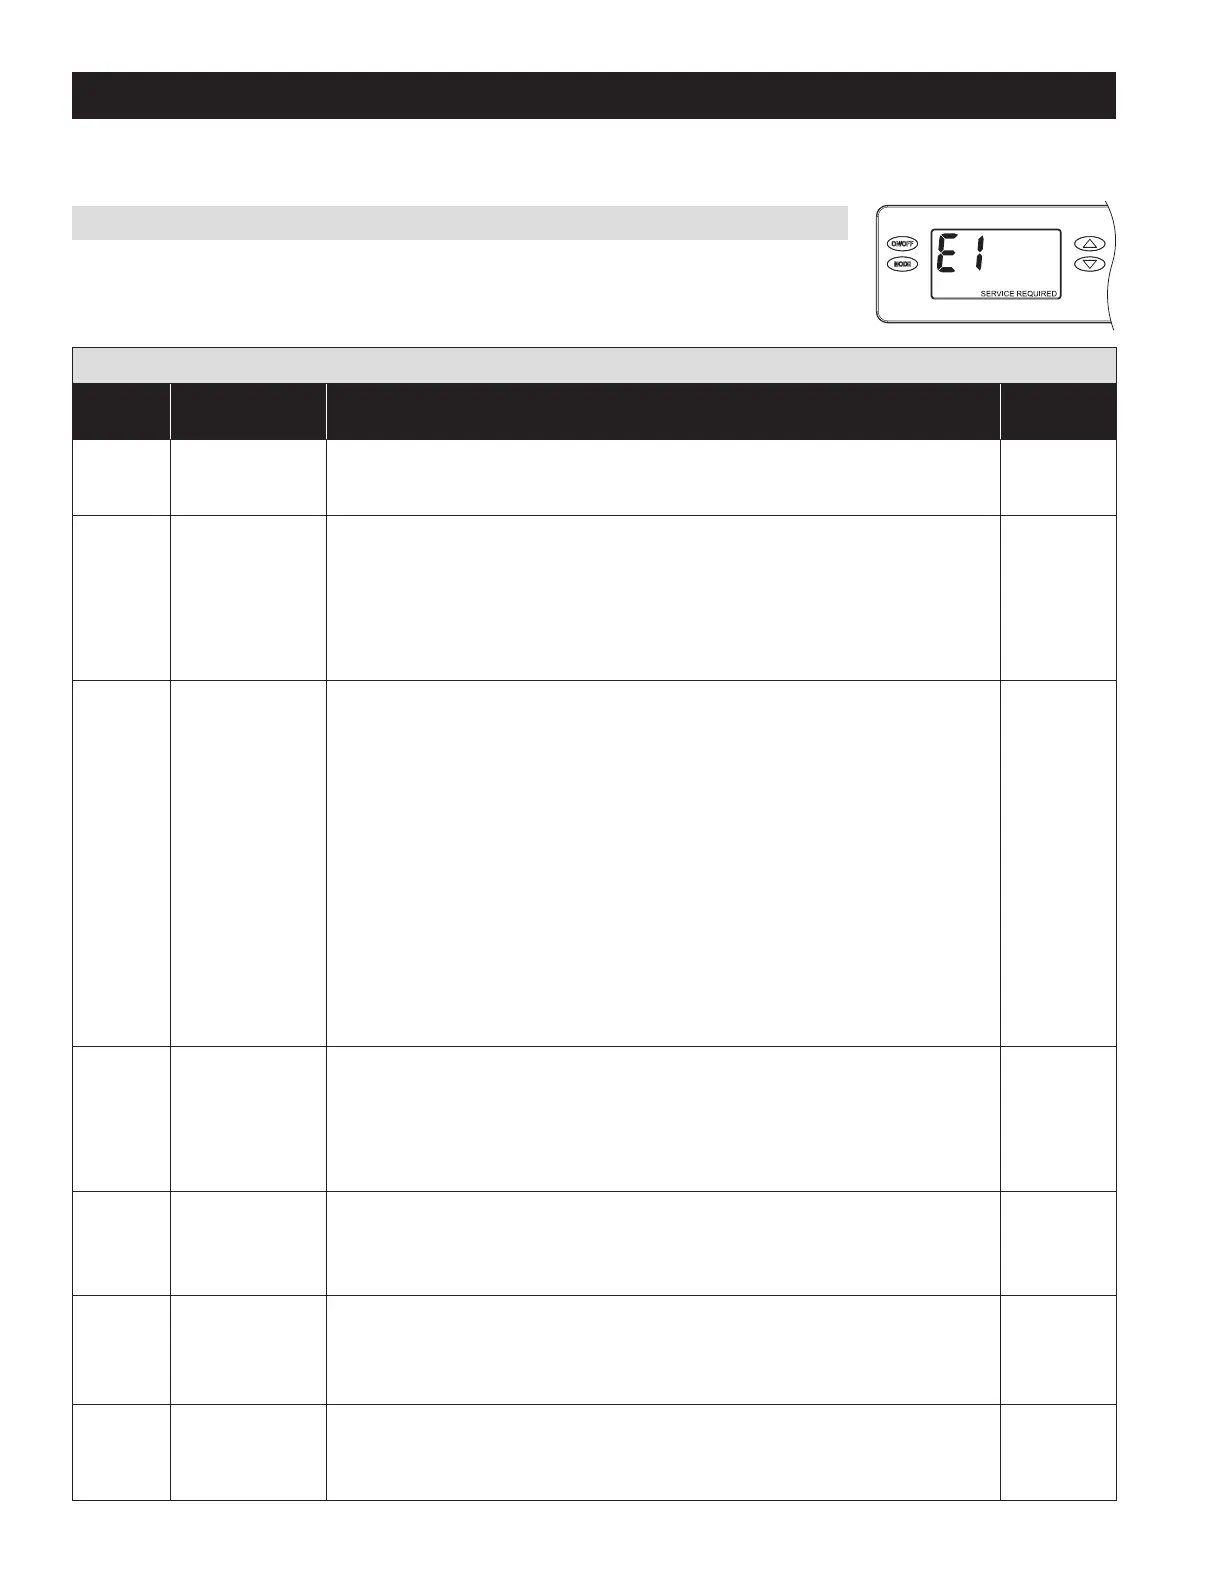
DIAGNOSTIC CODES
When an error occurs, the Diagnostic Code along with SERVICE REQUIRED will be displayed on the control
screen� If a 71000087 Alert Light is used, the light will turn on when an error occurs�
90-1854
16 English