EN
44
NOTE:
If any of the above error codes are shown,
switch o the appliance and check for any any
obstructions. Start the appliance. Switch o
the appliance and pull out the plug if an error
code is still shown. Contact an authorised
service centre or other qualied personnel.
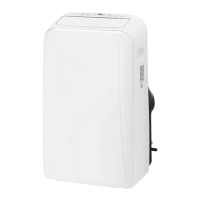
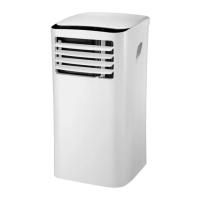
INSTALLATION
• Place the appliance on a level, stable
surface. Otherwise there is a risk of material
damage, noise and/or vibration.
• The appliance must be connected to an
earthed power point and the tank should
be easily accessible.
• Leave a free space of a least 30 cm round
the appliance for it to work properly.
• Do not cover the inlet, outlet or signal
receiver on the appliance – this can
damage the appliance.
FIG. 4
Assembly parts
Part Description Qty
Appliance adapter 1
Outlet hose 1
Adapter for window insert 1
Adapter (A) for wall outlet 1
Adapter (B) for wall outlet 1
Screw 1
Window insert A 1
Window insert B 1
Screw and screw plug
(only for wall mounting)
4 + 4
Foam rubber seal A (self-
adhesive)
2
Foam rubber seal B (self-
adhesive)
2
Foam rubber seal C (non
self-adhesive)
1
Safety fastener with the
2 screws
1
Drain hose 1
WINDOW MOUNTING KIT
1. Press the outlet hose (B) in the window
insert adapter (C) or the wall adapter (D)
for wall mounting and in the appliance
adapter (A). The elastic plastic fasteners on
the adapters automatically lock the hoses.
FIG. 5
FIG. 6
2. Connect the outlet hose to appliance. Insert
the outlet hose in the air outlet in the
direction of the arrow.
FIG. 7
3. Adjust the window insert to the size of the
window.
4. If the window is so wide that it needs two
window inserts, use the (E) to join the
window inserts when they are adjusted to a
suitable length.
FIG. 8
Mounting in vertical sliding window
1. Cut the self-adhesive foam rubber seals
(F) and (G) to a suitable length and fasten
them on the jamb and window frame as
shown in the diagram.
FIG. 9