EN
76
BACK
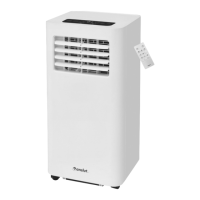
6. Top air lter (inside grille)
7. Top air inlet
8. Drain
9. Bottom air outlet
10. Air lter
11. Bottom air inlet
12. Cord retainer
13. Cord duct
14. Plug for cord
15. Drain outlet for collector tank
FIG. 2
INSTALLATION
BEFORE INSTALLATION
The place where the product is installed must
comply with the following requirements.
• Place the air conditioner on a level, stable
surface, otherwise there is a risk of
material damage, noise and/or vibration.
• The air conditioner must be placed near
an earthed power point and the collector
tank (on the back) should be easily
accessible.
• Leave a free space of a least 30 centimetres
round the air conditioner for it to work
properly.
• For best functionality do not stretch or
bend the hose. Check that there are no
obstacles within 50 centimetres of the air
outlet.
FIG. 3
• Do not cover the inlet, outlet or signal
receiver on the air conditioner – this can
damage it.
Tools needed
1. Phillips screwdriver, medium.
2. Tape measure or ruler.
3. Knife or scissors.
4. Saw (to shorten window adapter for small
window).
Accessories description
A. Product adapter
B. Outlet hose
C. Window insert adapter
D. Wall outlet adapter A (only for wall
mounting)
E. Wall outlet adapter B (with cap) (only for
wall mounting)
F. Screw
G. Window insert A
H. Window insert B
I. Screw and screw plug (only for wall
mounting)
J. Foam rubber seal A (self-adhesive)
K. Foam rubber seal B (self-adhesive)
L. Foam rubber seal C (non self-adhesive)
M. Safety fastener with the 2 screws
N. Drain hose
O. Remote control with battery (only for
models with remote control)
P. Cord retainer
FIG. 4
NOTE:
Parts marked with * sold separately.
Window mounting kit
Preparation of outlet hose
Press the outlet hose in the window insert
adapter and in the product adapter. The elastic
plastic fasteners on the adapters automatically
lock the hoses.
FIG. 5
Connect the outlet hose
1. Align the outlet hose product adapter
to the bottom slot in the air conditioner