3.4 Cloud Setting
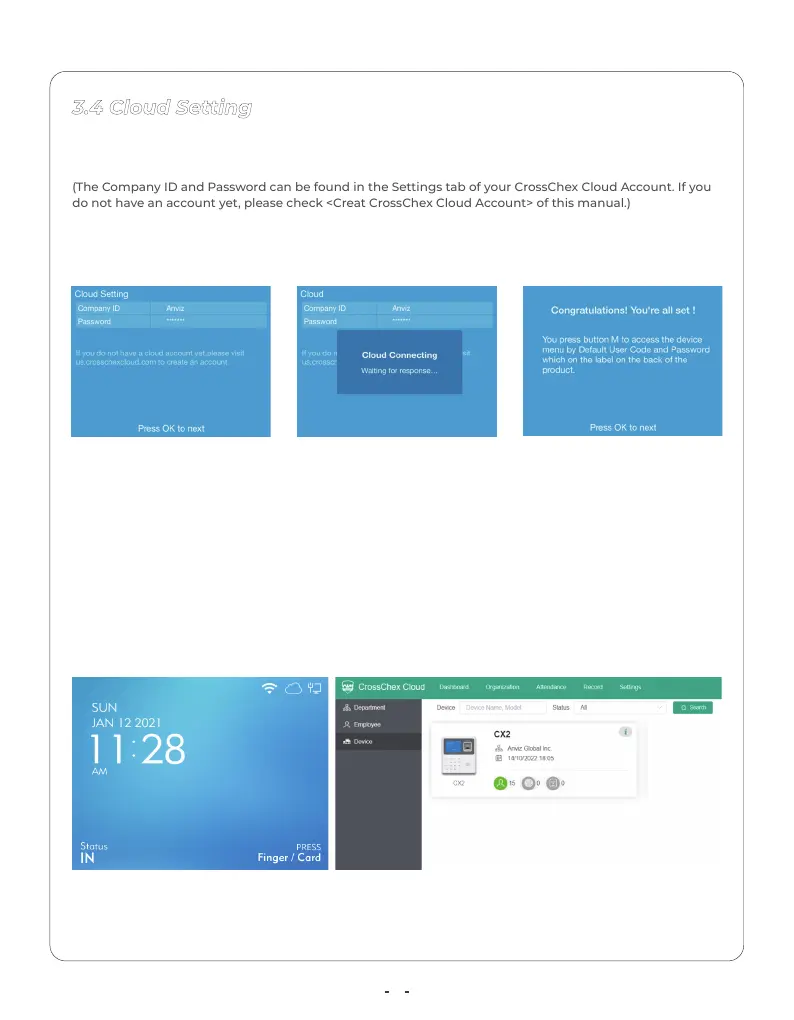
1. Fill the Company ID and Password in the Time Clock. Select the “Next (OK)”
and press “OK” to detect the cloud connection.
(The Company ID and Password can be found in the Settings tab of your CrossChex Cloud Account. If you
do not have an account yet, please check <Creat CrossChex Cloud Account> of this manual.)
2. After Cloud connected please Press OK to next starting your application.
3. Please check your Time Cloud’s Cloud Icon at the top of the Screen and
device will be shown at Device Tab of your CrossChex Cloud.
4. And press M button to device menu by input the default Admin ID and
Password.
Default Admin ID: 0 Password: 12345
Notice: Please change the default password from the Cloud software for
security concerns.
7