English
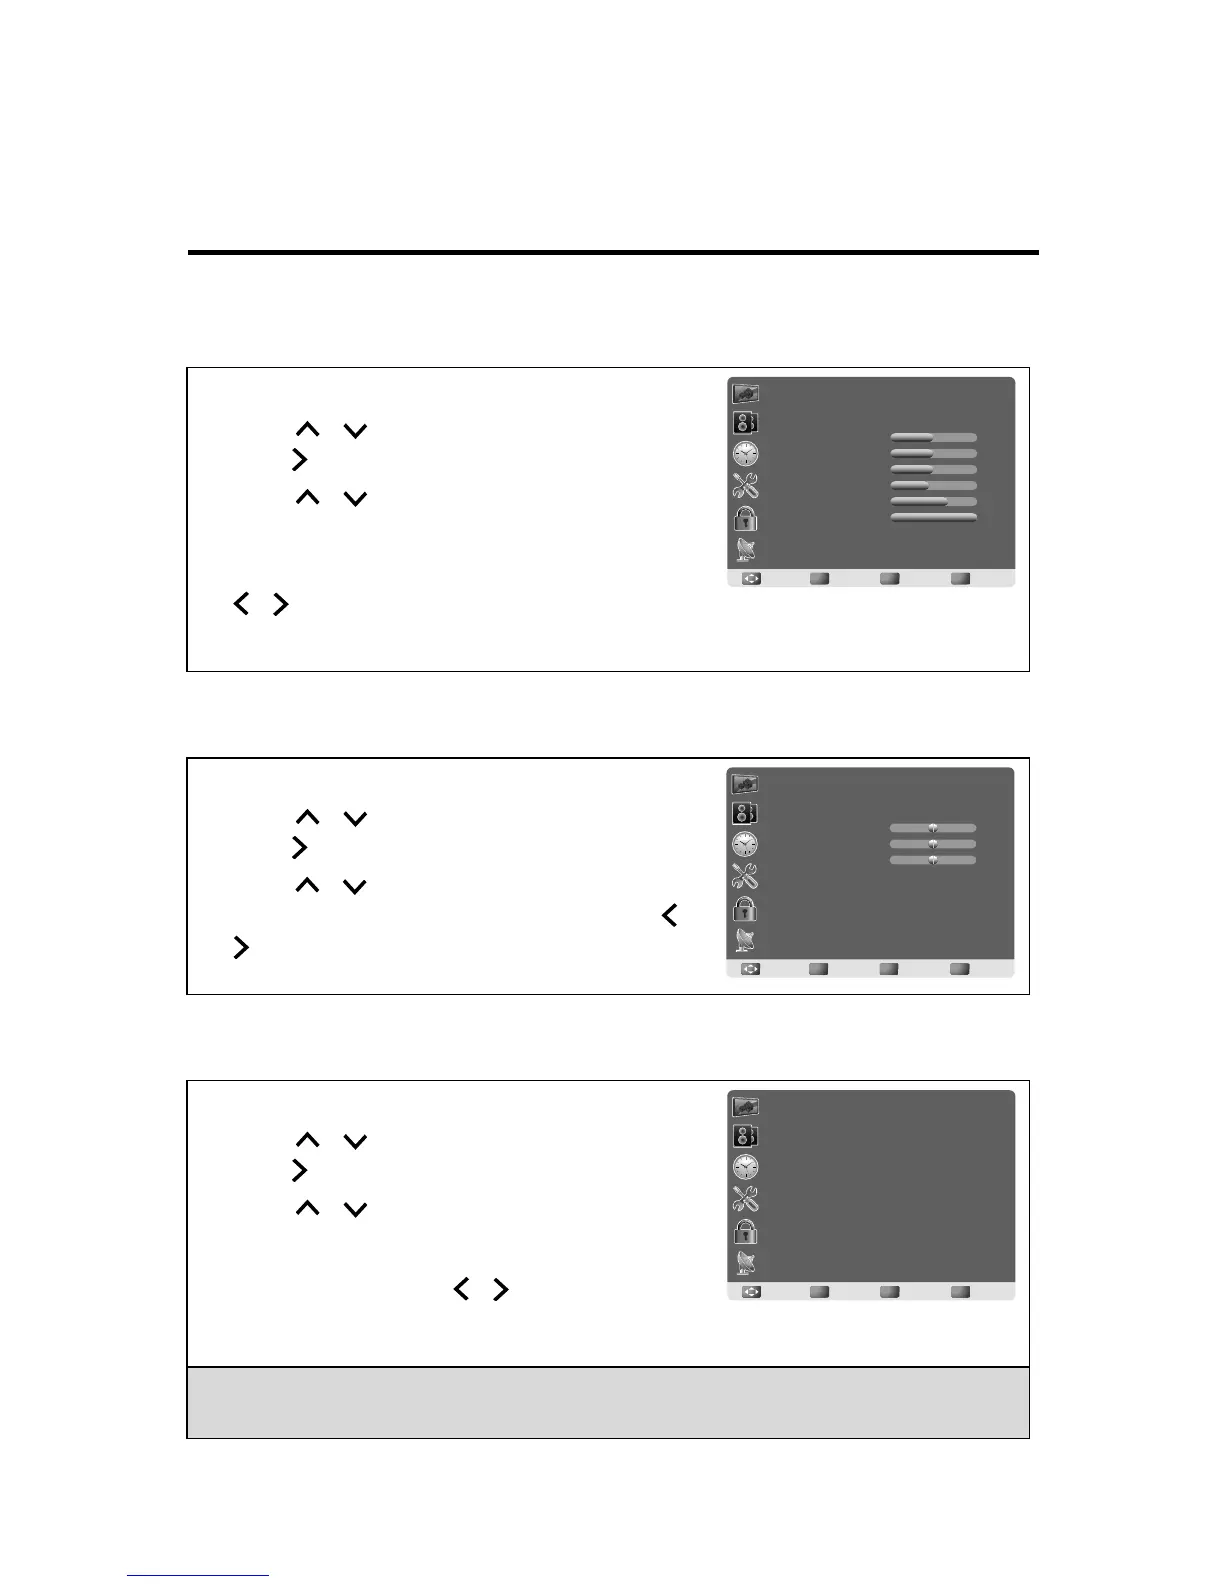
3.7 Setting up Picture Options
3.8 Setting up Audio Options
3.9 Configuring System Setting
1 Press MENU to display the OSD main menu.
2 Press / to select Picture menu, and then
press to enter.
3 Press / to select the control of Picture
Mode, Contrast, Brightness, Sharpness, Tint,
Color, Backlight, X-Contrast, Color Mode,
Screen Mode, Noise Reduction, and then press
/ to adjust the level.
4 Press RETURN to return back to previous menu in Picture.
1 Press MENU to display the OSD main menu.
2 Press / to select Audio menu, and then
press to enter.
3 Press / to select the control of Equalizer,
Balance, Treble, Bass, AVL, and then press /
to select your desired option.
4 Press RETURN to return back to top menu.
1 Press MENU to display the OSD main menu.
2 Press / to select Setup menu, and then
press to enter.
3 Press / to select the control of Menu
Language, Transparent, OSD Time Out,
Closed Caption, Restore Default, Input Label,
Media, and then press / to select your
desired option.
4 Press RETURN to return back to top menu.
Note:
The Media is available only when a USB drive is connected and the input source is
switched to USB.
50
50
50
45
70
100
Standard
Off
Standard
Picture
Picture Mode
Contrast
Brightness
Sharpness
Tint
Color
Backlight
X-Contrast
Color Mode
OK
EnterMove
Return
Return
Menu
Exit
OK
EnterMove
Return
Return
Menu
Exit
Audio
Equalizer
Balance
Treble
Bass
Standard
0
0
0
AVL On
OK
EnterMove
Return
Return
Menu
Exit
Setup
Menu Language
Transparent
OSD Time Out
Closed Caption
Restore Default
Input Label
Media
English
25%
15 Sec.
20
English