The AOPEN LCD Monitor is designed for video and visual display of information from electronic devices. This user's guide provides essential information for safe and comfortable use, installation, operation, and troubleshooting of the monitor.
Function Description:
The AOPEN LCD Monitor serves as a visual output device for computers and other electronic equipment. It supports various display modes and resolutions, offering features for adjusting picture quality, color settings, and OSD (On-Screen Display) preferences. The monitor is designed for plug-and-play functionality with systems supporting the DDC (Display Data Channel) protocol, ensuring automatic communication of its capabilities to the host system.
Important Technical Specifications:
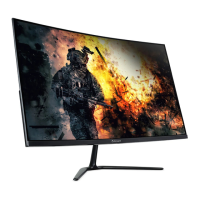
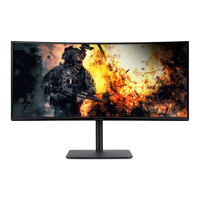
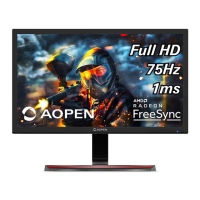
- Model Number: 22CX1Q
- SKU Number: 22CX1Q xxxxxx (where "x" can be 0-9, a-z, A-Z, or blank)
- Power Supply: Universal, supporting 100/120 V AC or 220/240 V AC voltage areas.
- Power Cord Requirements:
- For 120 V AC: UL-listed cord set, type SVT wire, rated 10 A/125 V.
- For 220/240 V AC: H05VV-F cord and plug, rated 10 A/250 V.
- Display Data Channel (DDC): Supports DDC2B standard.
- Input Signal Cables:
- HDMI (19-pin):
- TMDS RX2+, TMDS Ground, TMDS RX2-
- TMDS RX1+, TMDS Ground, TMDS RX1-
- TMDS RX0+, TMDS Ground, TMDS RX0-
- TMDS Clock+, TMDS Ground, TMDS Clock-
- CEC, Floating, DDC Clock, DDC Data, Ground, +5V Power, Hot Plug Detect
- VGA (15-pin):
- Red, Green, Blue
- NC (Not Connected)
- GND (Ground)
- R-ground, G-ground, B-ground
- +5V for DDC, GND, NC, SDA, H-sync, V-sync, SCL
- Standard Timing Table (Examples):
- VGA: 640x480 at 60 Hz, 72 Hz
- MAC: 640x480 at 66.66 Hz
- VESA: 720x400 at 70 Hz, 1152x864 at 75 Hz, 1280x960 at 60 Hz, 1280x720 at 60 Hz
- SVGA: 800x600 at 56 Hz, 60 Hz, 72 Hz
- XGA: 1024x768 at 60 Hz, 70 Hz
- SXGA: 1280x1024 at 60 Hz
- WXGA: 1360x768 at 60 Hz
- WXGA+: 1440x900 at 60 Hz
- WSXGA+: 1680x1050 at 60 Hz
- UXGA: 1920x1080 at 60 Hz
- Pixel Statement: The LCD unit is produced with high-precision manufacturing techniques. Blemishes of 0.01% or less (missing or constantly lit pixels) are considered normal and do not constitute a malfunction.
Usage Features:
- Installation:
- Attaching/removing the base: The base attaches to a bracket on the back of the display with a click sound, ensuring a firm fix. Removal involves pressing two latches.
- Screen position adjustment: The monitor tilt can be adjusted from 3 degrees down to 18 degrees up.
- Connecting power: Ensure the correct power cord type is used and properly connected to a grounded AC outlet.
- Connecting video cables: Supports VGA and HDMI (for HDMI models). Ensure both monitor and computer are switched off before connecting.
- Power-on sequence: Turn on the monitor first, then the computer.
- Power Saving: The monitor enters "power saving" mode, indicated by an orange power LED, when a control signal from the display controller is detected. Recovery time is approximately 3 seconds.
- User Controls (Shortcut Menu):
- Empowering Key/Exit: Select scenario mode; acts as an exit key in the OSD menu.
- OSD functions / Down / Right: View OSD; select items in the OSD menu.
- Contrast/Up/Left: Adjust contrast; select items in the OSD menu.
- Input source switching/ Up / Left: Enter Input select function; select items in the OSD menu.
- Brightness Key: Adjust brightness.
- Mode Management Menu: Accessed via the Empowering Key, this menu allows selection of various display modes:
- sRGB Mode: Better color matching with peripheral devices (printers, digital cameras).
- Reading Mode: Decreases blue light while maintaining adequate brightness.
- Darkroom Mode: Reduces brightness for comfortable use in darkened rooms.
- User Mode: Allows fine-tuning of settings.
- Standard Mode: Default native display settings.
- ECO Mode: Adjusts settings to reduce power consumption.
- Graphics Mode: Enhances colors and emphasizes fine details.
- Movie Mode: Presents great visuals in unsuitably-lit environments.
- OSD Settings Adjustment:
- Picture Quality: Adjust Brightness (0-100), Contrast (0-100), Black Boost (0-10, enhances shadows), Blue Light (OFF, 80%, 70%, 60%, 50% for eye protection), ACM (dynamic contrast adjustment), Super Sharpness (On/Off, boosts pixel density).
- Color Settings: Adjust Gamma, Color Temp. (Cool, Normal, Warm, Bluelight, User), Modes (scenario mode), sRGB (On/Off), Grayscale Mode, 6-axis Hue, 6-axis Saturate.
- Performance Settings: Adjust Refresh Rate Num.
- OSD Settings: Adjust Language, OSD Timeout (delay before OSD menu turns off), Transparency (0%, 20%, 40%, 60%, 80% when using gaming mode), OSD Lock (On/Off, locks all OSD keys; unlock by pressing OSD Key B for >3 seconds).
- System Settings: Adjust Input (HDMI Model), Auto Source (HDMI Model), Wide Mode, Hot Key Assignment, DDC/CI (Display Data Channel/Command Interface, allows software control of monitor settings), HDMI Black Level, Quick Start Mode.
- Information Settings: Displays current input source, resolution, HV frequency, mode, series number. Allows Reset All Settings and Exit.
Maintenance Features:
- Cleaning:
- Always unplug the monitor before cleaning.
- Use a soft cloth to wipe the screen and cabinet front and sides.
- Product Servicing:
- Do not attempt to service the product yourself. Refer all servicing to qualified service personnel.
- Unplug the product and seek service if the power cord/plug is damaged, liquid is spilled, product is exposed to rain/water, product is dropped, case is damaged, product exhibits distinct performance change, or product does not operate normally.
- Only adjust controls covered by operating instructions; improper adjustment may cause damage.
- Disposal Instructions:
- The product should not be disposed of with household waste.
- Dispose of waste electrical and electronic equipment at designated collection points for recycling to conserve natural resources and protect human health and the environment. Contact local city office, waste disposal service, or the shop of purchase for information.
- Accessibility: Ensure the power outlet is easily accessible and close to the operator for quick disconnection.
- Safe Listening: Gradually increase volume, limit high-volume listening, avoid turning up volume to block noise, and turn down volume if unable to hear others speak.
- Warnings: Do not use near water, place on unstable surfaces, block ventilation openings, push objects into slots, spill liquid, place on vibrating surfaces, or use in vibrating environments.
- Electrical Power: Operate from the specified power type, do not allow anything to rest on the power cord, ensure extension cord/wall outlet ampere ratings are not exceeded, and avoid overloading power outlets (overall system load should not exceed 80% of branch circuit rating).
- Grounding: The power cord has a three-wire grounded plug; ensure the power outlet is properly grounded. The grounding pin is a safety feature and provides protection from electrical noise.
- Potentially Explosive Environments: Switch off the device in areas with potentially explosive atmospheres (e.g., near gas pumps, chemical plants, blasting operations, areas with flammable gases/dust).
- Additional Safety: Device and enhancements may contain small parts; keep out of reach of small children.
- Comfortable Use:
- Eyestrain and Headaches: Adjust viewing angle, use a footrest, adjust sitting height. Avoid fixed postures, slouching, and leaning backward. Stand and walk around regularly.
- Vision Care: Rest eyes frequently, take breaks, blink often. Keep display clean. Position display so eyes point downward. Adjust brightness/contrast. Eliminate glare and reflections by positioning the display, minimizing room light, using a task light, changing viewing angle, using a glare-reduction filter, or a display visor. Avoid awkward viewing angles and looking at bright light sources for extended periods.
- Work Habits: Take short, regular breaks. Perform stretching exercises. Breathe fresh air. Exercise regularly and maintain a healthy body.