2
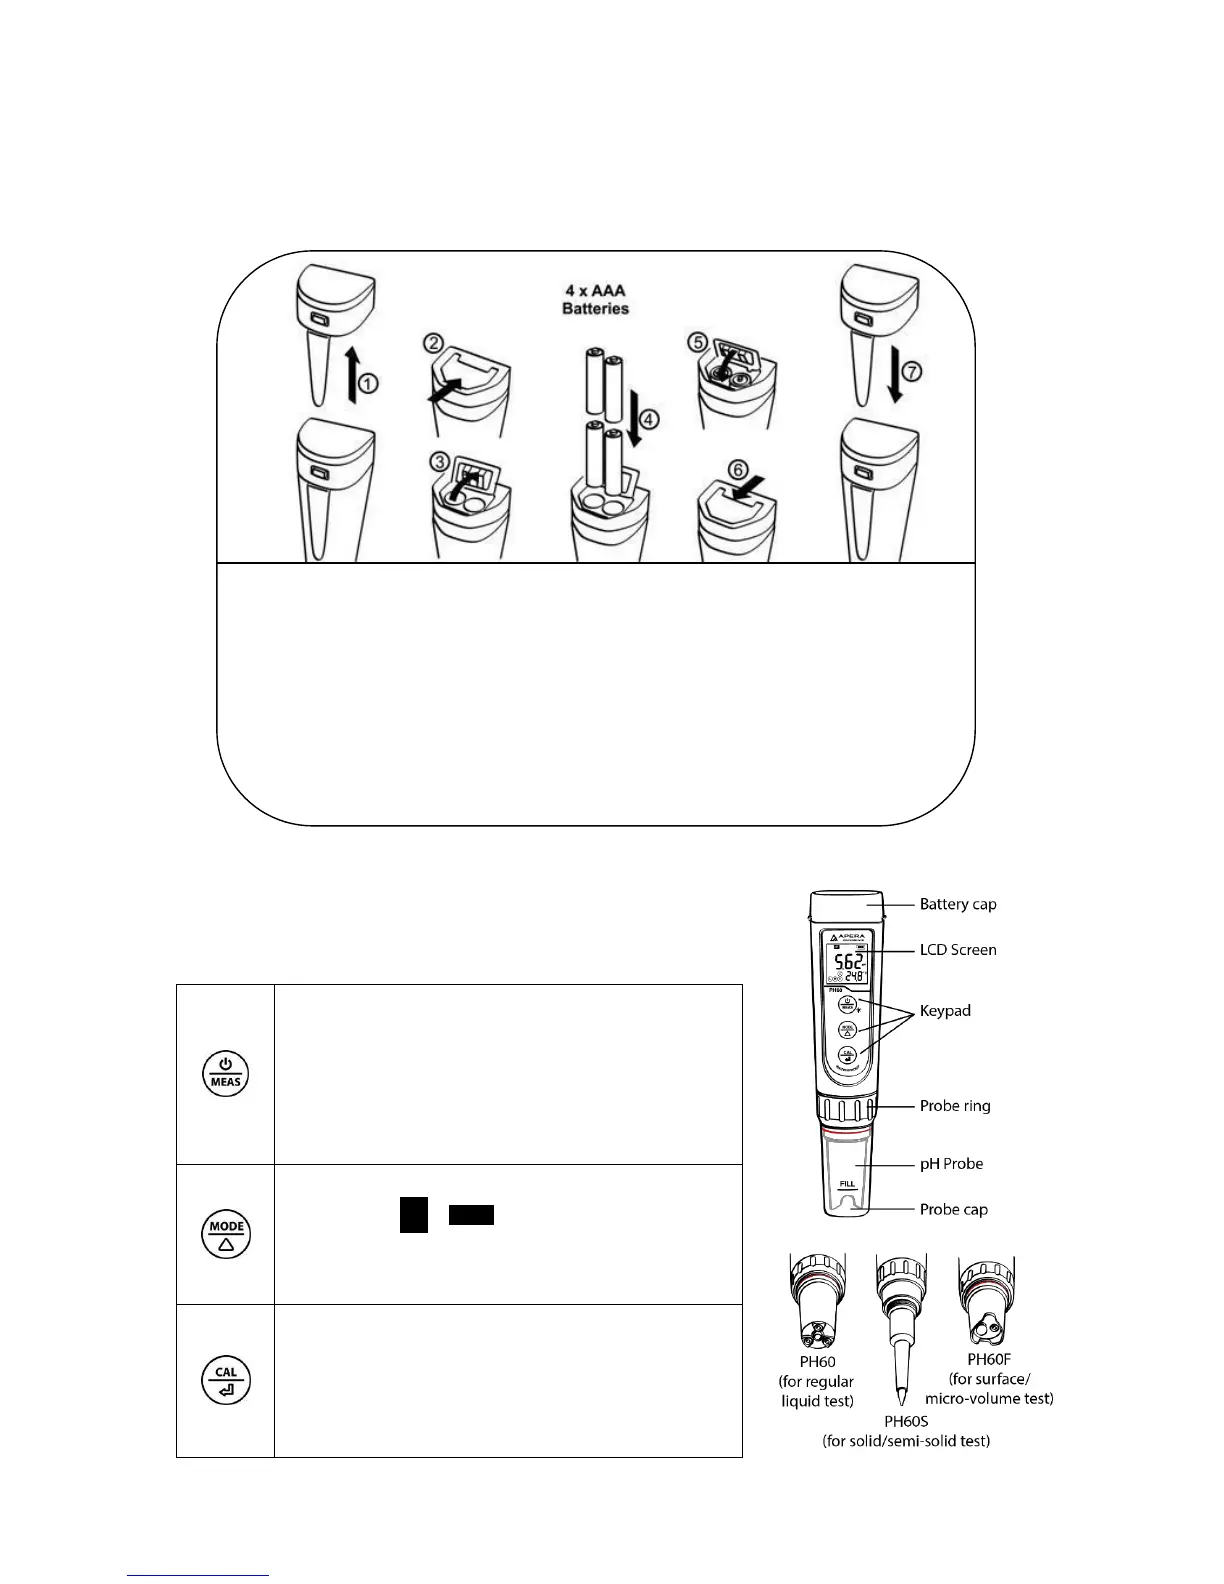
1. Battery Installation
Please install batteries according to the following steps. *Please note direction of batteries:
All POSITIVE SIDES (“+”) FACING UP. (Wrong installation of batteries will cause
damage to the tester and potential hazards)
2. Keypad Functions
Short press: < 2 seconds
Long press: > 2 seconds
1. Short press to turn on the tester and long press
to turn off the tester.
2. When turned off, long press to enter parameter
setting.
3. In measurement mode, short press to turn on
backlight.
1. In measurement mode, short press to switch
parameter pH→ORP
2. In mode setting, short press to change
parameter (Unidirectional).
1. Long press to enter calibration mode;
2. In calibration mode, short press to confirm
calibration;
3. When measured value is locked, short press
to unlock.
① Pull the battery cap up
②
Slide the battery cap along to the direction of arrow
Insert the batteries (ALL POSITIVE SIDES FACING UP) (see graph)
Slide and lock the battery cap along to the direction of arrow
⑦ Fit the tester’s cap while making sure to push all the way down. The tester’s
waterproof design may be compromised if the cap is not fitted correctly.