Apogee Duet 3 User’s Guide
1. Connect the included breakout cable to the rear panel multi-pin connector.
2. Connect microphones and line level audio gear to the XLR inputs.
● Connect dynamic and condenser mics to XLR inputs, then set Analog Level to Mic from
Apogee Control 2 (link). When using condenser mics, be sure to engage 48v phantom power.
● Connect analog line level audio gear line outputs to the XLR inputs using the appropriate
adaptor if required. Set Analog Level to +4 dBu for professional sources, set to -10dBV for
consumer level sources.
3. Connect synthesizers and keyboards to the ¼” inputs 1 & 2, then set Analog Level to Instrument
from Apogee Control 2.
4. Connect Main outputs 1-2 directly to active speakers. If your speakers are equipped with XLR
inputs, use a ¼” TRS (tip-ring-sleeve) to XLR male adaptor cable. If using passive speakers,
connect the Main outputs to the speaker’s amplifier inputs.
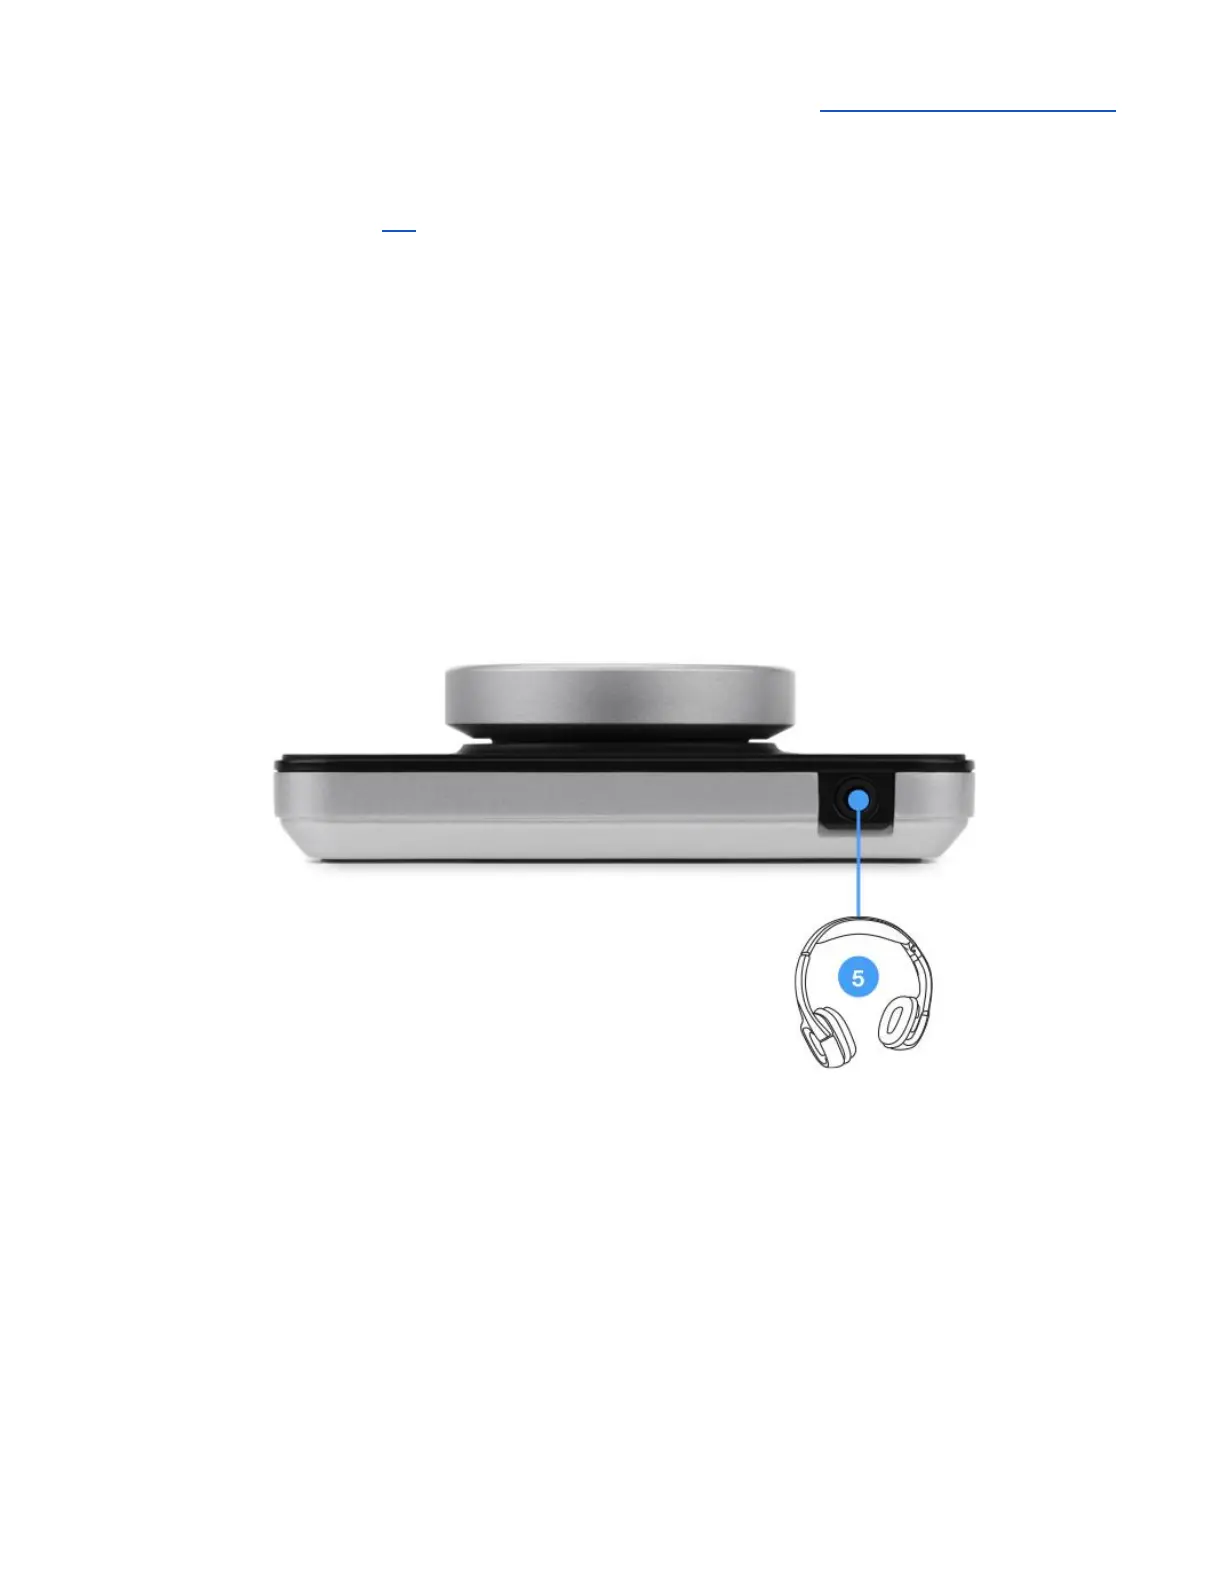
5. Connect headphones to the front panel ⅛” connector.