35
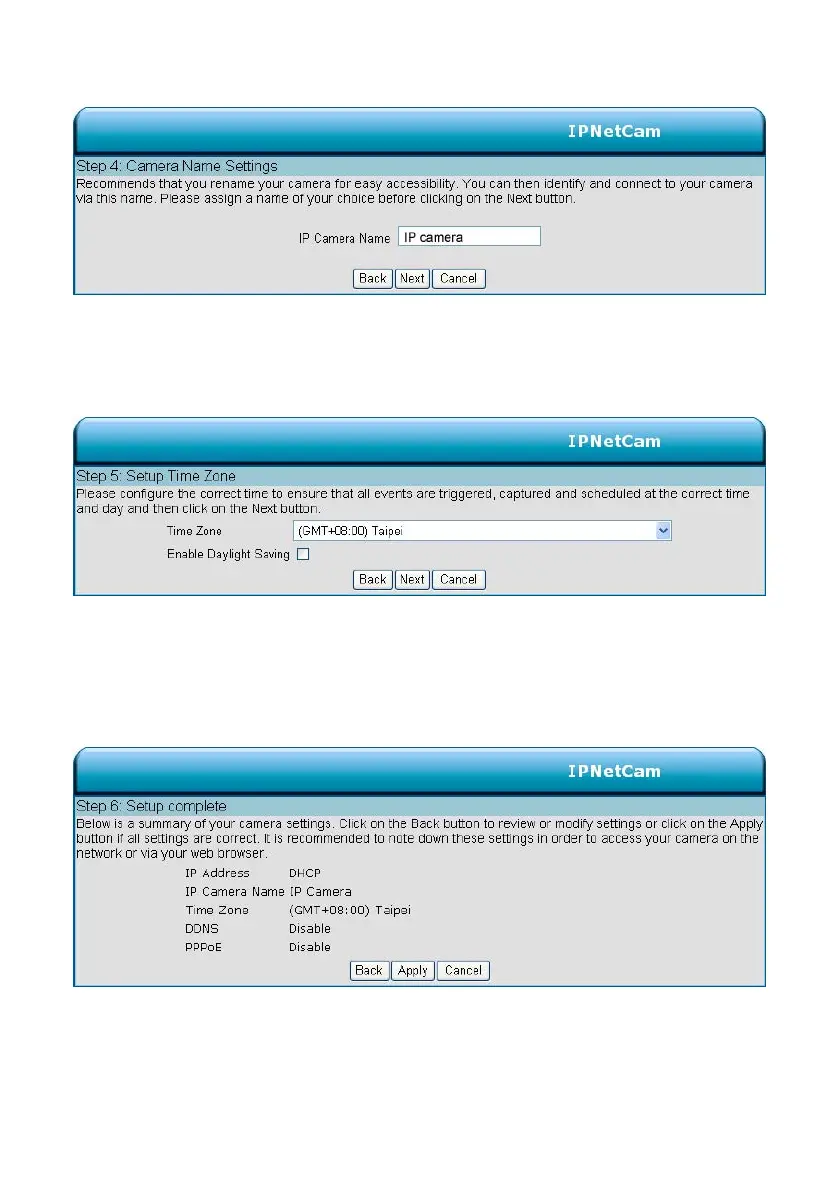
Step 4:
Enter a name for your camera and click Next to continue.
Step5:
Configure the correct time to ensure that all events will be triggered, captured and scheduled at the
right time. Click Next to continue.
Step 6:
If you have selected DHCP, you will see a summary of your camera’s settings. Please note down
all this information as you will need it for accessing your camera within the network.
Click Apply to save your settings.