Do you have a question about the Aprilaire E100 and is the answer not in the manual?
Details the steps to turn the dehumidifier on using the power switch and control panel.
Step-by-step guide for cleaning the unit's air filter and clearing service reminders.
Guidelines for placing a condensate pan and using float switches.
Details for connecting the dehumidifier to the HVAC system.
Lists error codes, failure modes, and corrective actions.
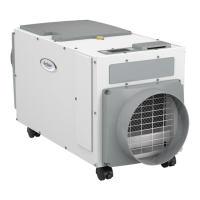
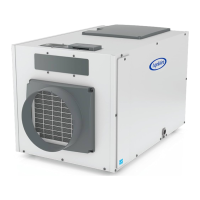
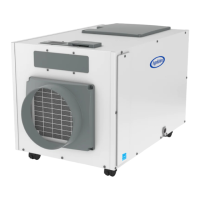
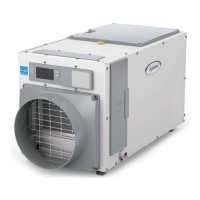
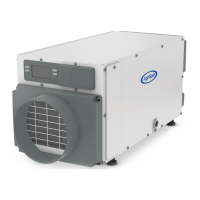
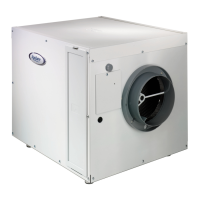
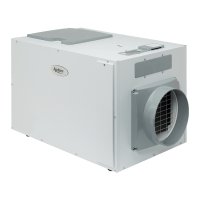
The AprilAire Dehumidifier, specifically models E080 and E100, is designed to control humidity levels throughout an entire home. It operates by drawing air into a cabinet where it is filtered and then passes through a sealed refrigeration system. This system cools the air, causing moisture to condense and drip into a drain pan, which is then routed to a floor drain or condensate pump. After moisture removal, the air is reheated and returned to the home, resulting in warmer and drier air.
The primary function of the AprilAire Dehumidifier is whole-home dehumidification. It actively removes excess moisture from the air to maintain a comfortable humidity level, preventing clamminess or musty smells. The unit can be integrated with an HVAC system to pull air from and discharge air to the whole home, or it can operate with dedicated registers for both inlet and discharge. For optimal performance, the dehumidifier should be installed in a location that allows for proper airflow and drainage.
The dehumidifier can be controlled directly via its onboard control panel or through external/remote controls like an AprilAire Thermostat or Model 76 Dehumidifier Control, especially when the unit is in a hard-to-reach location such as an attic or basement. When using a remote control, users can monitor the humidity sensed by the dehumidifier and adjust settings from a convenient location.
Beyond basic dehumidification, the unit offers several advanced features:
To operate the dehumidifier, power is applied via the ON/OFF Power Switch located near the power cord. The ON/OFF Button on the control panel then turns the unit on or off. The display shows the current humidity setting, and when sampling, it indicates "AIR SAMPLING" along with the measured humidity level. If the humidity is above the set point, the compressor turns on, and "DEHUMIDIFYING" appears on the display. The unit samples air every 60 minutes or when the humidity setting is lowered.
For energy savings, users are advised to adjust the humidity setting to the highest comfortable level to reduce run time. Turning the dehumidifier off when windows are open, similar to air conditioning, also conserves energy. When vacating the home for extended periods in summer, setting the RH to 55% and the thermostat to a comfortable cooling temperature helps maintain controlled humidity while minimizing energy consumption.
Regular maintenance is crucial for the dehumidifier's efficient operation. The air filter and drain should be checked and cleaned every 6 months.
The dehumidifier's feet can be adjusted for leveling, which is essential for proper drainage. A top-mounted bubble level helps ensure the unit is level. If a condensate pump is used, additional elevation might be needed, and risers or hanging kits are available. When installing in or above a finished space, a condensate pan is required, and a float switch should be installed in the pan or connected to the condensate pump to prevent overflow.
Troubleshooting information is provided through diagnostic codes displayed on the control screen, such as "E1" for internal sensor issues, "E2" for high refrigeration pressure, "E3" for remote control communication loss, and "E4" for insufficient capacity. Each code has specific actions for resolution, ranging from cycling power to checking connections or calling technical support. Other symptoms like the dehumidifier not turning on, low airflow, or unexpected HVAC fan activation also have corresponding troubleshooting procedures.
| Brand | Aprilaire |
|---|---|
| Model | E100 |
| Type | Dehumidifier |
| Energy Star Rated | Yes |
| Voltage | 115V |
| Refrigerant | R-410A |
| Capacity | 100 pints per day |
| Coverage Area | Up to 2, 500 sq ft |
| Power Supply | Corded Electric |
| Power Consumption | 640 W |