Ensure that the isolation valves are connected to the diverter spigots, with the
arrows correctly aligned according to the direction of flow.
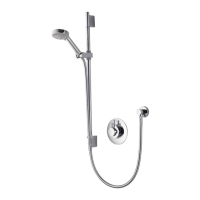
Run the pipes from the mixed water outlets of the diverter through to the proposed
siting for the shower outlets, depending on the system chosen. For 2 buttoned
shower divert controllers the outlets are assigned to the controller buttons as
follows:
• Top button to outlet A of the diverter
• Bottom button to outlet B of the diverter
See Diverter Outlet and Diverter Controller Matrix on the reverse page for
reference.
8
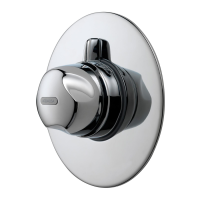
Positioning the controller
Think about the location of the controller. Avoid grout lines where possible
to ensure good surface contact with the silicone seal of the mounting plate.
Choose a suitable height so all users can easily see and use the controller.
Some controllers are activated by a proximity sensor. Refer to the user guide for
details and further information.
CONTROLLERS CONCEALED SHOWER
Supplied screws must be used as failure to do so will result in poor fitting of
the controller, aecting its functions and may invalidate the warranty. If the
supplied screws are not suitable for the mounting surface, use a screw of the
same size and head design, the screws used must be non corrosive.
Power supply to the Aqualisa SmartValve™ must be switched o before
connecting or removing the controller.
Ensure the data cable is the correct way round as both ends dier in type of
connection used (transparent connector to the Aqualisa SmartValve™).
Data cables must be protected by suitable sheathing or conduit in the event of
servicing and maintenance. Failure to install this way will invalidate the warranty.
Care should be taken to ensure that fixings do not pierce the data cable conduit.