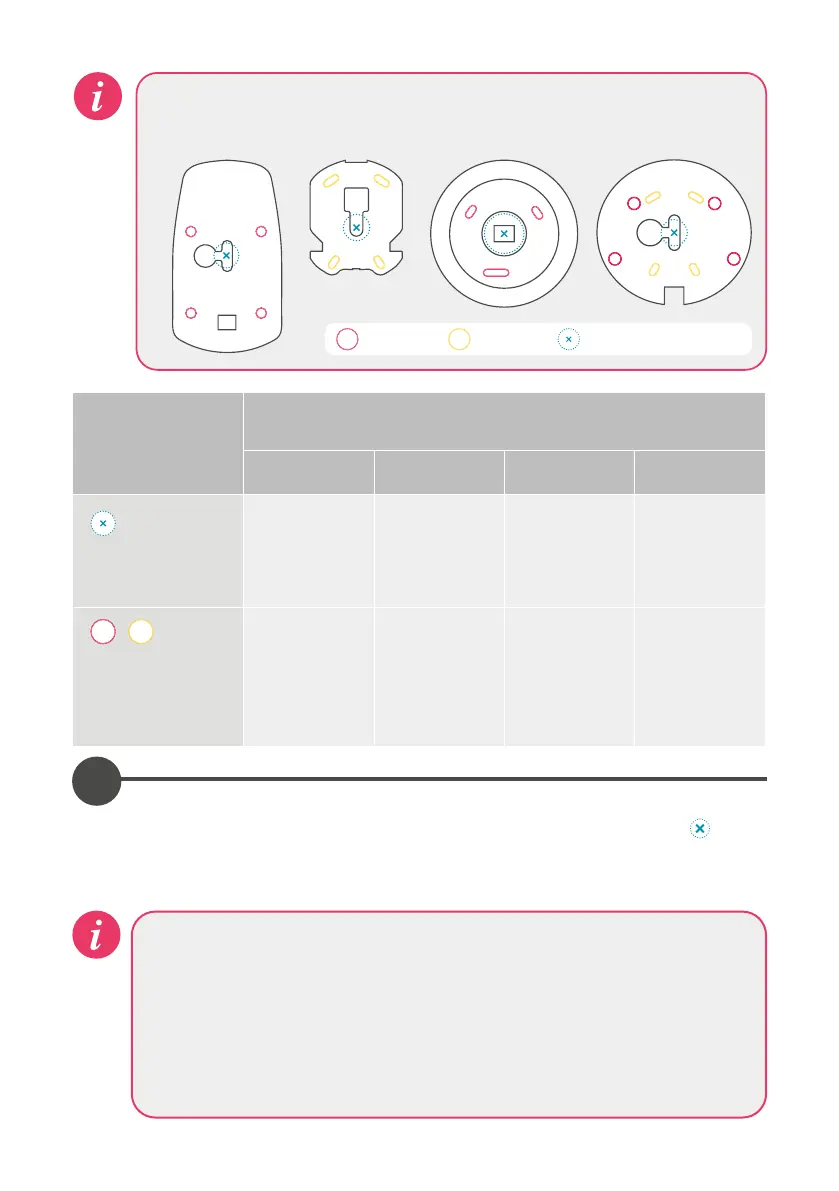
Make note of the type of your mounting plate (A, B C or D) when proceeding
with below instructions.
Fixing
Specifications
(refer to above)
Mounting plate type
A B C D
Data cable
entry hole size
Ø16mm Ø16mm
Ø22mm
diamond dust
hole saw must
be used
Ø16mm
Mounting plate
screws and fixings
6mm drill bit
for red fixings
5mm drill bit
for yellow
fixings
6mm drill bit
for red fixings
6mm drill bit,
for red fixings
or 5mm drill
bit for yellow
fixings
6mm 5mm Data cable entry hole
A B C D
Diamond dust hole saw
When using the diamond dust hole saw to cut a hole for the mounting plate,
follow the manufacturers guidelines. This type of hole saw is suitable for ceramic
tiles, glass, marble, slate and porcelain tiles. If cutting into showering panels or
marine board a suitable Ø22mm hole saw should be used. For some brands of
diamond dust hole saw it is recommended to wet the saw before cutting. Make
an initial cut into the tile at an angle to avoid slippage of the drill bit.
1
Place the mounting plate on the wall in the desired location for the controller and
mark the central position for the data cable entry point as represented by
in
the above diagram. Remove the mounting plate and drill the data cable hole at the
required size (see above table) at the appropriate position.