Connecting a record deck
Solo Mini is not fitted with a phono pre-
amplifier. If you wish to connect a record
deck to Solo Mini, then you’ll need an
external pre-amplifier. Please contact
your dealer for further information and
recommendations on the best option
for you.
Controlling an iPod
®
Music or podcasts from your iPod can
be fully integrated with your system
using Arcam’s rDock or rLead. These
accessory units use the RS232 CONTROL
and IPOD/TAPE connectors to take over
the control and amplification, with iPod
text appearing on the front panel display
of Solo Mini.
Information on connecting and using an
iPod with the Solo remote is given in
the rDock or rLead quick start guide
supplied with these accessory units, but
see ‘iPod connection’ in the connectivity
section of this manual.
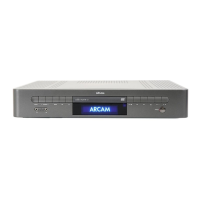
rear panel
Remote output
This output carries all signals from the front-
panel remote-control receiver. This can be
used to route remote-control commands
to other equipment (potentially in different
locations). For example, amplifier commands
could be received by Solo Mini, then routed
to a power amplifier in a remote location
using this output connector.
Programmer switch
This is an override switch that allows an
Arcam dealer to install software upgrades.
The user should not access this facility.
Tape output
This is the output to be used
for connecting to an audio
recorder or for a second room
system. It should be connected
by Phono–Phono (RCA)
cables to the amplifier in the
second room.
Preamp output
If you require more power than Solo Mini’s 25W per
channel, you can connect an external power amplifier.
Connect the
PRE OUT sockets to the input sockets of
your power amplifier, then connect your speakers to
the power amplifier’s speaker terminals.
This output may also be used to provide a signal for
a self-powered Low Frequency Effects speaker (a
subwoofer). Arcam’s Logo speaker ideally matches the
design and output characteristics of Solo Mini.
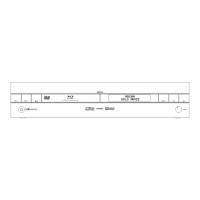
Analogue inputs
Solo Mini provides four pairs of analogue
inputs, allowing connection of other stereo
sources (e.g. a games console, AV, iPod/
Tape, or TV). All four inputs have the same
characteristics – the labels below the inputs
give suggested uses.
To connect a device to an input on the rear
of Solo Mini, use a stereo phono cable of a
suitable length. We advise you to use high-
quality interconnect cables wherever possible
to ensure the best possible sound quality.
Antennae inputs
These inputs can be used with the aerials
provided (DAB, if fitted, has a telescopic
aerial, FM a wire aerial, and AM a loop aerial).
In weak signal areas, external aerials of the
correct type may be required for optimal
reception.
Speaker outputs
Connect your Muso speakers
here!
Mains power input
100V, 115V or 230V AC,
depending on shipping region
Mains switch
This is the main Off/On switch,
though it is usual to place the
unit in low-power ‘Clock mode’
when not in use.
RS232 control
This is used for controlling an iPod (see page
9), or for control via a remote computer.