INSTALLATION & USER MANUAL ENERGY EFFICIENT WOODSTOVE | PHOENIX
11 | Page
6.4.1. Ventilation kit installation (optional)
The hot air ventilation kit is similar to a woodstove ventilation kit. It gives you the opportunity to distribute the hot air not only in the same room
with the stove, but to other rooms of the house too, by using the optional canal kit. This way you can heat all the rooms equally and more
efficiently.
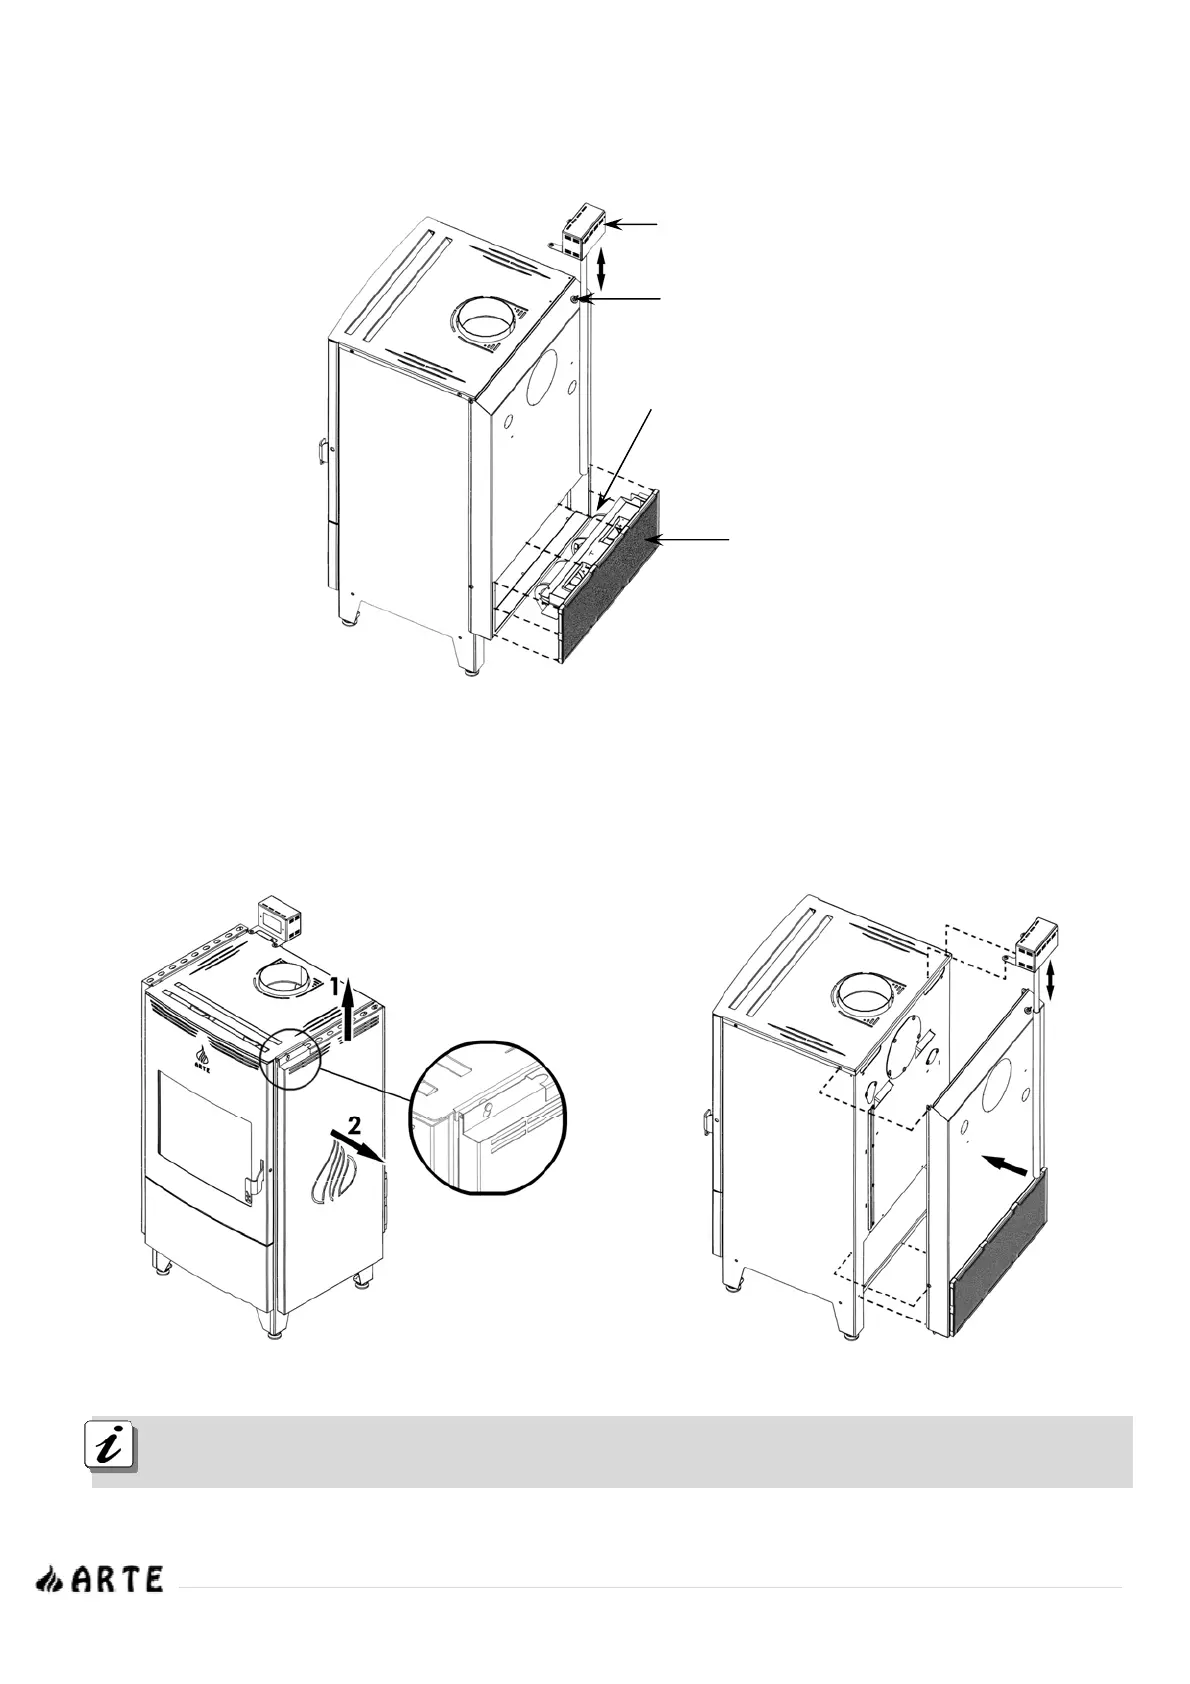
Pic. 6.4.1.1
The installation is very simple, as the kit is delivered ready to install:
Remove the sides of the stove. (Pic. 6.4.1.2)
Install the ventilation kit with 7 screws (supplied) on the sides and bottom of the device. (Pic. 6.4.1.3)
Install the telescopic bracket for the control panel on the top of the stove with 2 screws (supplied). (Pic. 6.4.1.3)
Replace the sides of the stove.
Pic. 6.4.1.2 Pic. 6.4.1.3
woodstove has an air inlet filter
cleaner and when it’s needed use water. For replacement filters contact your supplier.
with telescopic bracket
3. Hot air ventilation motor
2. Thermostat
4. Air inlet filter