INSTALLATION & USER MANUAL ENERGY EFFICIENT WOODSTOVE | PHOENIX
12 | Page
6.4.2. Air canals instalation (optional)
If you want to distribute the heat from the stove to other areas of your house, ARTE ® PHOENIX enables you to install the air canals kit that
works complementary with the ventilation kit. It gives 3, 80mm in diameter supplies In order to send hot air to other rooms.
The installation should be done by a qualified technician.
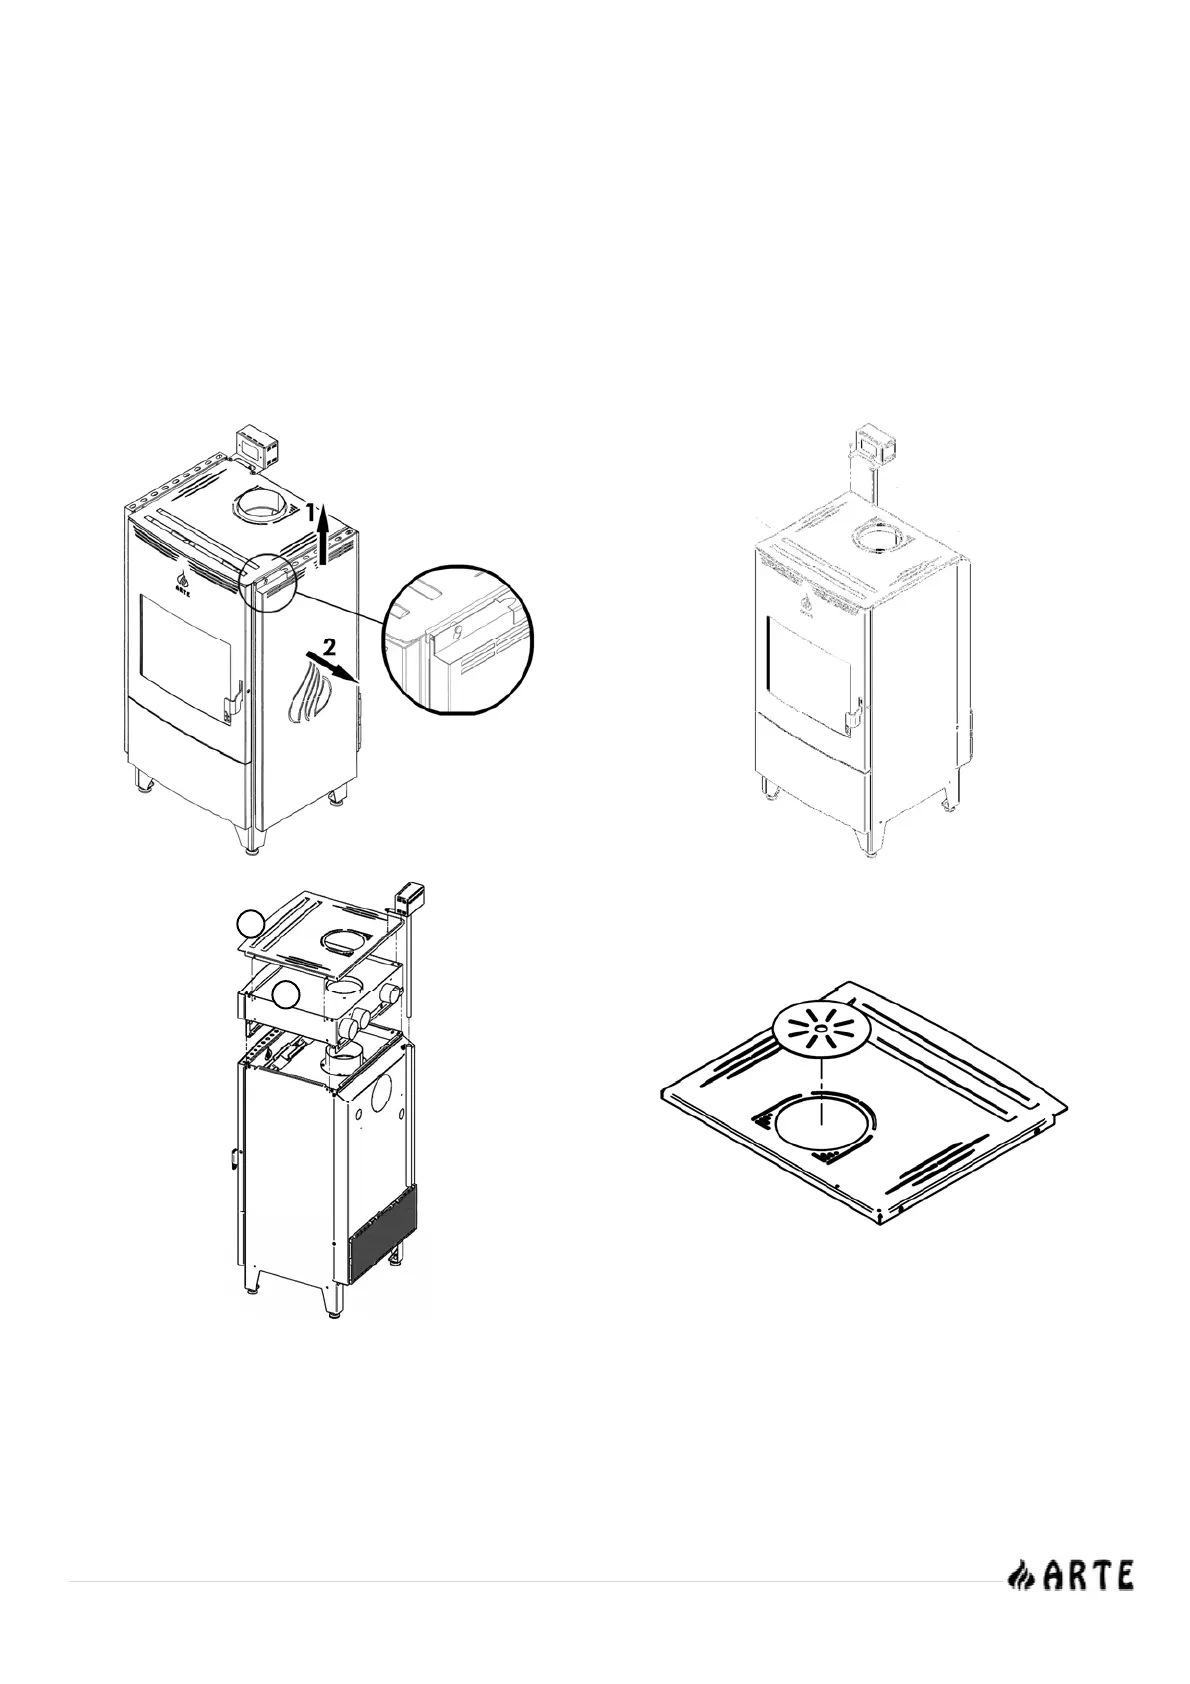
Remove the sides of the stove. (Pic. 6.4.2.1)
Unscrew the 2 screws that hold the control panel and move it upwards. (Pic. 6.4.2.2)
Remove the top cup. (Pic. 6.4.2.3-A).
Install the air canal kit with 4 screws (supplied) on the side of the device. (Pic. 6.4.2.3-B).
Reinstall the top cup and the control panel.
In case the flue is in the back, place the decorative metal cap in the opening on top. (Pic. 6.4.2.4)
Pic. 6.4.2.1 Pic. 6.4.2.2
Pic. 6.4.2.3 Pic. 6.4.2.4
Use a hammer to remove ONLY the covers that you will use and install the supplementary 80mm in diameter tubes.
For the distribution of the hot air, use insulated tubes with a minimum diameter of 80mm.
Do not exceed the maximum length of 7m in a straight line, for each outlet of hot air, keeping in mind that every 90
o
angle corresponds to
1m of tube and each 45
o
angle corresponds to 0,5m.
The path of the tube must be horizontal or upward. Do not try to install the tube on a downward path. If the tube passes through flammable
walls, insulate the gap thoroughly by placing at least 4cm thick insulation.