Running a Verification
(continued)
G: Scan the bar code on the approriate box of MVS Verification Plates.
Using the Bar Code Reader, highlight the bar code on the appropriate box of MVS
Verification Plates until a tone sounds.
This prompt will only appear once per lot of MVS Verification Plates.
H: Fill the (Plate ID) 1 of ___ with solutions as specified in the table below.
Using the device under test, fill the plate according to the displayed layout.
It is recommended that 384-well plates be centrifuged after filling (e.g. 1 minute
@ 1200 RPM) to remove bubbles in the wells and to flatten the menisci. On-board
mixing is also recommended for 384-well plates if using the Variomag Plate Shaker.
I: Place the plate on the Plate Shaker.
When the plate is axed to the shaker, click OK.
Check the plate to ensure that no splashing of liquid occurred during shaking
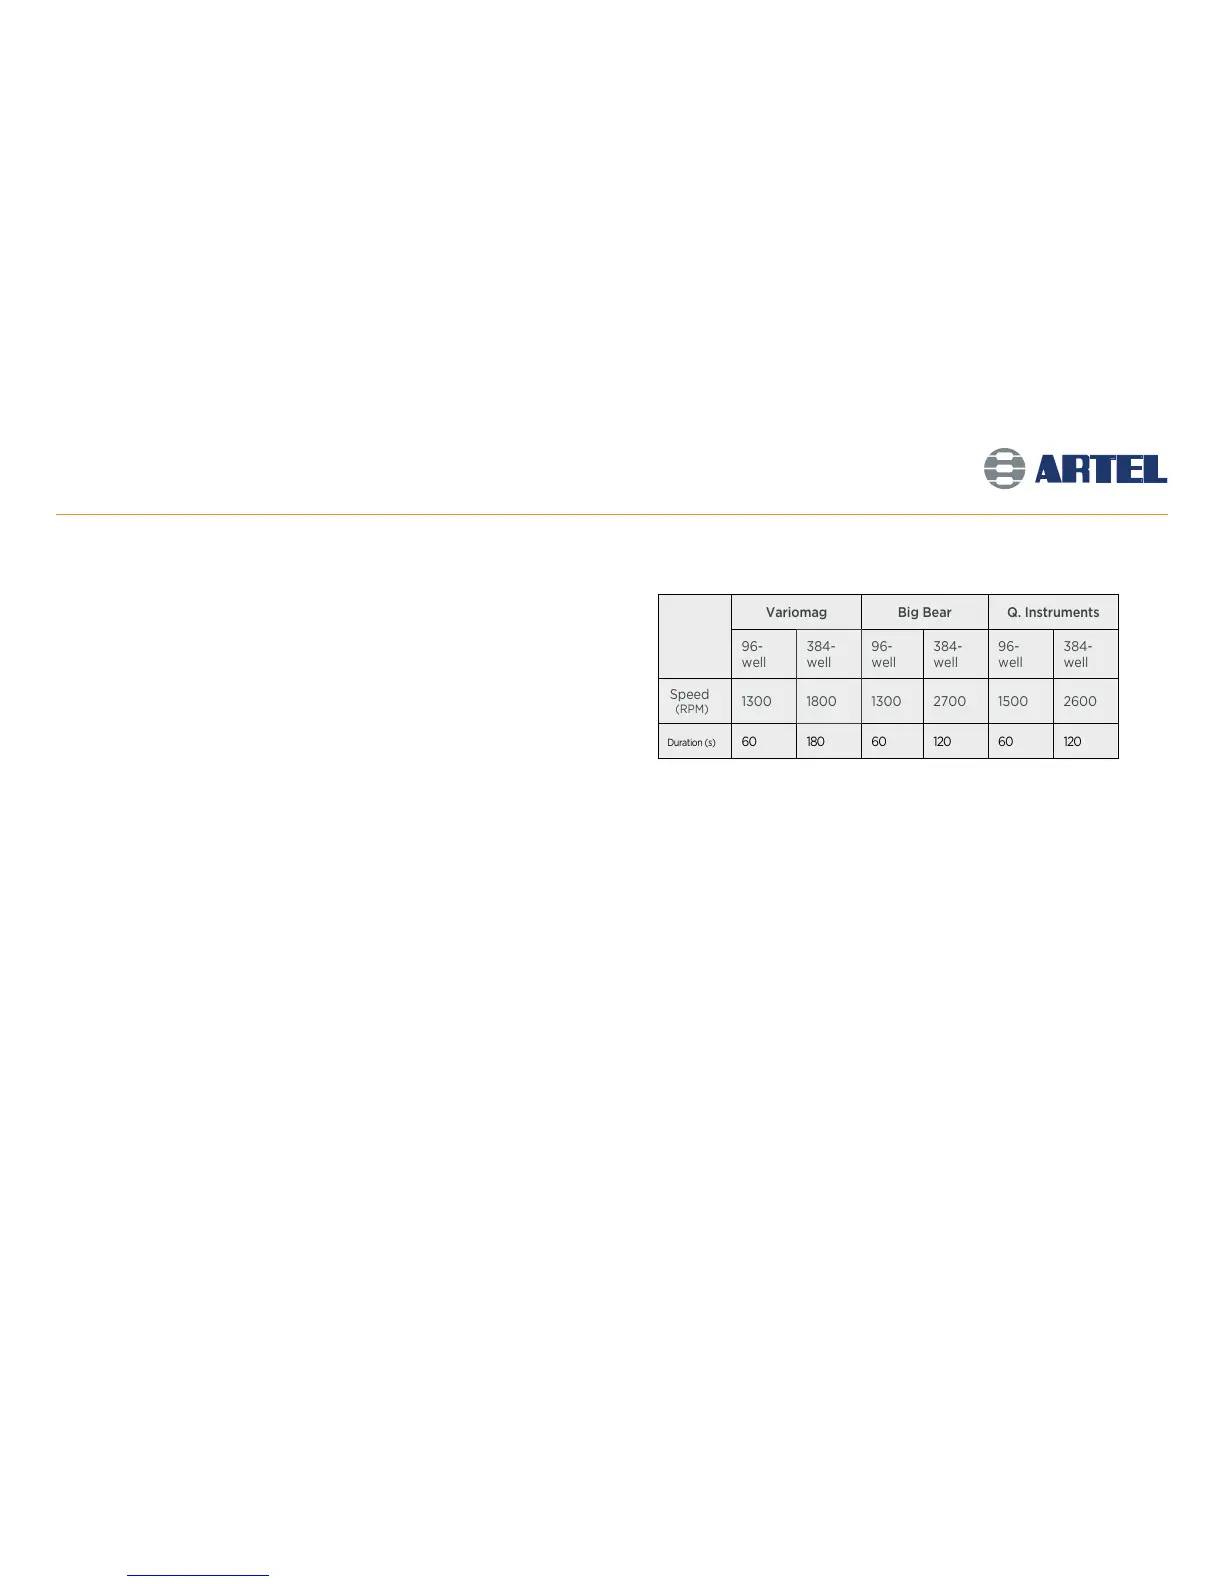
and that the liquid is thoroughly mixed. Adjust the speed of the Plate Shaker
accordingly. (Refer to the table at right for more information.)
Default Plate Shaker Speed & Duration (for Standard Profile Plates):
J: Insert the (Plate ID) into the Plate Reader.
Gently secure the plate on the Plate Reader tray with well A1 in the top-left
position of the reader. Click OK.
For 96- and 384-channel devices only: The number of data points set in the
Plate Layout will determine the number of times the software will repeat
steps H through J.
Variomag Big Bear Q. Instruments
96-
well
384-
well
96-
well
384-
well
96-
well
384-
well
Speed
(RPM)
1300 1800 1300 2700 1500 2600
Duration (s)
60 180 60 120 60 120
13