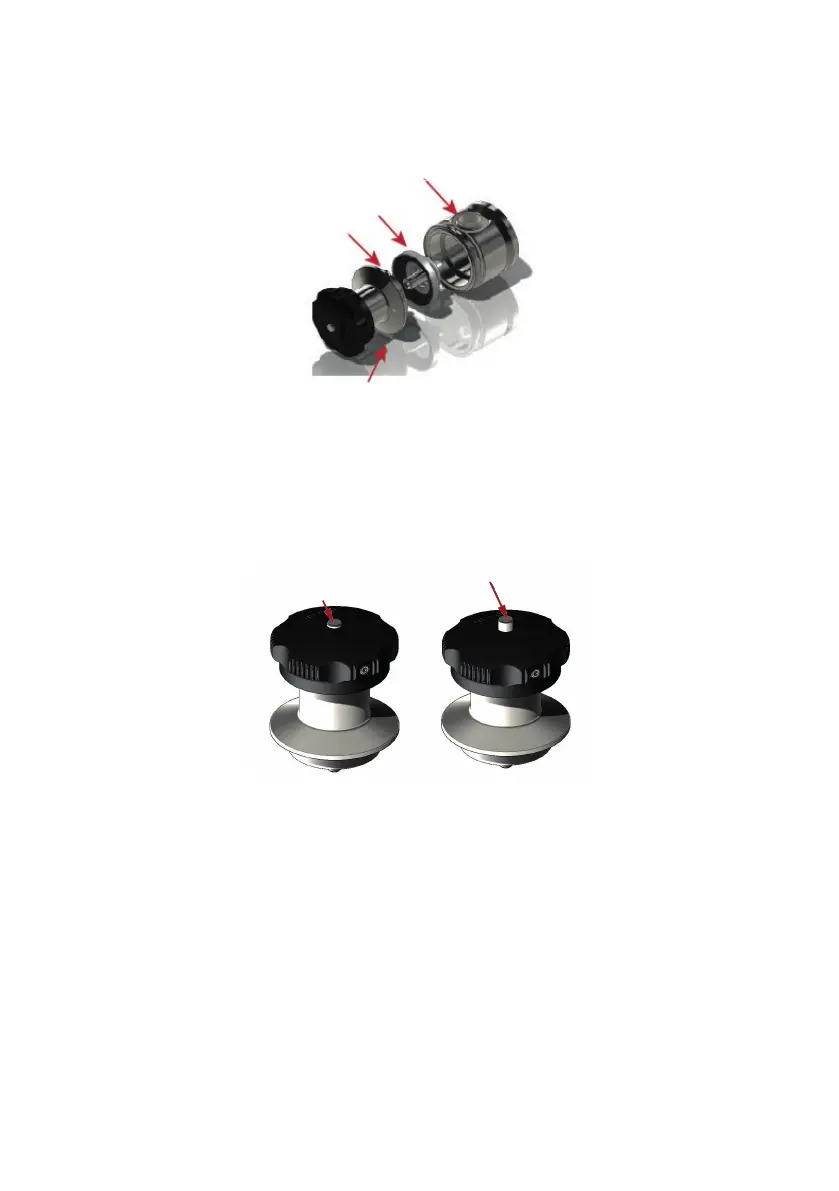
2. Verify that the diaphragm insert is screwed into the diaphragm, just finger-tight.
3. Mount the diaphragm on the actuator shaft and turn clockwise until it is fully seated.
DO NOT FORCE! Finger-tight is sufficient.
Actuator
Shaft end
Diaphragm
Valve
NOTE! Do not install gaskets between the valve body and the actuator.
4. Insert the actuator and diaphragm assembly into the valve body.
5. While keeping pressure against the valve body, rotate the handle counter-clockwise
until the O-ring contacts the actuator flat surface. The position indicator should be
protruding from the bottom of the actuator. For smaller diaphragm sizes, the side
travel marks should be showing. While the diaphragm will be slightly retracted, the
shoulder seals will remain in the same position.
Indicator ush -
Closed Position
Indicator out -
Open Position
6. Make sure that the actuator flange and the valve flange are close enough to easily
reinstall the clamp.
7. Reinstall the clamp on the actuator/valve assembly by hand. A double-bolt, high-
pressure clamp is can be used, alternating between the two bolts to ensure even
tightening.
8. Using a torque-controlled socket wrench set to 2.26Nm (50in-lbs), tighten the clamp.
If using a double-bolt clamp, tighten the clamp by alternating between the two bolts
until the bolts are fully torqued.
NOTE! Unlike elastomer diaphragm materials, the following steps are necessary to finish
preparing a new PTFE diaphragm for optimum performance:
9. Open the valve and steam the valve for 15 minutes.
10. Close the valve and steam again for 30 minutes.
11. Check the valve seat for integrity. There should be no loss of pressure.
m-radialdiaphragmvalve-en-02 13