Do you have a question about the Assa Abloy SecureComm HKC GSM-WIFI U and is the answer not in the manual?
Outlines the 3 phases of setting up SecureComm connectivity, starting with billing.
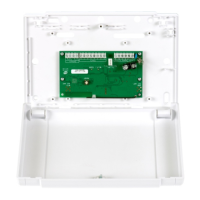
Details powering up the unit and using the Connect/Reset button for factory default.
Steps to initiate commissioning via the SmartLink700 app.
Choosing GSM-WiFi Universal and commissioning a new unit.
Using serial number or QR code for device identification.
Inputting the SecureComm installation ID for account linking.
Setting a Remote Code for future unit reconfiguration.
Entering Account Code for IP reporting via monitoring company.
Setting User Code for app control and SecureComm Password.
Finalizing connection to the SecureComm server and checking status LEDs.
Entering and saving customer details within the system.
Connecting the communicator to a WiFi network for full functionality.
Clicking the red cloud icon to connect to the communicator.
Accessing WiFi configuration through COMMUNICATORS menu.
Using the Scan WiFi Networks function to find available routers.
Selecting a WiFi network, entering password, and connecting.
Instructions for end-users to download the HKC APP.
Guiding end-users on entering Installation ID and password.
Completing the HKC APP setup for system login.
Explains input activation via OV or 12V and programmable triggers.
Lists default input types for Ireland and UK.
Details on Normally Open and Normally Closed relay outputs.
Illustrates typical wiring for a standalone setup.
Important notes on programming inputs as positive triggers.
Guidance on programming zones for specific faults like "Line Fault" or "Key".
Reiteration of SecureComm billing arrangements setup.
Requirement to set up the HKC APP for system control.
Commissioning via the panel's engineering menu, not the SmartLink700 app.
Instruction to wire the communicator to the SecureWatch panel.
Diagram showing connections between SW panels and the communicator.
Wiring for tamper and programming the zone input as Tamper.
Verifying specific software versions for SW-812 and SW-16120.
Overview of the engineering menu structure for commissioning.
Steps to enable GSM and WiFi features via panel menus.
Entering Installation ID and managing the system password.
Details on GSM status, disabling GSM, and monitoring signal.
Explanation of jam detection, tamper, and relay connections.
Scanning for the strongest GSM signal for optimal connection.
Details on WiFi status, disabling WiFi, and IP settings.
Configuration of WiFi monitor signal, fault delay, and tamper.
Scanning for available WiFi networks for selection.
Overview of SecureComm status, Installation ID, and password management.
Options for disabling Virtual Keypad and APP notifications.
Setting up IP monitoring and contacting the ARC.
Making test calls to ARC and customizing event reporting.
Configuring Alarm Delay and Mains Delay for fault reporting.
Programming initial and subsequent test calls to the ARC.
Tailoring poll fault messages for communication path stability.
Steps to setup SecureComm billing arrangements via securecomm.hkc.ie.
Requirement to set up the HKC APP for system control.
Commissioning via the panel's engineering menu, offering more options.
Instruction to wire the communicator to the SecureWave panel.
Diagram showing connections between SW-10270 Control Panel and the communicator.
Note on checking specific software version for SW-10270.
Overview of the engineering menu structure for commissioning.
Steps to enable GSM and WiFi features via panel menus.
Entering Installation ID and managing the system password.
Details on GSM status, disabling GSM, and monitoring signal.
Explanation of jam detection, tamper, and relay connections.
Scanning for the strongest GSM signal for optimal connection.
Details on WiFi status, disabling WiFi, and IP settings.
Configuration of WiFi monitor signal, fault delay, and tamper.
Scanning for available WiFi networks for selection.
Overview of SecureComm status, Installation ID, and password management.
Options for disabling Virtual Keypad and APP notifications.
Setting up IP monitoring and contacting the ARC.
Making test calls to ARC and customizing event reporting.
Configuring Alarm Delay and Mains Delay for fault reporting.
Programming initial and subsequent test calls to the ARC.
Tailoring poll fault messages for communication path stability.
All Poll Fault settings for communicator connection status.
Configuring AVI time, message, and keypad buzzer activation.
Details on security grade, temperature, power supply, and weight.
Information on jam detection, voice messaging, cellular telephony, and WLAN standards.
Explanation of LED states for GSM/WiFi connectivity and signal strength.
The HKC GSM-WiFi U is a universal GSM/WiFi IP communicator designed to enhance the capabilities of security systems through cloud-based communication services. It can operate in standalone mode or be integrated with HKC SecureWatch and SecureWave panels.
The primary function of the GSM-WiFi U is to provide reliable communication for security systems, leveraging both GSM (cellular) and WiFi networks to transmit signals to a monitoring center (ARC) and enable control via the HKC APP. It acts as a bridge between the security panel or standalone inputs and the SecureComm cloud service.
In Standalone Mode, the GSM-WiFi U can monitor up to 8 programmable inputs and control 2 relay outputs. These inputs can be configured for various trigger types (e.g., Fire, Panic, Intruder Alarm, Arm/Disarm, Zone Inhibit, Mains Fail, Pre-Alarm, Tamper), with activation delays up to 60 minutes. Output 1 is a programmable Normally Open output that defaults to following the onboard tamper switch and opens if a fault is detected on the GSM or Wi-Fi path. Output 2 is a normally closed-circuit output that can be wired into a Key input of a control panel and controlled via the HKC app for arming/disarming.
When integrated with SecureWatch or SecureWave Panels, the communicator can be commissioned and configured through the panel's engineering menu structure, eliminating the need for the SmartLink700 app for this task. This integration also provides a full complement of SecureComm options, especially with SecureWave panels.
The device supports IP Reporting to monitoring companies, requiring an account number from the ARC. It can detect and flag attempts at GSM jamming, and this feature can be enabled or disabled. It also offers poll fault reporting for both WiFi and GSM paths, notifying the monitoring station if the connection to the SecureComm Server is lost for a specified period.
The HKC APP allows end-users to control the system remotely, receive notifications for alarms and faults, and utilize a virtual keypad. The app requires an installation ID and a SecureComm password for setup.
| Brand | Assa Abloy |
|---|---|
| Model | SecureComm HKC GSM-WIFI U |
| Category | Transceiver |
| Language | English |