14
Fig. 39
Fig. 40
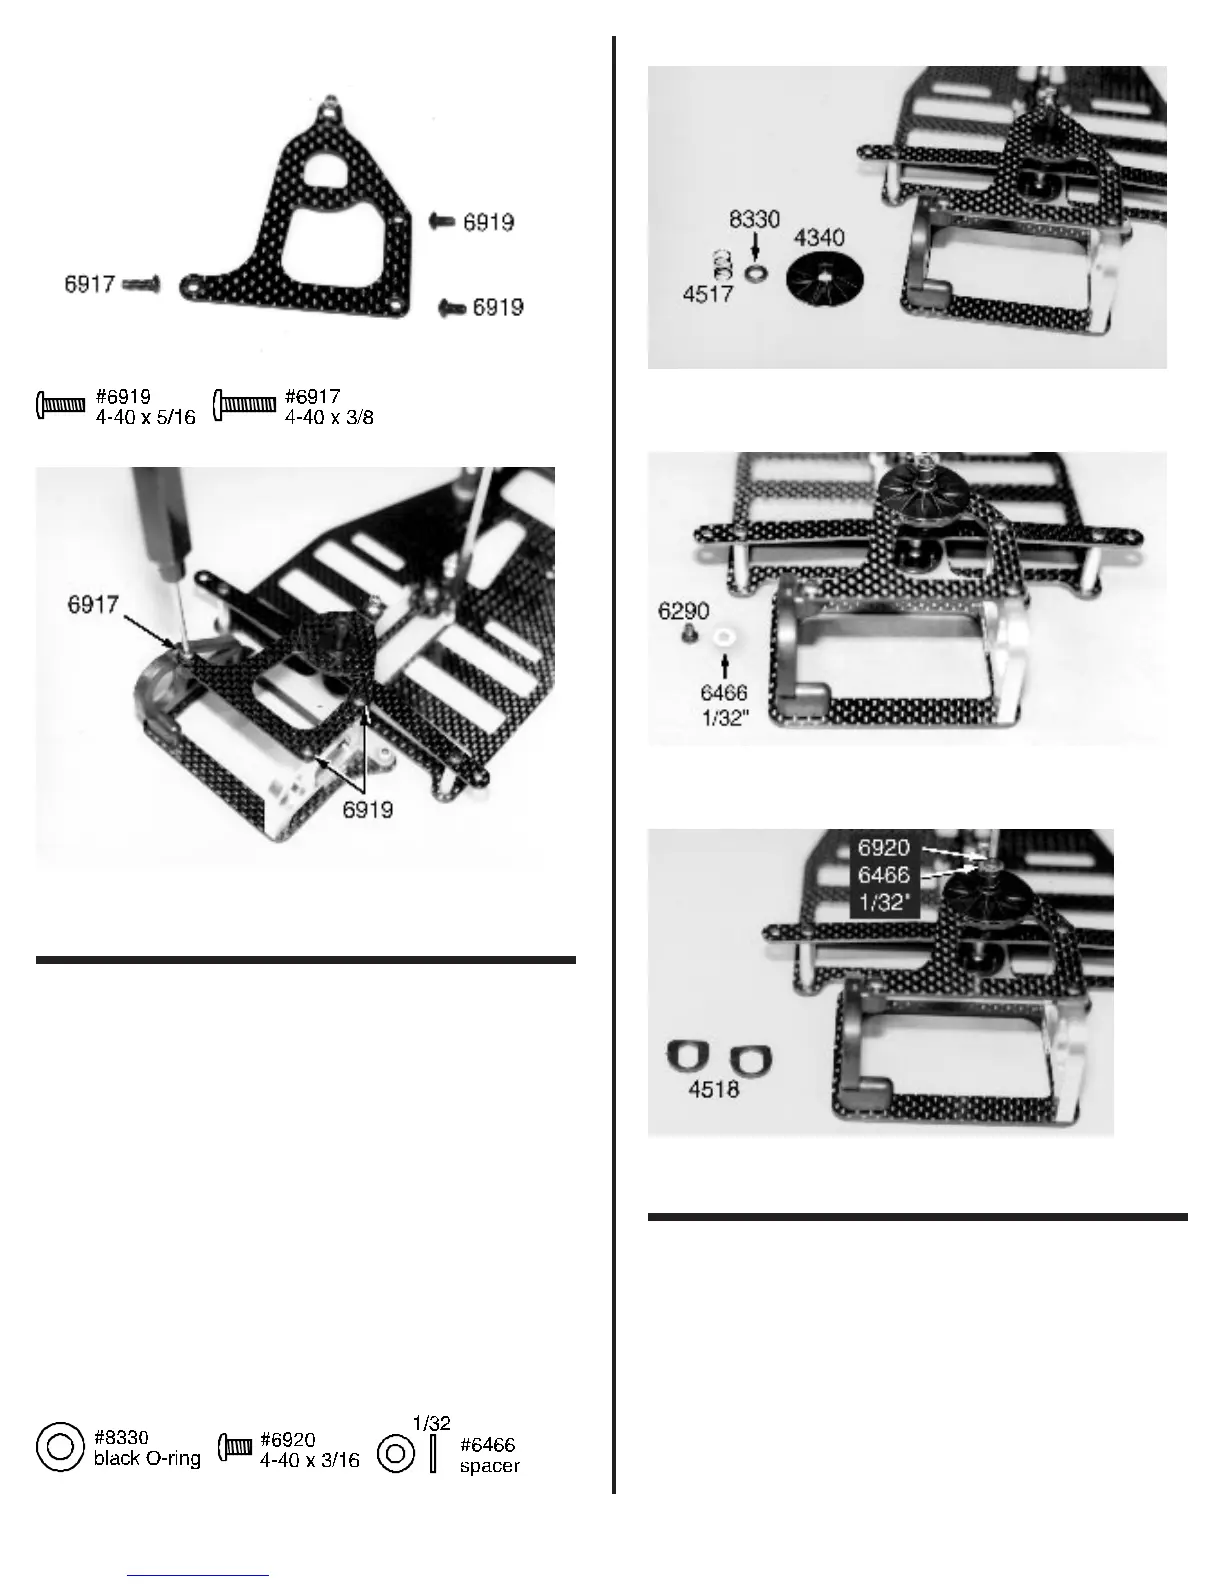
❑ Figs. 41, 42 & 43 Now go back and get the
remainder of bag #3 we set aside earlier. Take out one #4340
plastic dampener washer, one #8330 black O-ring, one #4517
dampener spring, one #6920 4-40 x 3/16” BHSScrew, and one
#6466 1/32” plastic washer. Push the #8330 O-ring into the
center cavity of the #4340 plastic dampener washer. The Team
drivers use diff lube on the O-ring to improve the performance
of the dampener system. Now place the plastic dampener
washer over the dampener post smooth side down. Next install
the #4517 dampener spring over the post. Finally insert the
#6920 screw into the #6466 washer and then thread it into the
top of the dampener post.
In the same bag you will find the two #4518 plastic
dampener roll stop inserts. Take them out and look at them so
you will know what they look like. Now put them in your tool box.
We will discuss using these later in the tuning section of the
manual. We do not use them for the standard setup.
Fig. 41
Fig. 42
Fig. 43
❑ Figs. 44 & 45 Remove the two parts trees that
contains the #4348 zero offset (this one is marked with three
dots), 4349 #1 offset, and #4350 #2 offset rear axle bearing
height adapters. For this kit use the #4350 #2 adapters.
Remove them from the parts tree and insert one adapter into
the right side aluminum motor bulkhead. Now install the second
adapter into the left molded bulkhead. When installed, the
bearing hole offset should be closer to the ground as shown.