20
National titles were also won with Reedy motors. If you are not
sure which motor to get check with your local dealer or you are
welcome to contact Associated at 714-850-9342 and we will do
our best to assist you.
We will start by installing the capacitors onto the motor.
Some motors come with one or two capacitors installed. We
want to end up with a total of three. The following drawings show
the more common soldering locations for both stock and
modified motors. Please check your speed control manual to
make sure you have the right type and quantity of capacitors.
Most speed controls use .1mfd (micro farad) capacitors rated
at 25 volts.
STOCK MOTORS
front rear
MODIFIED MOTORS
front rear
Fig. 69
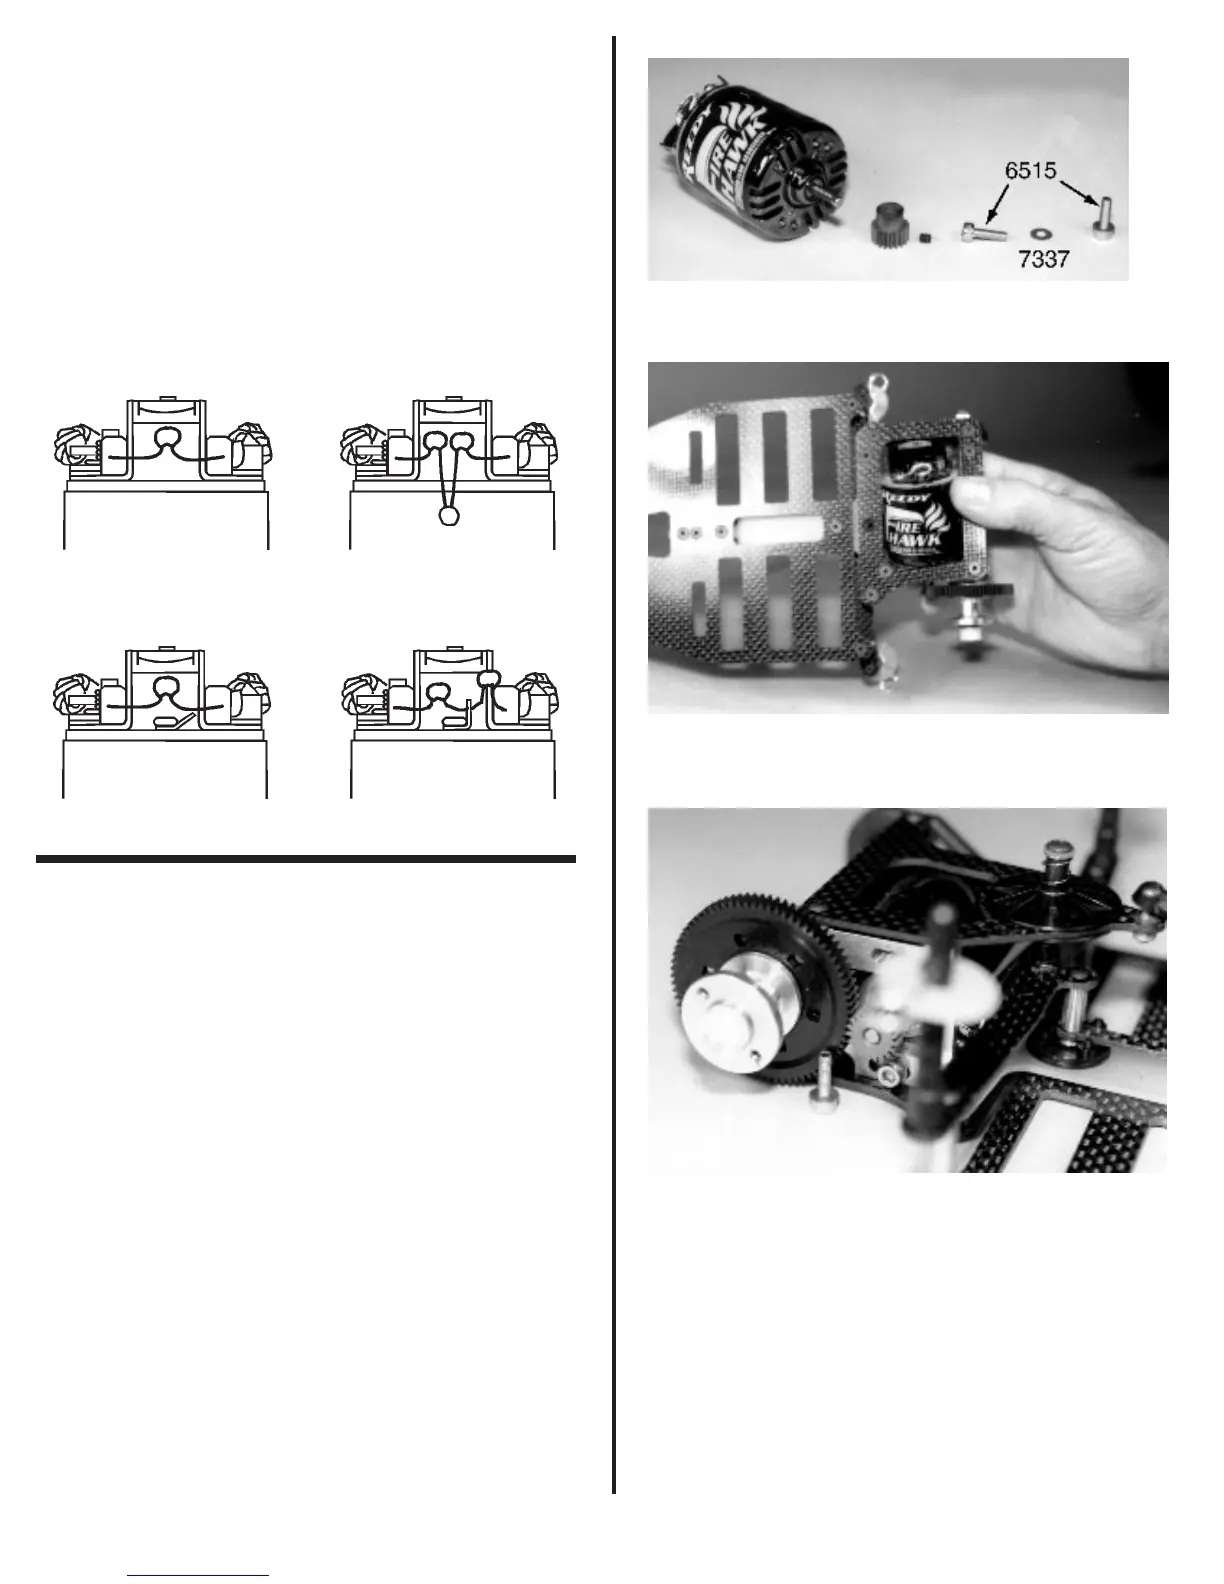
❑ Figs. 70, 71, 72 & 73 In the master kit bag you
will find the small bag that contains the two #6515 3mm x 10mm
gold colored SHCScrews, and two #7337 gold colored steel
washers. Slide one of the #7337 washers onto each screw.
Now turn the chassis up on it’s right side. Pick up your motor
and insert it through the lower pod plate and place it against the
motor plate, shaft end first. Now turn the car back over. Line up
the mounting holes in the motor with the motor adjusting slots
in the motor plate. Use the two #6515 screws to secure the
motor to the motor plate. Leave the screws loose for now.
Locate the pinion you chose to use with your motor choice.
Insert the pinion set screw into the pinion and then slide the
pinion onto the motor shaft. Make sure the set screw side of the
pinion goes onto the shaft first. Rotate the pinion until the set
screw is lined up over the flat portion of the motor shaft. Now
check the alignment of the pinion gear with the spur gear. Make
sure you have full contact across the face of each gear. Go
ahead and secure the pinion gear when you have achieved this.
Fig. 70
Fig. 71
Fig. 72