24
In order to connect the cells together you will need to
use battery braid or battery bars. Normally battery braid is
cheaper and a little easier to solder, but the battery bars help to
stiffen the battery pack when it is being handled. Associated
sells Reedy #650 battery braid and the new #651 silver treated
battery bars for assembling battery packs.
If you are going to use connectors or plugs their wires
will just be soldered to the cells at each end of the battery pack.
If you are going to hard wire (the technique we show in the
photos) you will need to bend the braid or battery bars so you
will have an easy place to make the wire solder connections
above the cells.
Fig. 84
Fig. 85
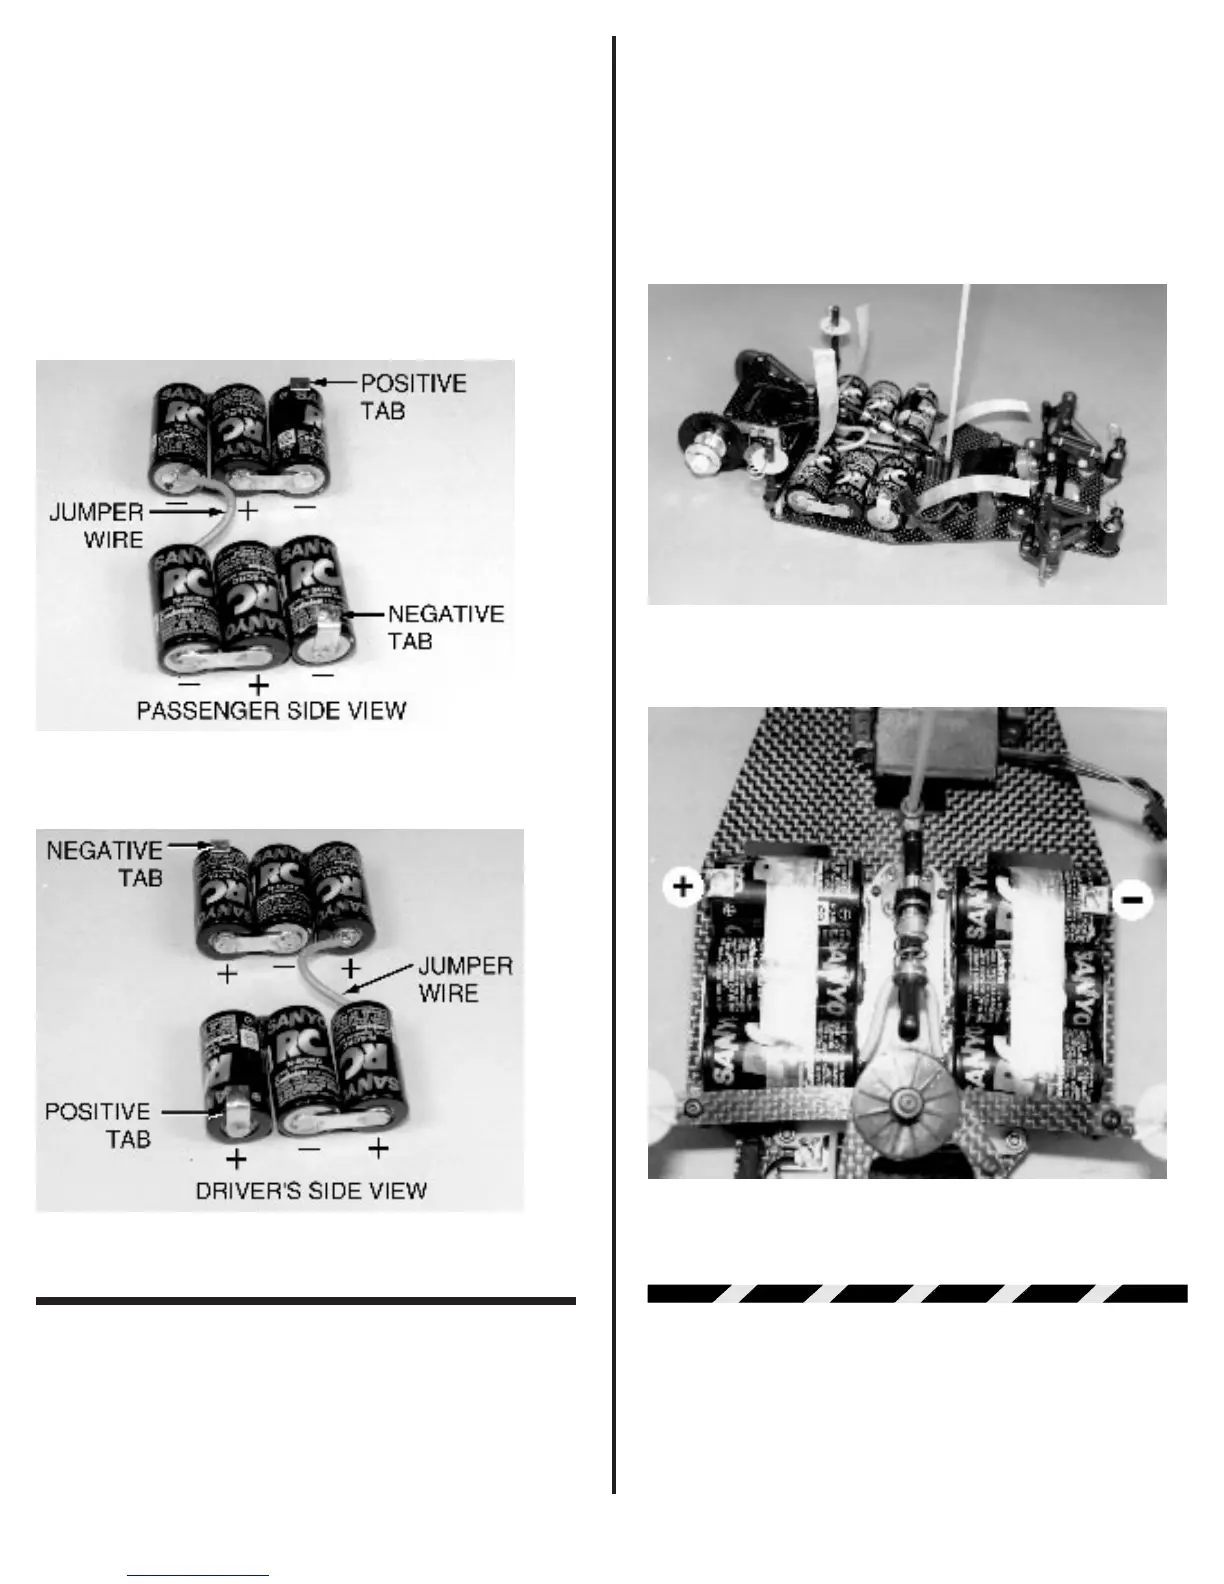
❑ Figs. 86 & 87 Before you can place the battery pack
on the chassis, you will need to disconnect one end of the shock
from its pivot ball. This will prevent problems with the jumper
wire between the third and fourth cell.. Now place the as-
sembled battery pack on the chassis slots then connect the
shock back onto the ball end. If you are only using a four cell
pack you will want to use the back slots. For our installation this
will place the positive connection on the left (drivers side) front
and the negative connection on the right (passenger side) front.
To hold the cells to the chassis we use fiberglass
reinforced strapping tape. The decision to use ½” ¾” or 1” tape
will be a personal choice. We do recommend that there be at
least two layers of tape on the bottom and where it comes up
out of the slots. When racing, the dots or discs that are used
near the corners, at some tracks, can cut the strapping tape.
This could cause the battery to come out of the chassis. The
extra layer of tape will normally prevent this from happening.
Fig. 86 shows the batteries in the slots and fig. 87 shows them
secured by the reinforced tape.
Fig. 86
Fig. 87
 Loading...