6
dispose of the graphite filings or dust.
Fig. 1
Fig. 2
❑ Fig. 3 Because graphite conducts electricity somewhat
like metal, we have to take some precautions. What we want to
do is insulate the battery slots so the battery cells cannot short
against the chassis. While the shrink wrap on each cell is an
insulator, we still want to take extra precautions. We need to
wrap the battery slot segments with electrical tape where the
batteries will touch.
WARNING!: It is also important to make
sure that none of the solder connections can touch the chassis
anywhere on the car.
Racer’s Tip: Team drivers will use a small piece of our #6312
clear chassis protective coating in place of the electrical tape.
Cut a piece slightly larger than the battery area on each side of
the chassis. Apply the adhesive coating over the battery area,
cut out the slots, and then firmly smooth out any trapped air
bubbles.
Fig. 3
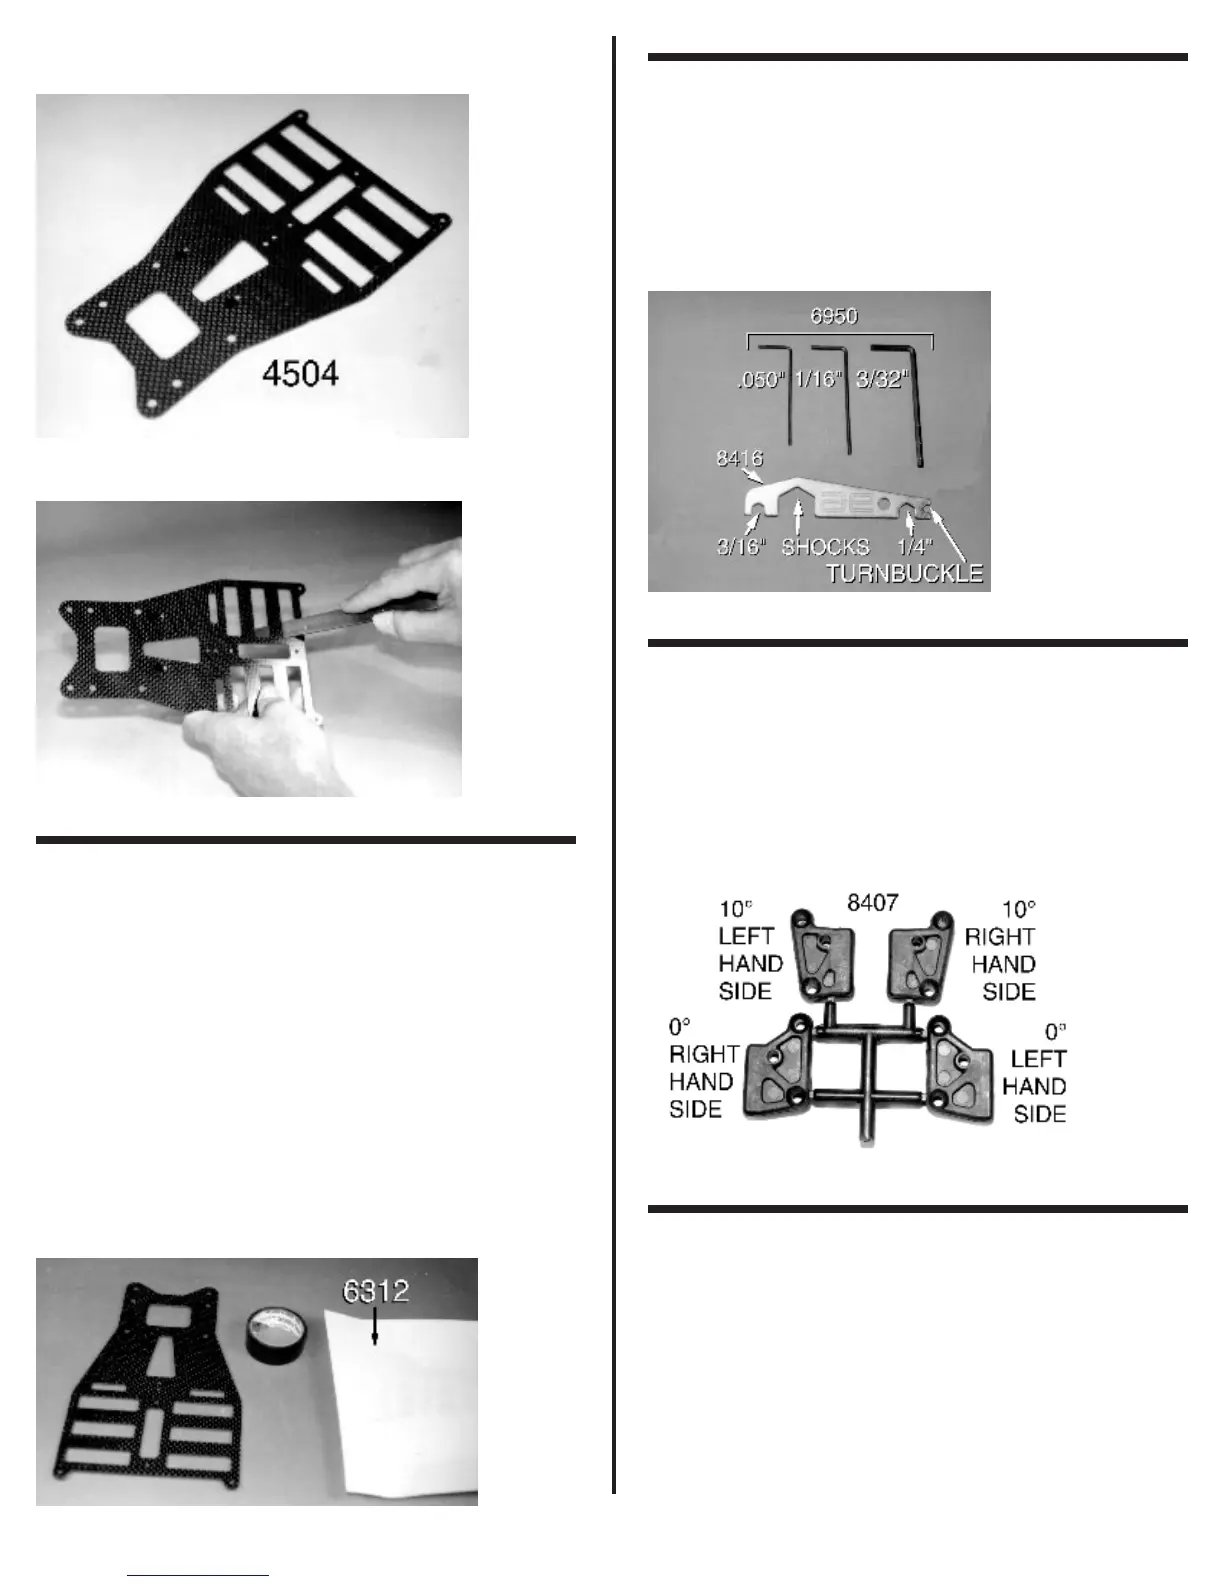
❑ Fig. 4 Before we start the assembly we need to locate
the tools that come in your kit. Inside the Master kit bag you will
find the #6950 tool bag. In this bag you will find three Allen
wrenches. The information about each Allen wrench is indi-
cated in the photo. Now open up bag #1. Inside you will find the
#8416 gold colored shock/turnbuckle wrench. We will be using
these supplied tools many times during the assembly of the kit.
Fig. 4
❑ Fig. 5 Go back to bag #1 and remove the #8407 front
upper arm mount parts tree. There are two separate sets of
mounts on the tree. Notice that one side of each mount has two
“dome shapes” with holes drilled through the middle. Now
locate the right side mount as shown in the photo. For road
racing remove the 10° mounts. If you are going to try oval racing
you will want to start with the 0° mounts.
Fig. 5
❑ Figs. 6, 7 & 8 From bag #1 remove the #8419 front
lower suspension arms. These are normally connected by a
molding runner. Also remove four #8409 4-40 x ½” aluminum
shoulder FHMScrews. Go back to the #6950 tool bag we
opened in fig. 4 and remove the 1/16” Allen wrench.
Start with the right hand side suspension assembly. To
make sure you have the correct suspension arm, place the arm
in front of you with the ball socket facing to the right. On the right
arm the back arm mounting hole will have a slanted top surface.
Look at the back of the lower arm. You will see two
recessed domes that will match up with the two domes on the