10
T-BAR ASSEMBLY
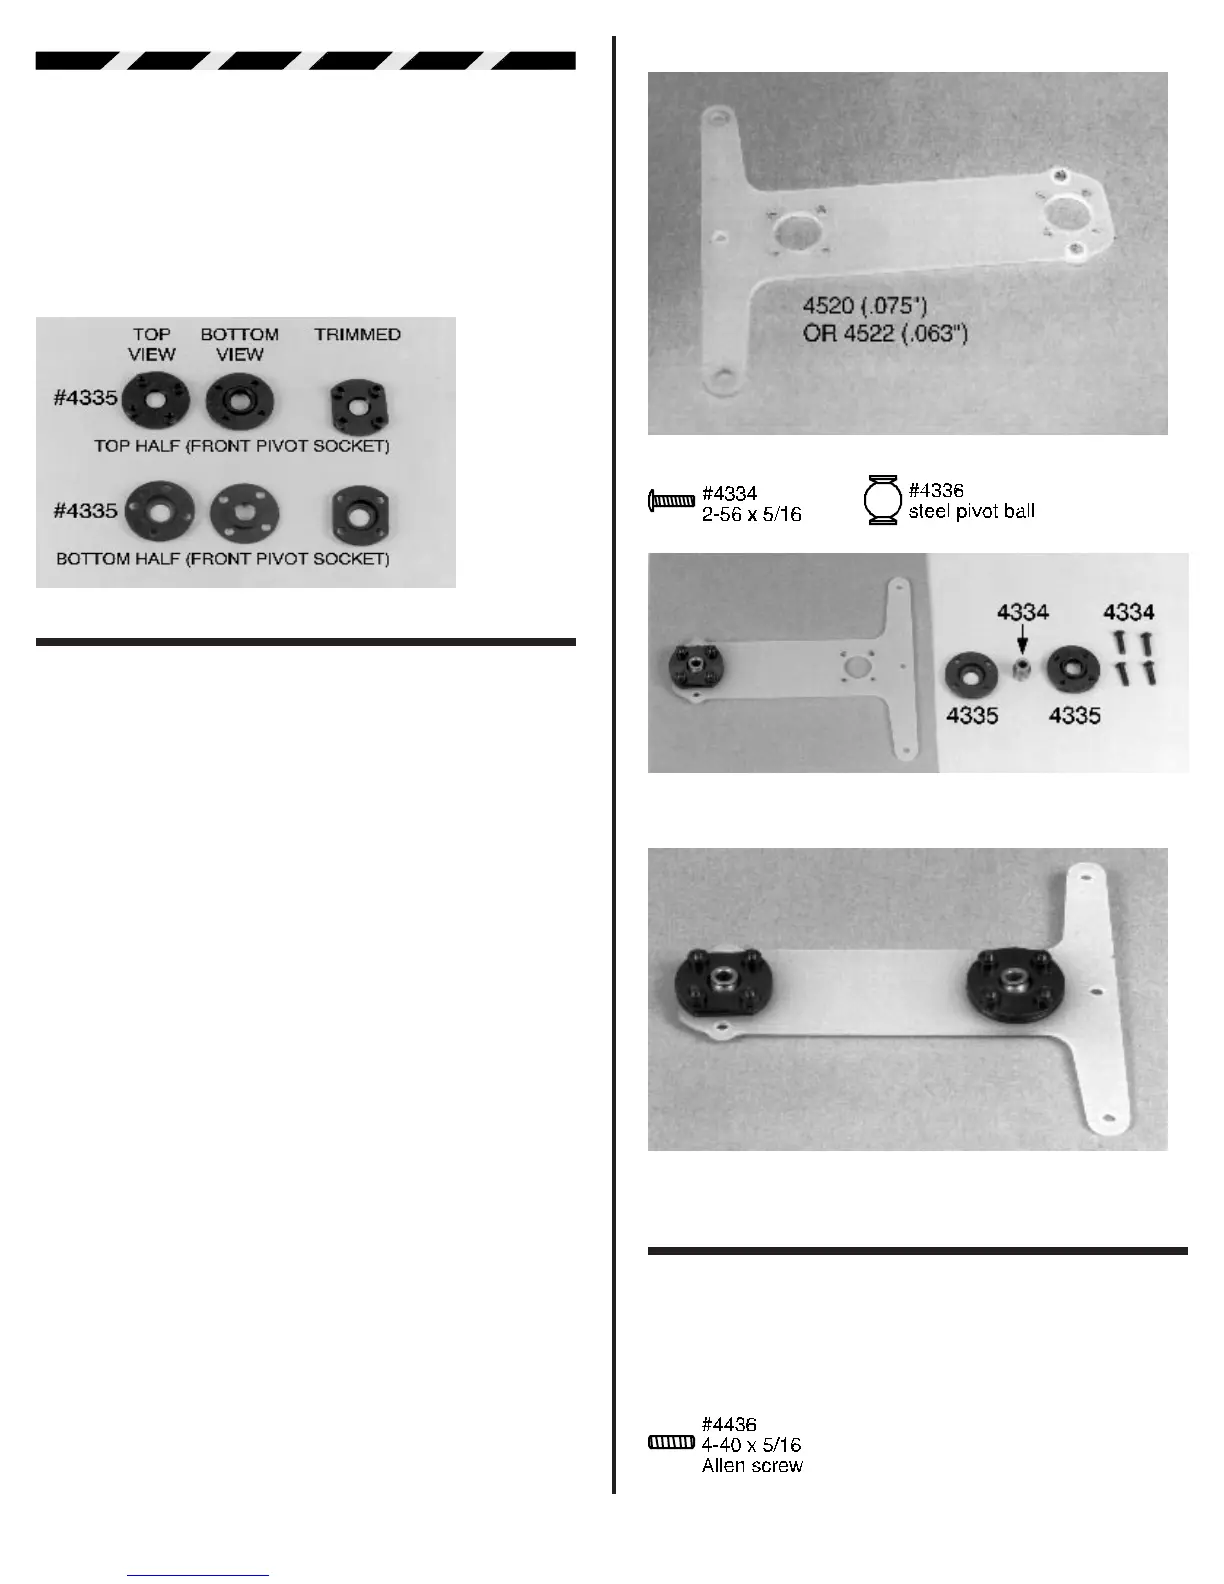
❑ Fig. 21 Now we can open bag #2. Start by taking out
the two #4335 plastic pivot sockets. There are two halves to
each socket. Take one upper and lower portion of the pivot
socket. This will become the front pivot socket. Look at the
photo, you will see how much you must trim from each side of
the two halves. We only have to do this for the front pivot socket.
Fig. 21
❑ Figs. 22, 23 & 24 In bag #2 you will find one
#4520 .075” fiberglass T-bar and one #4522 .063” fiberglass T-
bar. The .075" and .063" refer to the thickness of the T-bar. If
you are going to be racing on asphalt you will want to start with
the #4522 .063” T-bar. If you are going to race on carpet we
recommend starting with the #4520 .075” T-bar. There is no top
or bottom on the T-bar until the pivot sockets have been
installed.
Now remove two #4336 steel pivot balls and eight
#4334 2-56 x 3/16” BHSScrews from the same bag. We will
start with the front pivot socket assembly which we modified in
fig. 21. Look at the lower half of the pivot socket. There is a
raised portion that will match the hole on the front of the T-bar.
Place the socket into the hole and line up the trimmed sides as
shown. This will leave the tweak screw holes exposed. Now
take one of the #4336 steel pivot balls and snap it into the center
of the lower pivot socket. Place the upper portion over the steel
pivot ball. Be sure to line up the trimmed sides on both halves.
Holding the socket parts in place with your fingers, turn the T-
bar and socket parts upside down. Now use your .050” Allen
wrench from your tool bag and four of the #4334 2-56 screws
to secure the socket to the T-bar. This will place the heads of
the screws on the bottom of the T-bar and the socket and ball
parts on top.
Note: It is very important to make sure the Allen
wrench is fully seated into the socket portion of the screw or
they will strip out.
Now repeat the above assembly for the second pivot.
For this pivot the ball must pivot freely in the socket while not
being loose. If the ball is not pivoting freely, you can equally
unscrews all four #4434 screws 1/8 to 1/4 turn. However the
best way to make the ball pivot freely is to remove the pivot ball
and polish it. You can do this by placing the ball on a long 4-40
screw and securing it with a 4-40 nut. You would then mount the
screw in a drill press, hand drill, or a Dremel tool, then polish the
ball with crocus cloth or 600 grit wet or dry and paper. Clean the
ball off and reinstall it and check the movement. Keep doing this
until the ball pivots freely, but is not loose.
Fig. 22
Fig. 23
Fig. 24
❑ Fig. 25 In the same bag you will find two #4436 4-40
x 5/16” socket set screws. Install the two set screws into the two
holes next to the front pivot socket as shown. The holes for the
set screws are not threaded so take your time when threading
them in. You will again be using your .050” Allen wrench with
these screws.