9
Also in bag #1 you will find the #4448 aluminum ball
ends and the #4449 4-40 small aluminum locknuts. Remove
two of each for this step. You will also need to remove the two
#3213 front axles and two #6299 1/8” E-clips. The E-clips are
held together by white tape. They are so small it is easier to look
for the white tape than to look for the E-clips.
Thread one #4448 ball end into each steering block
and then thread the #4449 4-40 small aluminum locknut onto
the end of the ball end threads. We want the ball end on top and
the nut on the bottom of the steering block.
Now take the #6299 E-clips and install one onto one
end of each front axle. We can now push the axle into the
steering block so the E-clip will be on the back side as shown.
Fig. 16
Fig. 17
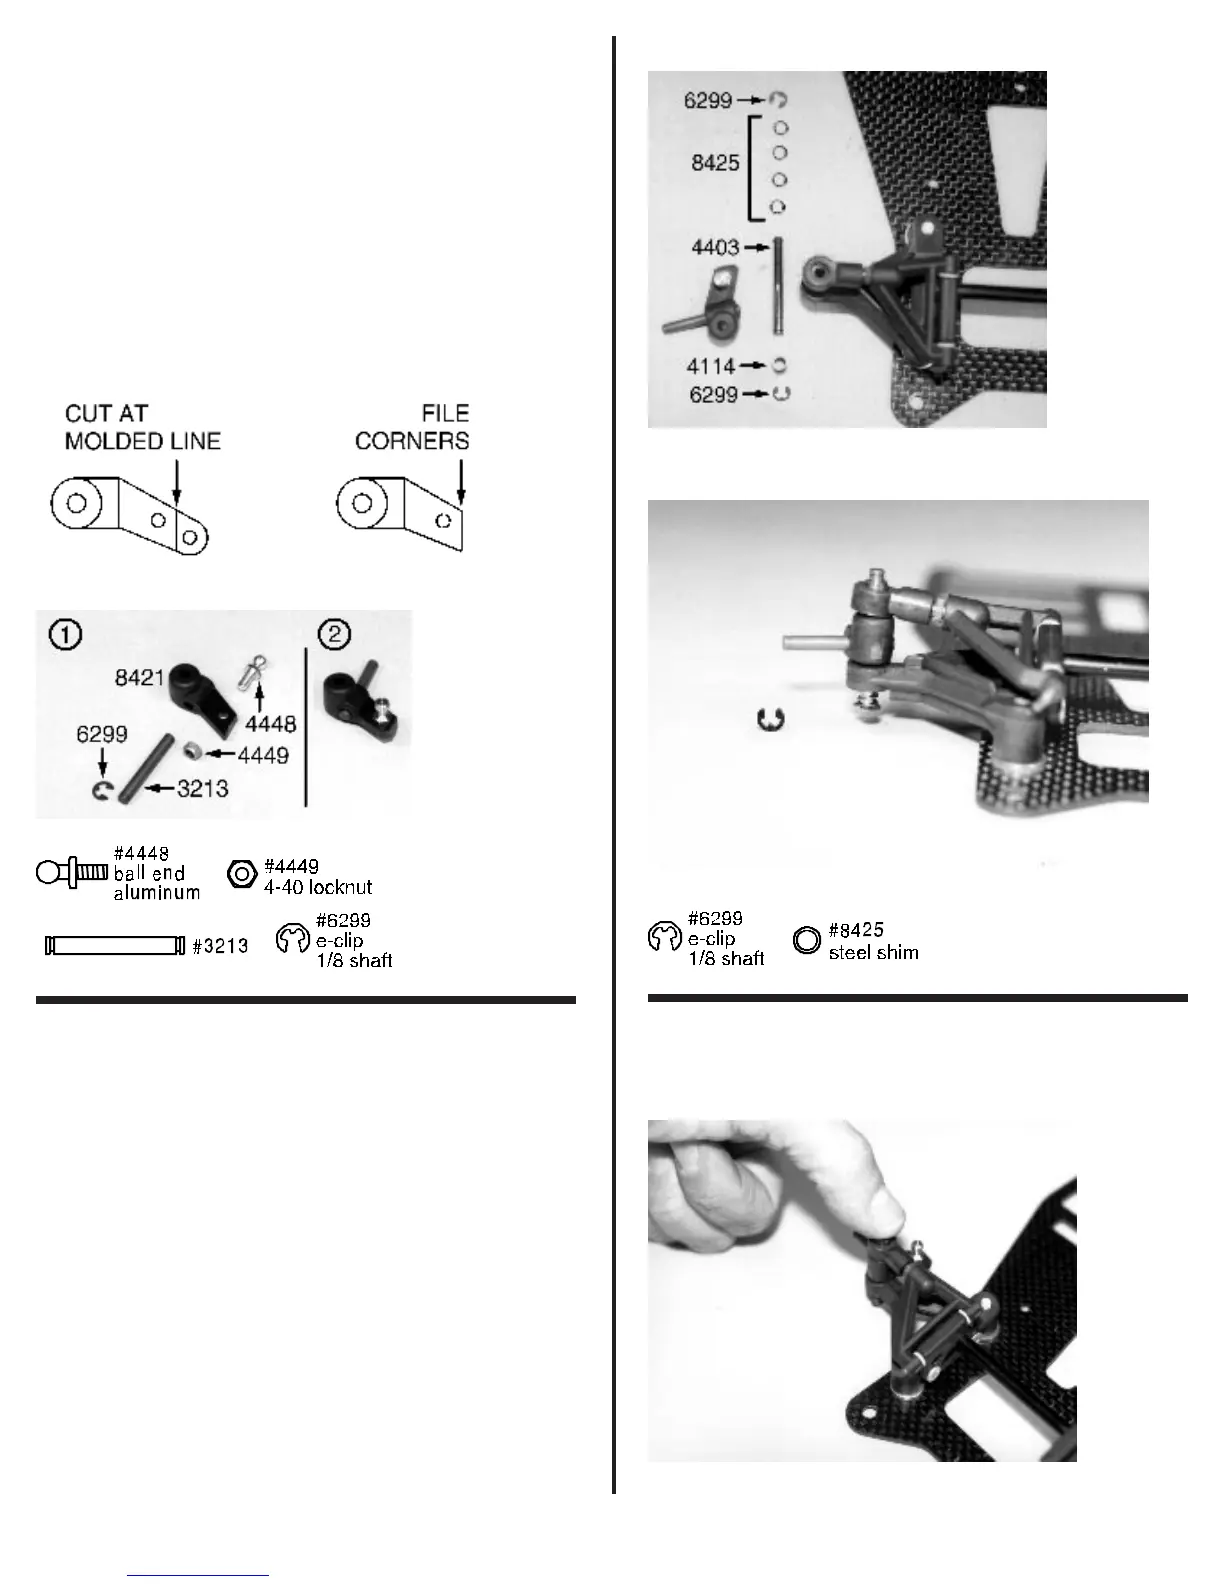
❑ Figs. 18 & 19 Take out the two #4403 kingpins, two
#4114 .018” springs, four #6299 1/8” E-clips, and the eight
#8425 steel kingpin shims. All of these parts will also be in bag
#1. First install one #6299 E-clip onto each #4403 kingpin. Next
install one of the #4114 springs onto the kingpin and let it rest
on the E-clip. We will start with the right side arm assembly and
steering block. Push the kingpin up through the pivot ball in the
lower front suspension arm. Install the kingpin from the bottom
of the pivot arm. Now install the steering block onto the kingpin
over the lower suspension arm. Check that the ball end is on top
and the flat side of the steering block is on the bottom. Push the
steering block down against the lower suspension arm pivot
ball. Finally, align the kingpin with the pivot ball in the upper
suspension arm and push it through.
Place four of the #8425 kingpin shims over the end of
the kingpin on top of the upper arm pivot ball. Now secure the
shims in place with another #6299 1/8” E-clip. Go back and
repeat the process for the left assembly.
Note: Check that the
raised shoulder on both the upper and lower pivot balls are
making contact with the steering block.
Fig. 18
Fig. 19
❑ Fig. 20 Using your thumb, push down on the top of the
kingpin so that any free play in the kingpin will be taken up on
the spring side of the kingpin.
Fig. 20