9
English
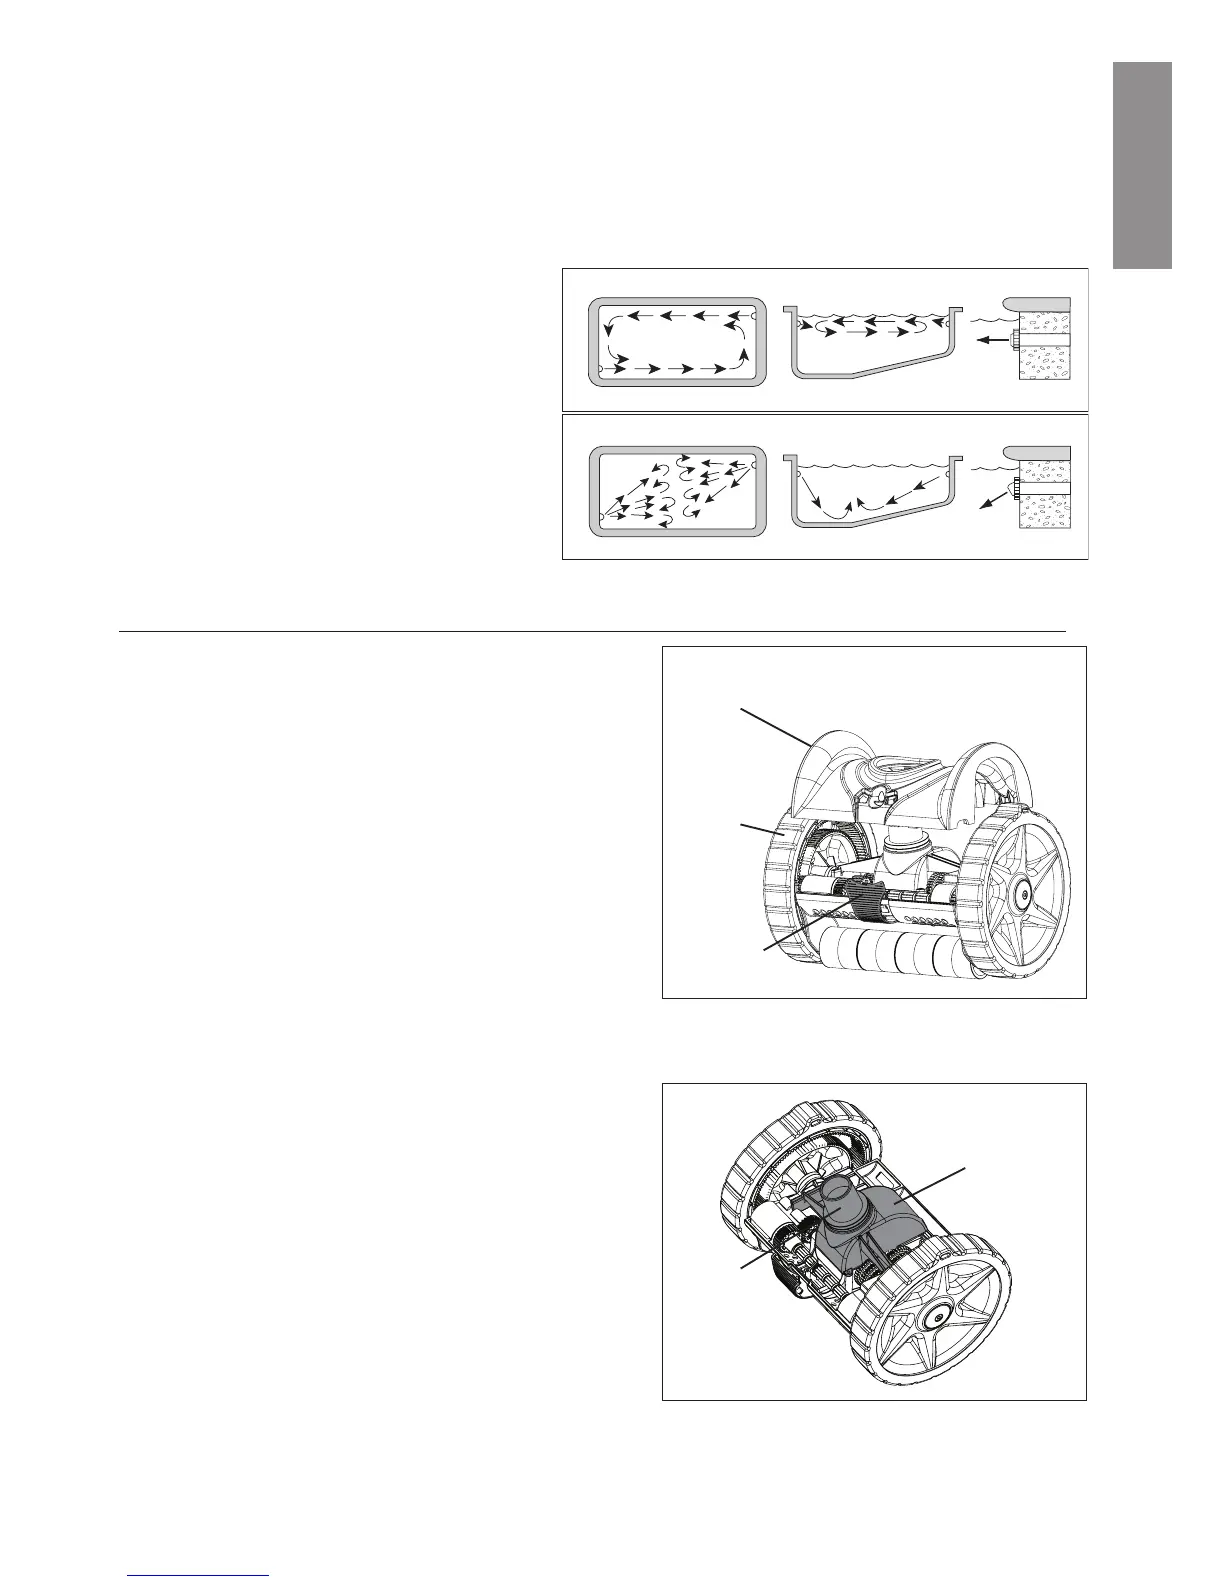
Return Line Water Flow
IMPORTANT: The water ow from your return line can push the S5™ Sucon Side Pool Cleaner’s hose and aect its
performance. It may cause the cleaner to steer away from the end of the pool where the return line is located, or it may
cause your cleaner to remain in one secon of the pool. To correct this, use a eyeball diverter.
Eyeball Diverter Posions
Posion the diverter opening to redirect the return line
water ow so it does not interfere with the cleaner’s
movement. Try dierent posions to see which works
best in your pool:
• ow directed along the side of pool (the le line).
• ow directed downward.
• ow directed against the hose will help steer the cleaner
away from obstrucons such as stairs and ladders.
Aer installing the eyeball diverter, turn the pool pump
on. The cleaner should begin moving across the pool oor
vacuuming up debris in its path.
The S5™ Sucon Side Pool Cleaner requires almost no maintenance.
Visually inspect your cleaner from me to me to make sure that:
• The turbine is moving freely and is not obstructed by debris. See
“Removing Debris from the Turbine” below.
• The res are not excessively worn. See Figure 18 on the next page.
We recommend that you leave the cleaner in your pool, except
during chemical shock treatments.
• During swimming it is easy to unplug the cleaner and pull it to
one side.
• Note: When storing the cleaner, do not coil the hose. Lay the
hose at in an area protected from direct sunlight.
This cleaner’s hose is specially designed to ensure opmum cleaner
performance. Should replacement be required, insist on genuine
Pentair cleaner hose.
MAINTENANCE
Removing Debris from the Turbine
1. Be sure the pool pump is o. Remove the cleaner from the pool
and disconnect the cleaner from the leader hose.
2. Check to see if anything is clogged inside the cleaner. Do this by
posioning the cleaner with the buckle facing you and aempt
to rotate the right side wheel forward. If the wheel rotates
smoothly there probably is no obstrucon. If it won’t rotate
there is an obstrucon.
3. Place the cleaner on a at work surface. Open the buckle on the
front of the cleaner by pulling it out and down.
Li the front of the top cover up and then rmly pull it forward.
This will separate the top cover from the cleaner body and you
will now be able to li the top cover straight up from the cleaner
body (see Figure 15). Set the cover aside.
Note: The top cover is designed to t ghtly so you may have to
wiggle it a lile.
4. Pull the turbine cover straight up and o of the cleaner body. Set
the turbine cover aside. See Figure 16.
Buckle
Top Cover
Figure 15
Turbine
Cover
Figure 16
Swivel
Assembly
Right Side
Wheel
Removal of Top Cover
Swivel Assembly and Cleaner Internals